Clutch Rotor/Bearing: Installation
NOTE:
DO NOT support the rotor by resting the pulley rim on a flat surface during the bearing installation or the rotor face will be bent.
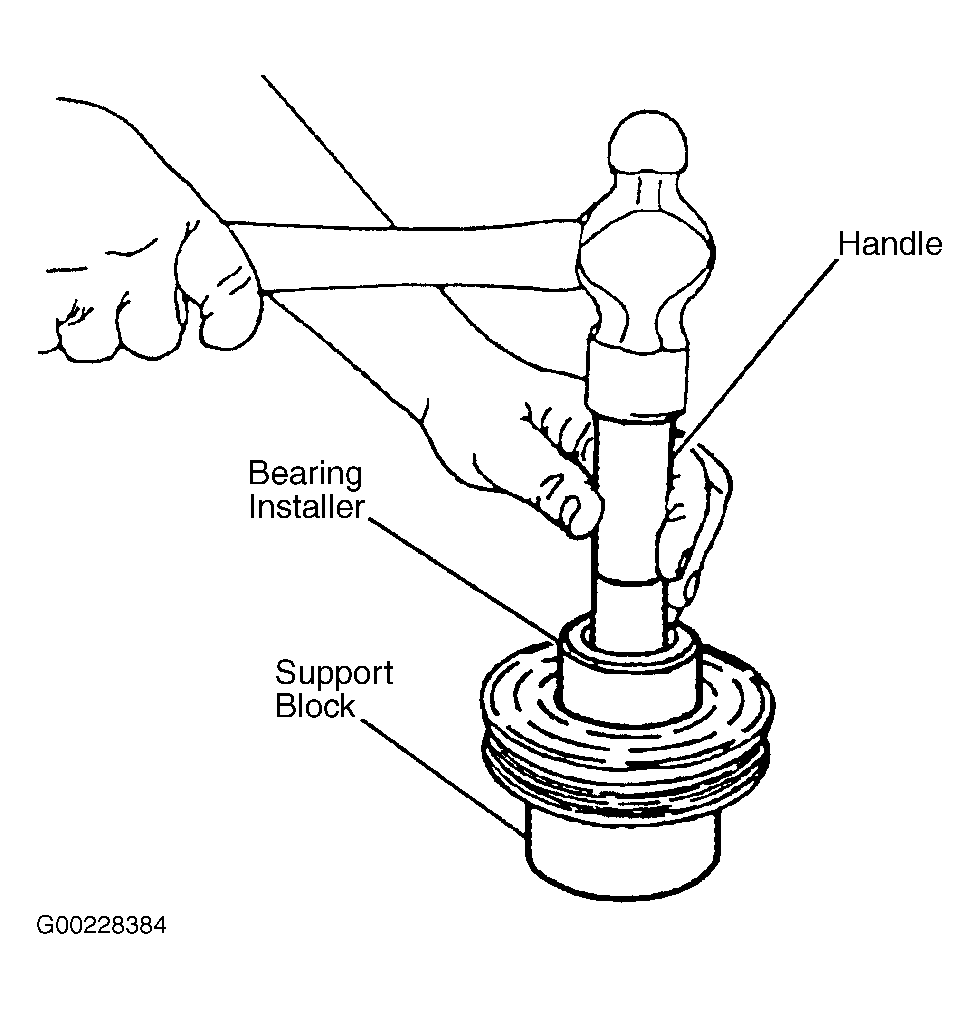
- Place the pulley rotor on the support block in order to fully support the rotor hub during bearing installation. See Fig 4.
- Use the following tools in order to align the NEW bearing squarely with the hub bore:
- Compressor Pulley Puller
- Bearing Installer
- Driver Handle
- Drive the bearing fully into the hub. The installer will apply force to the outer race of the bearing, if used as shown. See Fig 4.
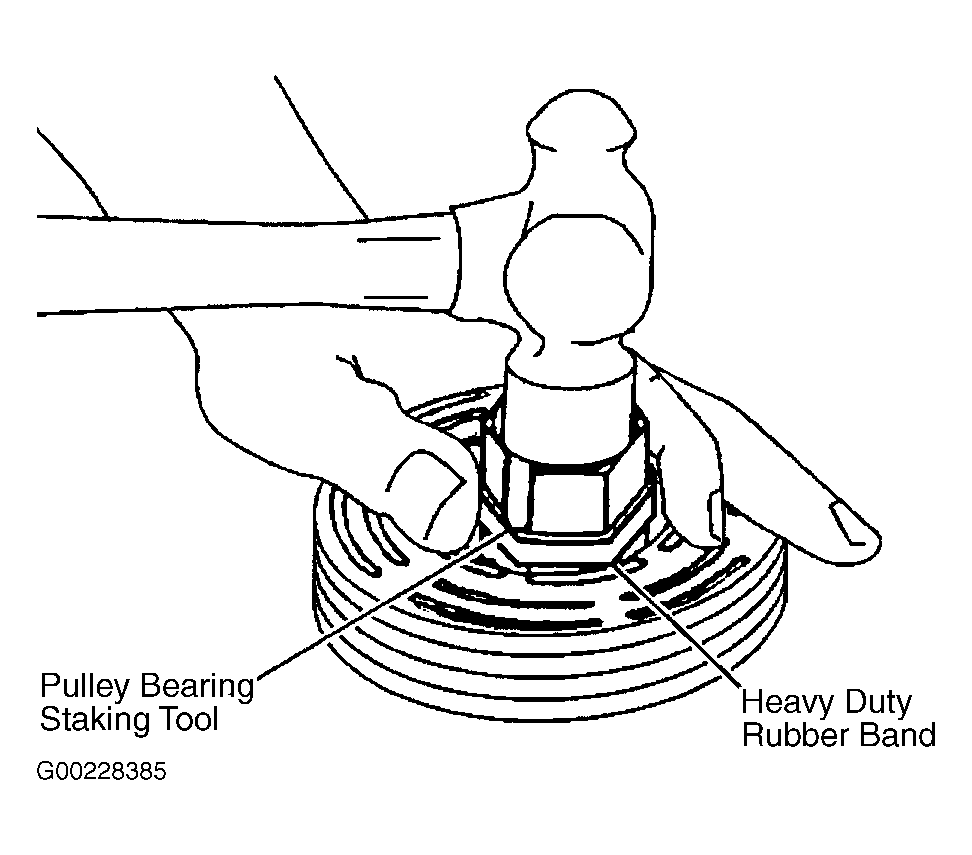
- Place the pulley bearing staking tool in the hub bore. See Fig 5.
- Shift the rotor and bearing assembly on the support block in order to fully support the hub under the staking pin location. Use a heavy-duty rubber band in order to hold the stake pin in the guide. Properly position the stake pin in the guide after each impact on the pin.
- Strike the staking pin with a hammer until a metal stake, similar to the original, forms down to but not touching the bearing.
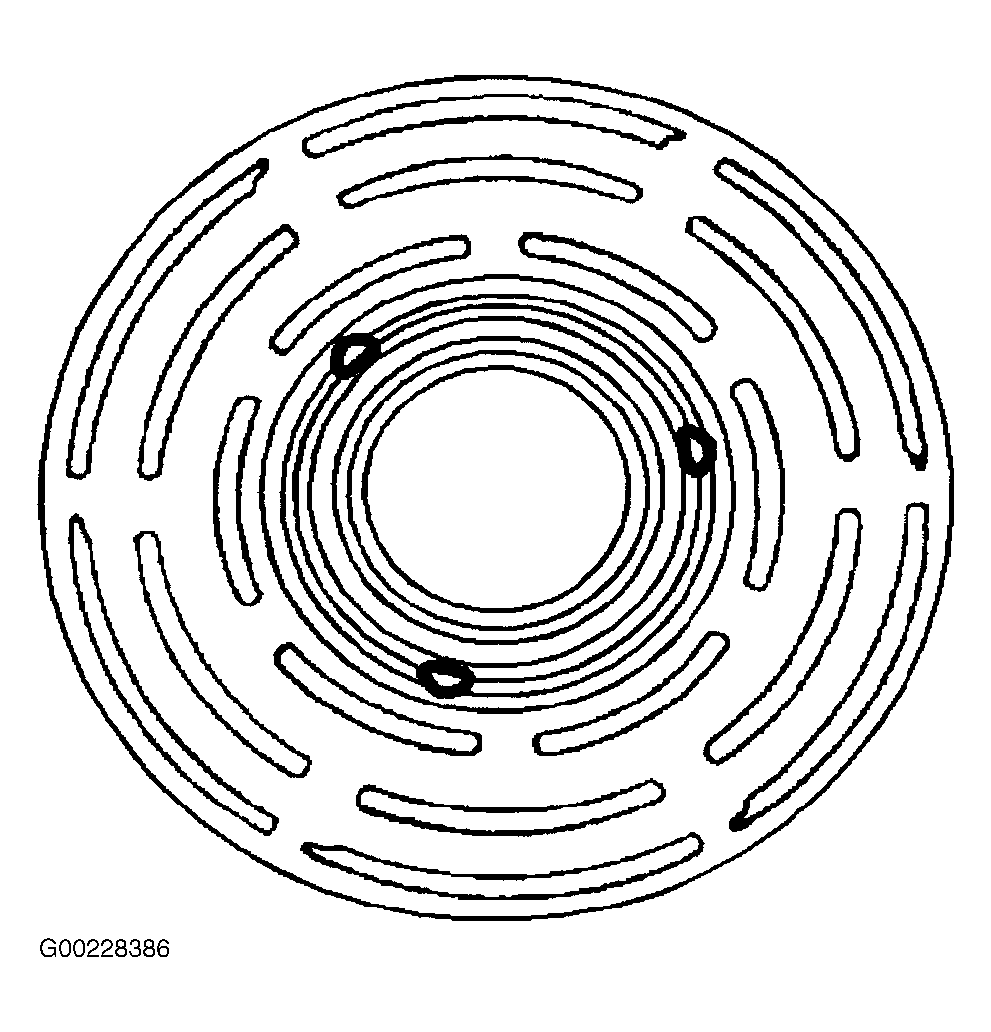
- Stake 3 locations on the bearing race 120 degrees apart as shown. See Fig 6.
- With the compressor mounted on the compressor mounting fixture, position the pulley rotor and the bearing assembly on the front head.
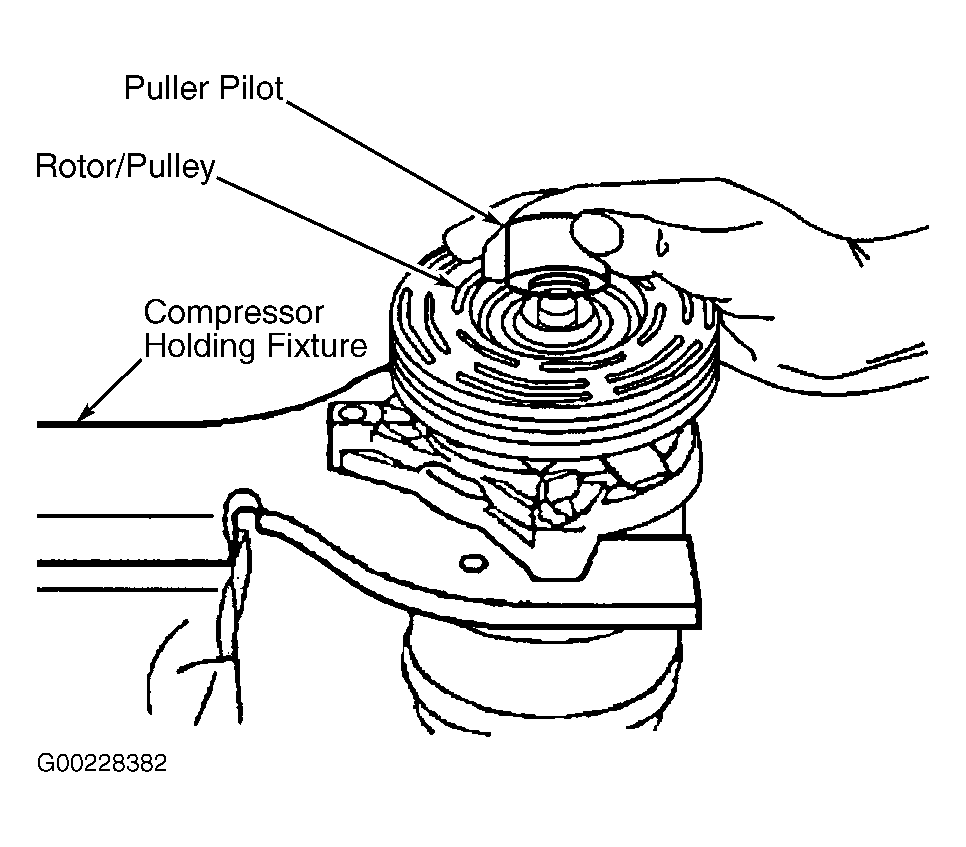
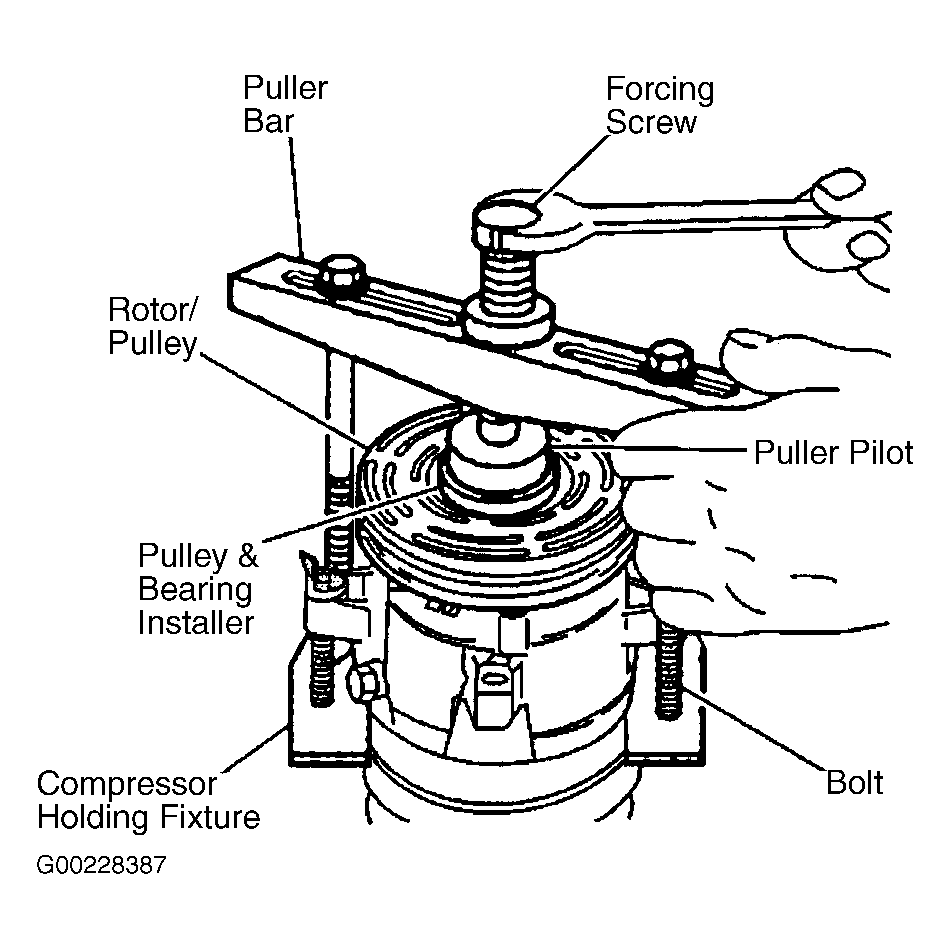
- Position the pulley and bearing assembly installer and the puller pilot directly over the inner race of the bearing. See Fig 7.
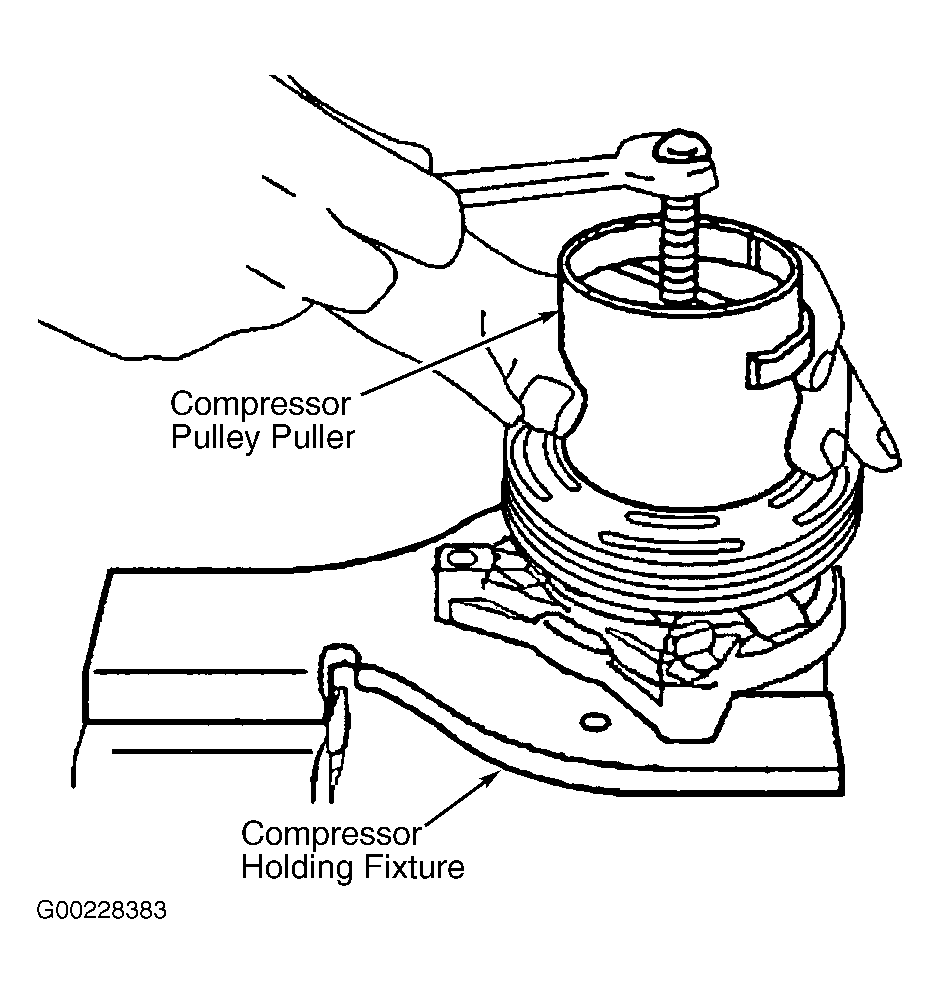
- Position the puller bar on the pulley and bearing assembly installer.
- Assemble the 2 through bolts and the washers through the puller bar slots.
- Thread the through bolts into the compressor holding fixture. ensure that the thread of the through bolts engage the full thickness of the compressor holding fixture.
- Tighten the center screw in the puller bar in order to force the pulley rotor and bearing assembly onto the compressor front head. if the pulley and bearing assembly installer slips off direct in-line contact with the inner race of the bearing, perform the following steps:
- Loosen the forcing screw.
- Realign the installer and the pilot in order to ensure that the pulley and bearing assembly installer properly clears the front head.
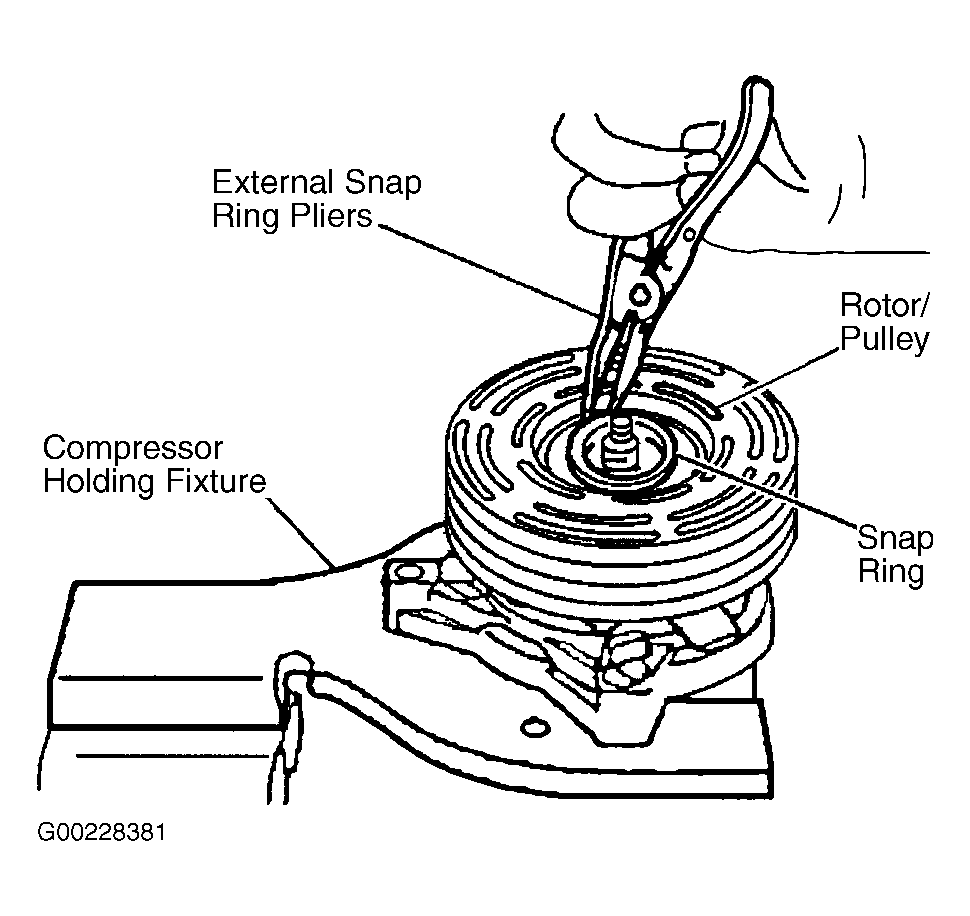
- Use the external snap ring pliers in order to install the pulley rotor and the retaining ring. See Fig 1.
- Install the clutch plate and hub assembly.
WARNING:
Use care in order to prevent personal injury when striking the staking pin with a hammer.
NOTE:
Noisy bearing operation and reduced bearing life may result if the outer bearing race is deformed while staking. Ensure that the stake metal does not contact the outer race of the bearing.