Installation ("S" Series)
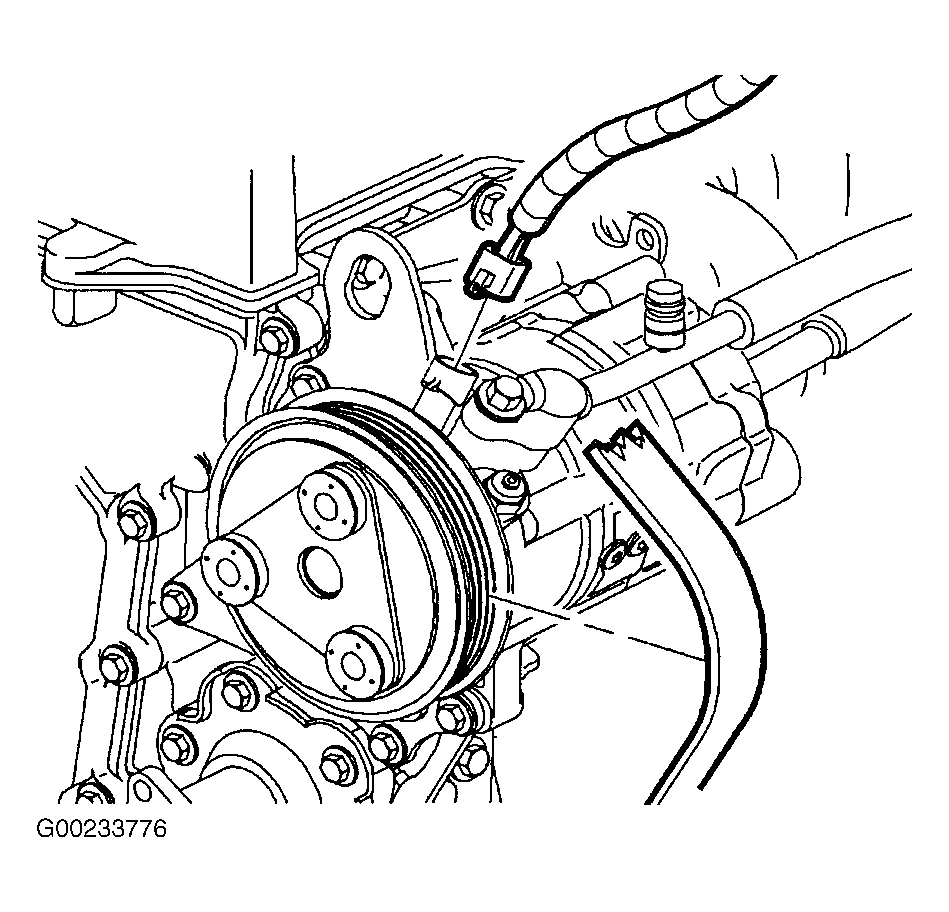
- Position the A/C compressor clutch coil so that the electrical connector is aligned with the indent in the compressor front head.
- Install the 3 A/C compressor clutch coil screws. Tighten the clutch coil-to-compressor screws to 44 INCH Lbs. (5 N.m).
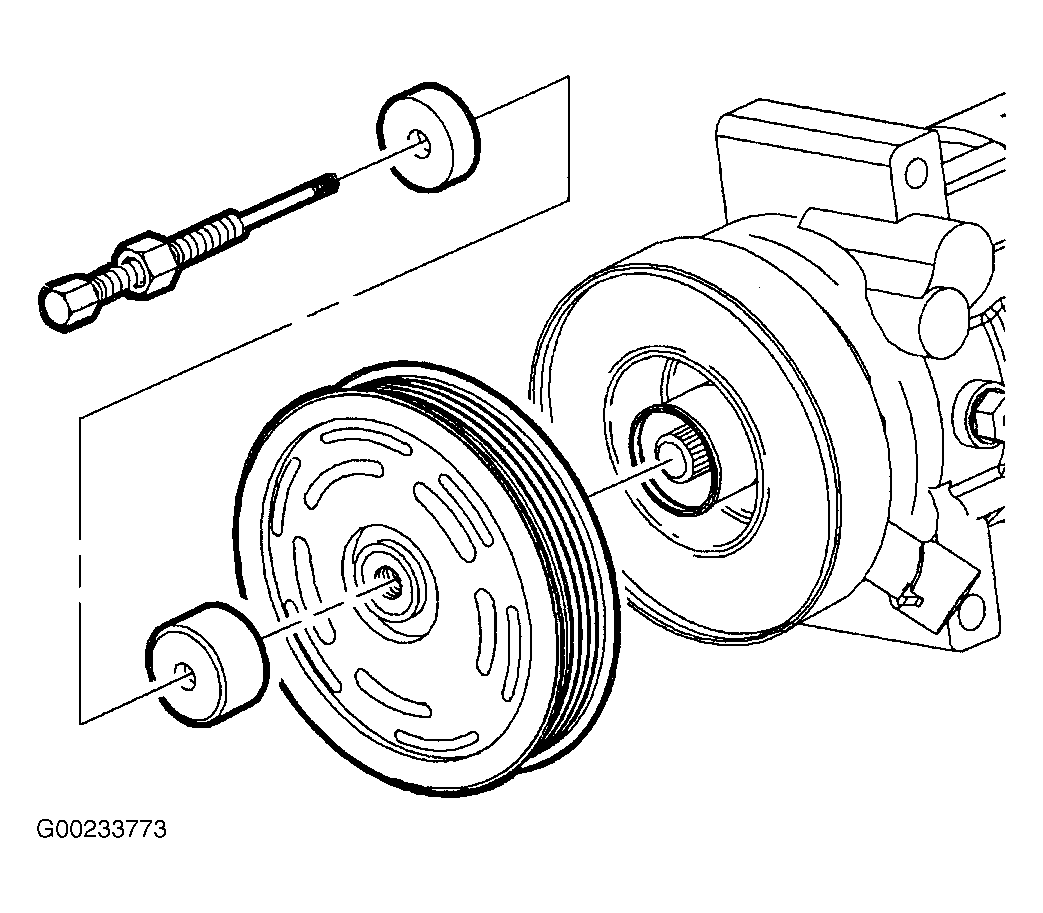
- Place the drive plate installer on the installation bolt and insert it through the center of the pulley. See Figure. Thread the installation bolt into the end of the A/C compressor shaft and finger tighten.
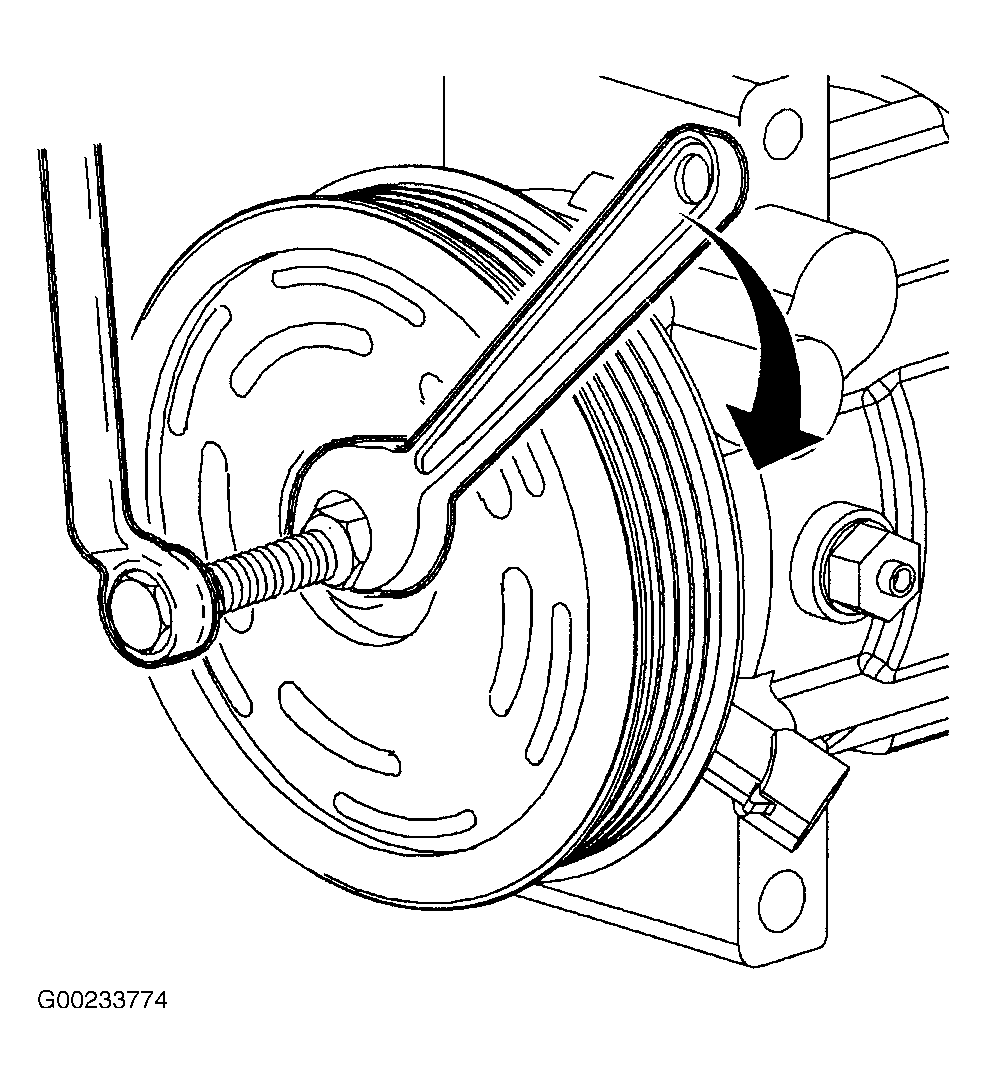
- Finger tighten the nut on the installation bolt to align the pulley to the A/C compressor. While holding the end of the bolt, tighten the nut until the pulley bottoms out on the A/C compressor. See Figure.
- Loosen the nut and remove the pulley installation bolt.
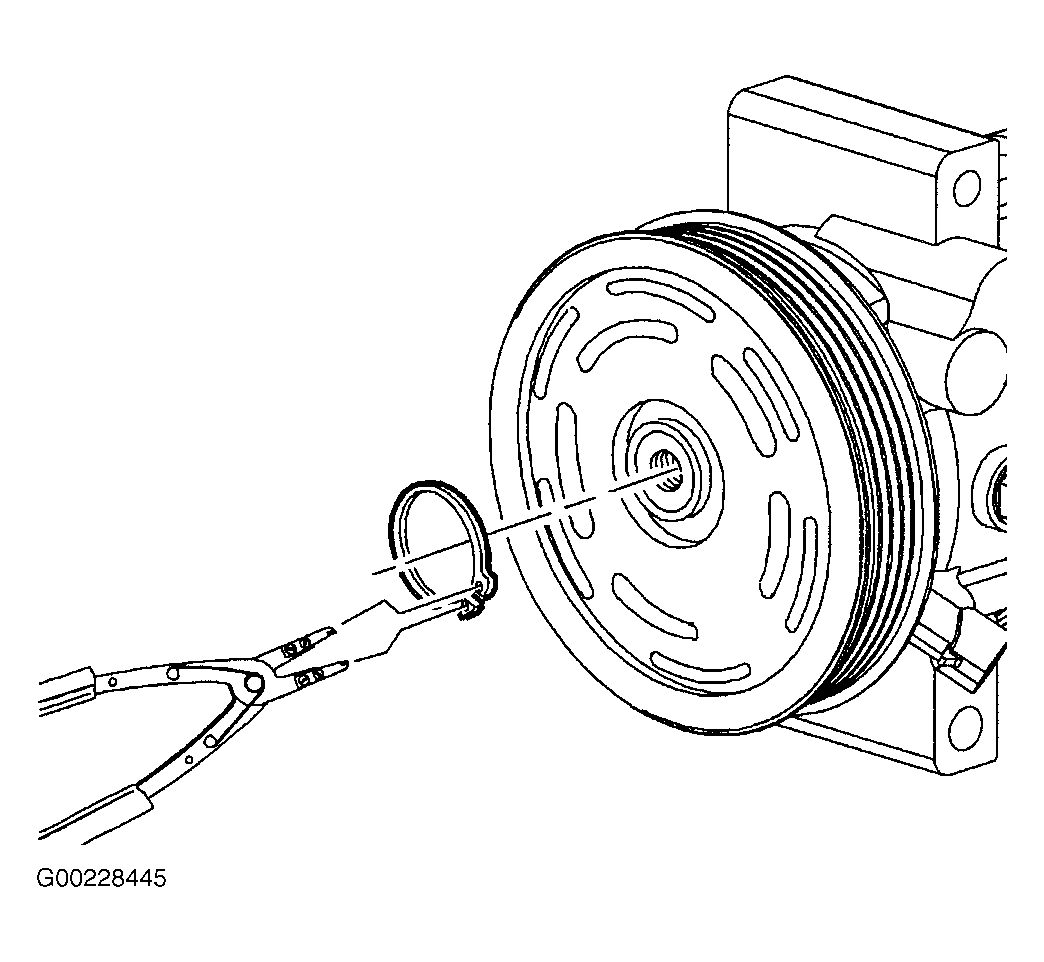
- Install the snap ring with the tapered side out using the snap ring pliers. See Figure.
- Install the shims from the old drive plate opening to the NEW drive plate opening.
- Position the clutch drive plate on the compressor shaft making sure the splines line up. Press the shaft into place.
- Position the screwdriver between the 2 vibration dampeners on the front of the clutch face and install the clutch bolt.NOTE: After tightening the center bolt, check to make sure that the pulley rotates smoothly by spinning it.
- Install the center bolt and tighten the compressor clutch drive plate-to-compressor center bolt to 115 INCH Lbs. (13 N.m).
- Check to make sure the clutch clearance is 0.012-0.024" (0.3-0.6 mm).
- If necessary, adjust the clearance by adding or removing shims provided.
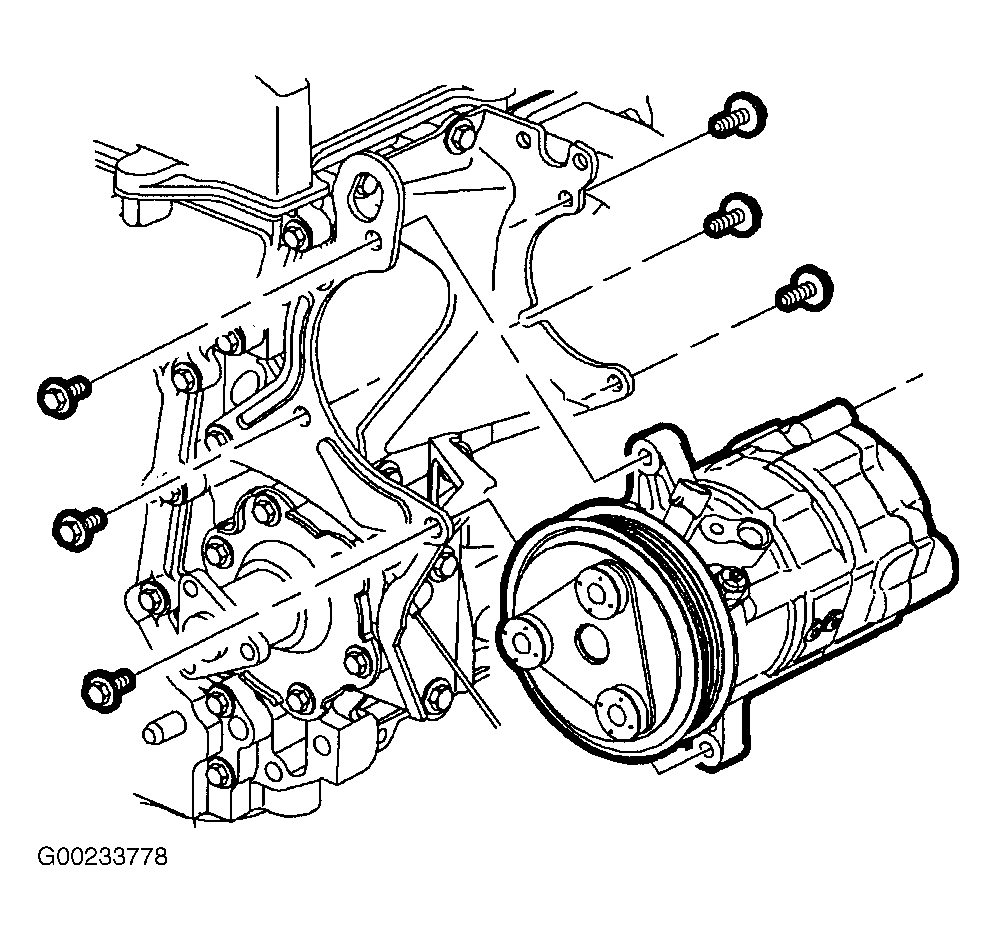
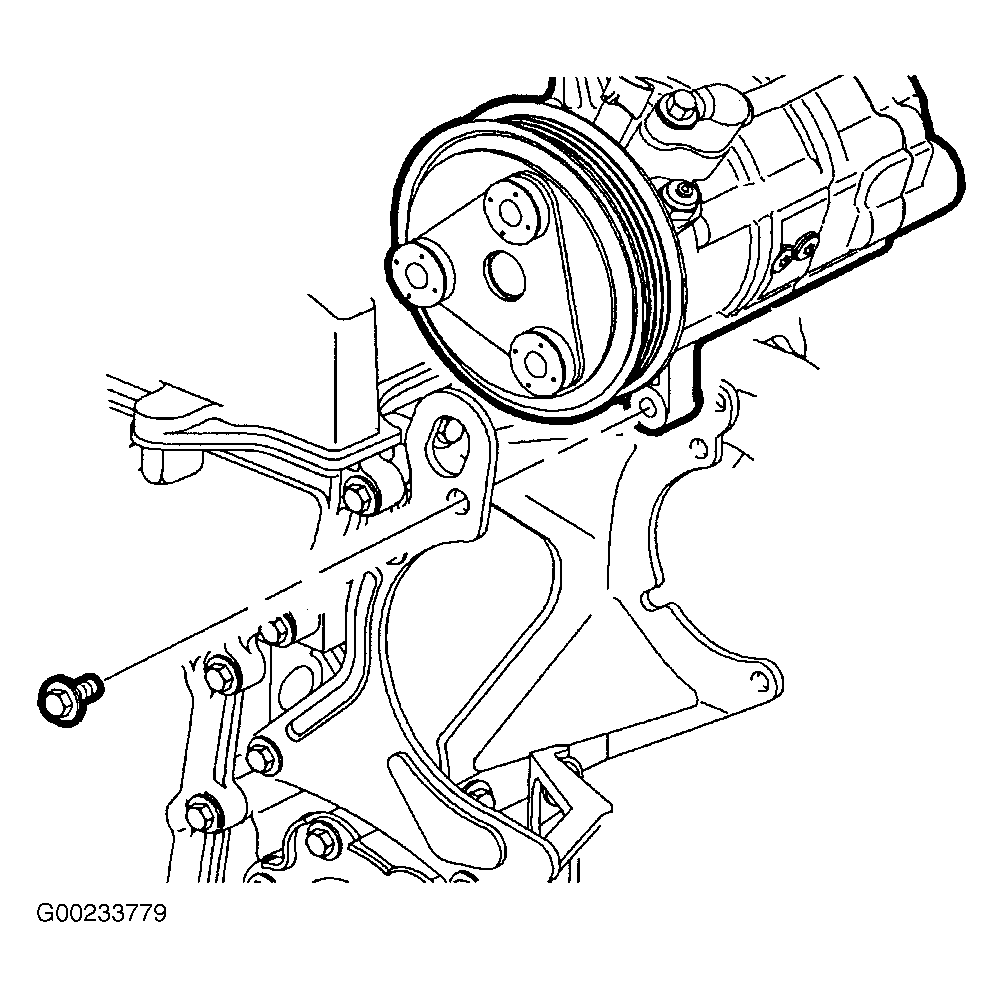
- Remove the front bracket-to-compressor bolt and position the A/C compressor between the brackets.
- Install the A/C compressor to the front bracket with 3 bolts. Finger tighten the bolts.
- Install the A/C compressor to the rear bracket with 3 bolts. Tighten the A/C compressor front bolts-to-bracket to 36 Ft. Lbs. (49 N.m). Tighten the A/C compressor rear bolts-to-bracket to 19 Ft. Lbs (25 N.m).CAUTION: Make sure gaskets are installed correctly or a leak will occur. If gaskets are removed from stubs, replace with NEW gaskets. Installation steps must be performed in sequence.NOTE: The next 7 steps are only necessary if the vehicle is equipped with a secondary air pump reaction system (AIR).
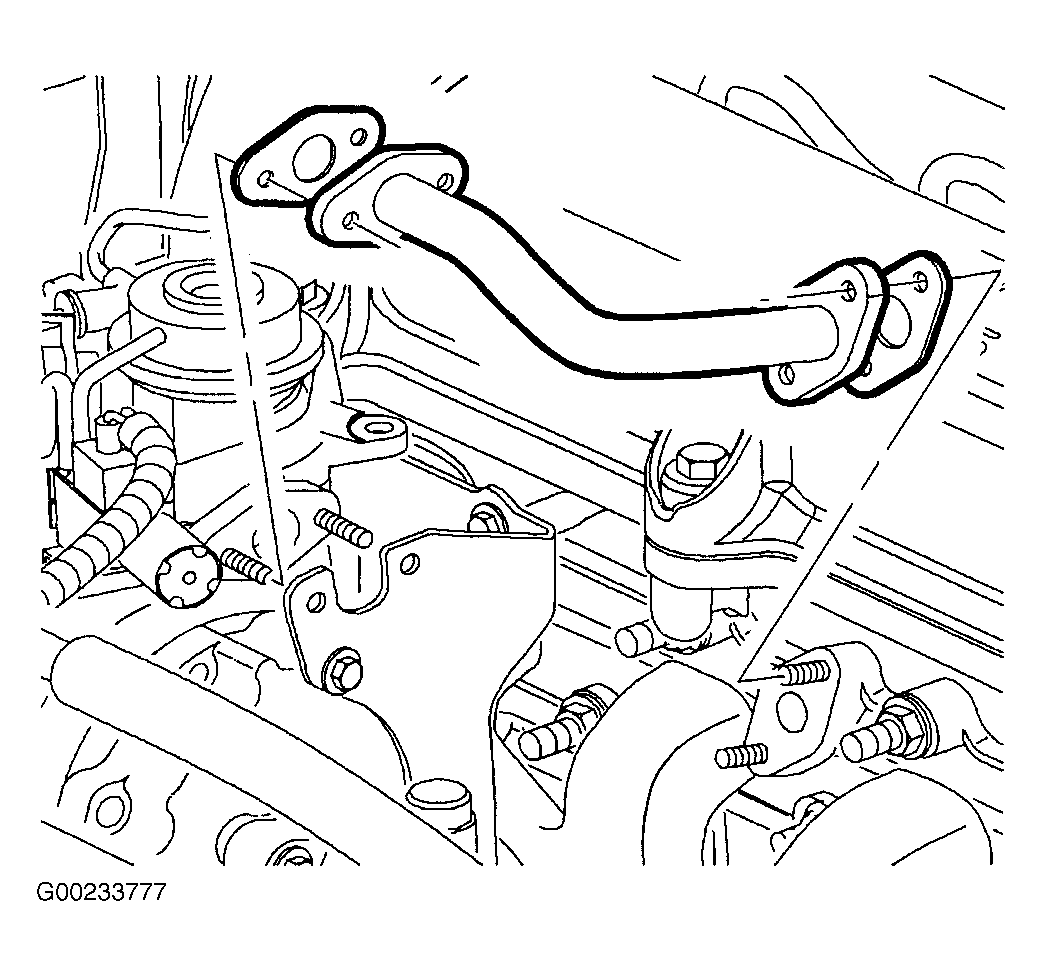
- Install the air pipe onto the exhaust manifold studs.
- Install the air pipe into the rear air compressor bracket slot.
- Install the combination valve studs into the rear air compressor bracket through the air pipe flange holes.
- Install and tighten the nuts on the combination valve studs. Tighten the air system combination valve nuts to 62 INCH Lbs. (7 N.m).
- Install and tighten the nuts on the exhaust manifold studs. Tighten the air system pipe-to-exhaust manifold studs to 62 INCH Lbs. (7 N.m).
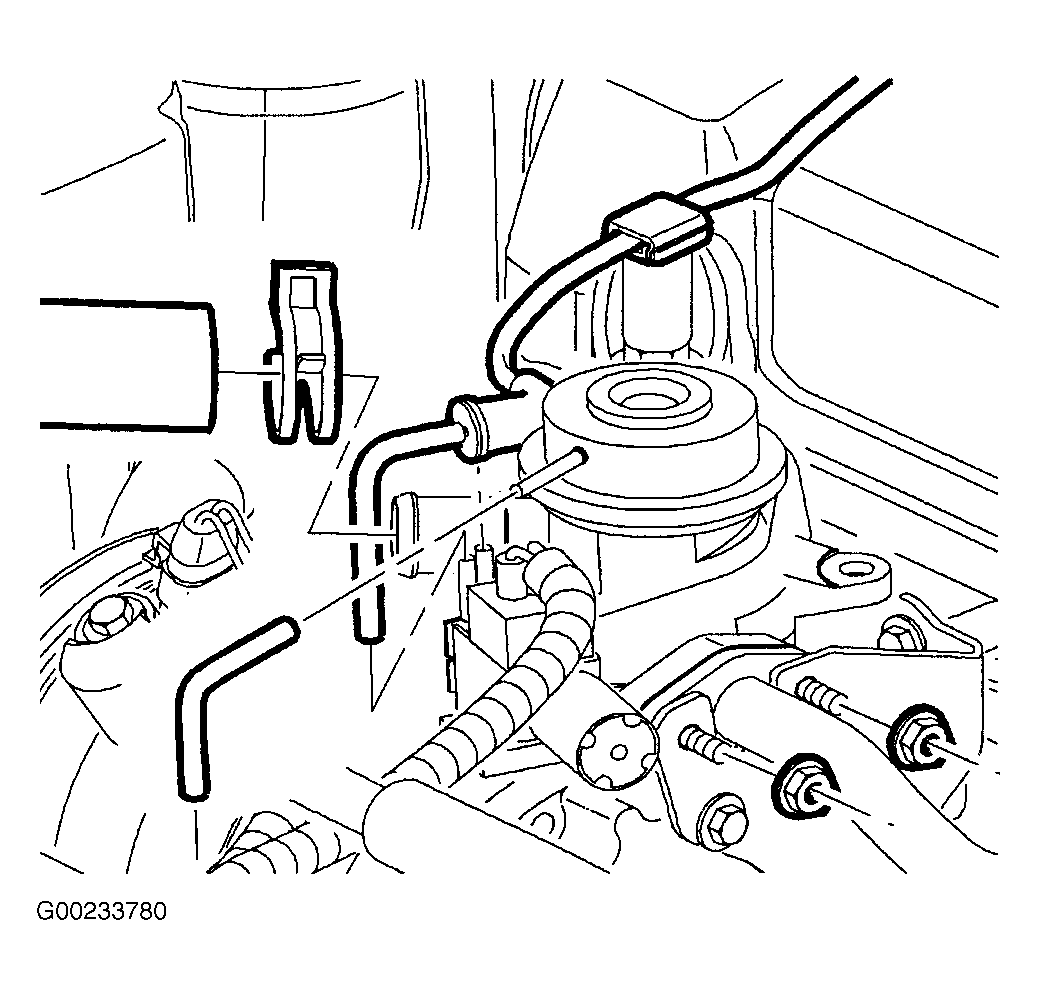
- Install the vacuum source hose. See Fig 2.
- Install the air hose.
- Connect A/C the compressor clutch electrical connector.
- Install the accessory drive belt.
- Start the engine and engage the A/C compressor 10-15 cycles to break-in NEW A/C compressor clutch. This cycling of the A/C compressor will match the drive plate and the pulley surfaces.