Radiator
RadiatorSpecial Tools And Equipment:
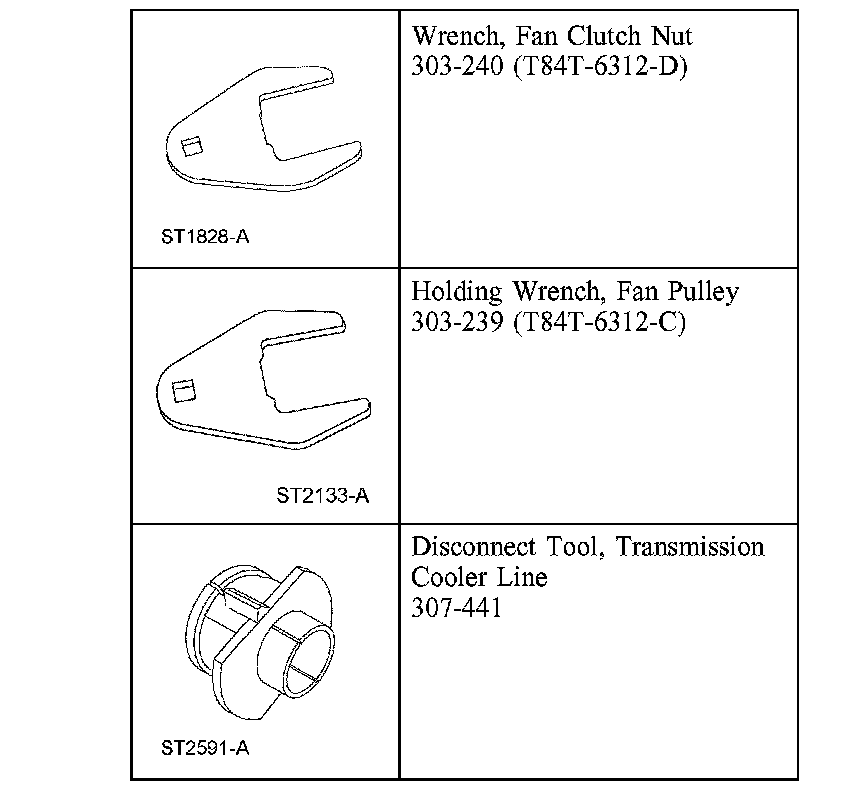
Special Tools
Removal and Installation
All vehicles
1. With the vehicle in NEUTRAL, position it on a hoist.
2. Drain the cooling system.
3. Loosen the clamp and disconnect the upper degas bottle hose.
4. Loosen the clamp and disconnect the upper radiator hose.
5. Loosen the clamp and disconnect the lower radiator hose.
6. Loosen the clamp and disconnect the lower degas bottle hose. Detach the lower degas bottle hose from the radiator fan shroud.
Vehicles equipped with a 4.6L (2V) engine
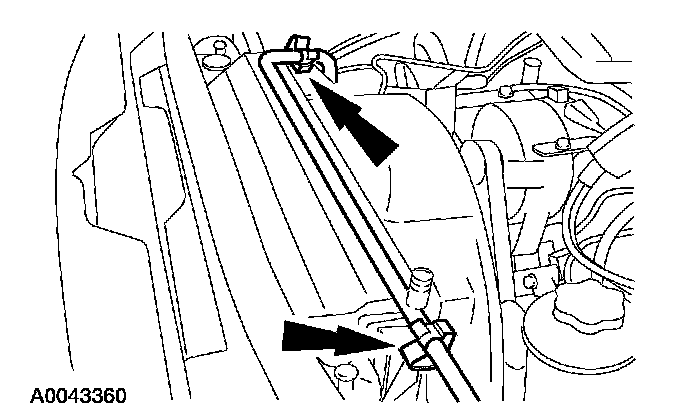
7. Detach the A/C tube from the retainers.
All vehicles
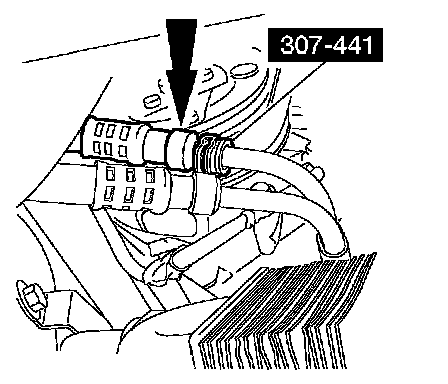
8. Remove the safety retainers from the transmission cooler tubes. Using the special tool, disconnect the transmission cooler tubes.
9. If equipped, remove and discard the radiator fan shroud screws.
10. Remove the bolts and the upper radiator fan shroud.
^ To install, tighten to 7 Nm (62 inch lbs.).
11. CAUTION: Cardboard must be placed against the radiator when removing the cooling fan. Failure to follow these instructions can result in damage to the vehicle.
Place a piece of cardboard against the radiator to prevent damage while removing the cooling fan.
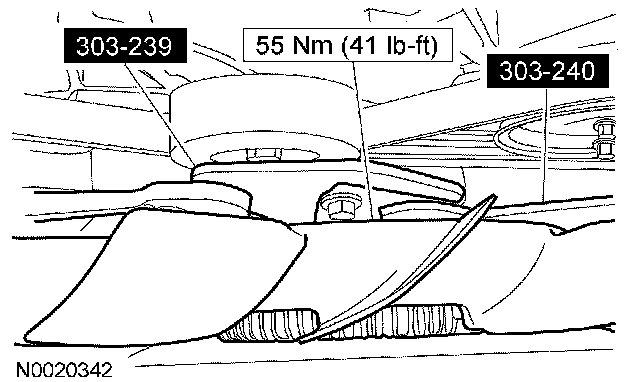
12. Using the special tools, remove the cooling fan.
^ To install, tighten to 55 Nm (41 ft. lbs.).
13. Remove the bolts and the lower fan shroud.
14. Remove the 3 lower radiator shield push pins.
Vehicles equipped with a 4.6L (2V) engine
15. Remove the 4 push pins and the lower air dam.
All vehicles
16. Remove the 4 bolts and the 2 radiator brackets.
17. Remove the inner air deflector.
18. Remove the 2 A/C condenser bracket bolts. If necessary, remove the brackets.
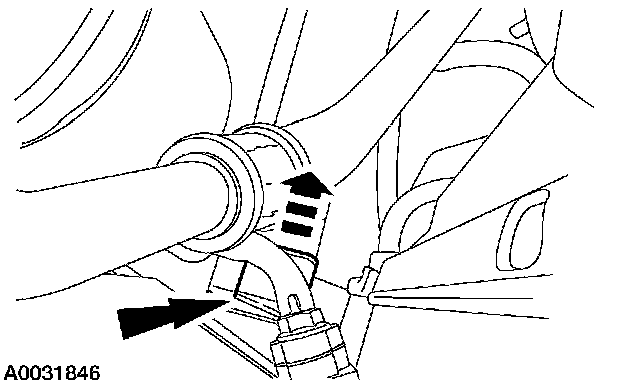
19. NOTE: It will be necessary to lift the radiator assembly up off the mounts and set it on the frame in order to separate the A/C condenser from the radiator.
NOTE: RH side shown, LH side similar.
Lift the radiator off the mounts and set it on the frame.
20. Remove the inner air deflectors.
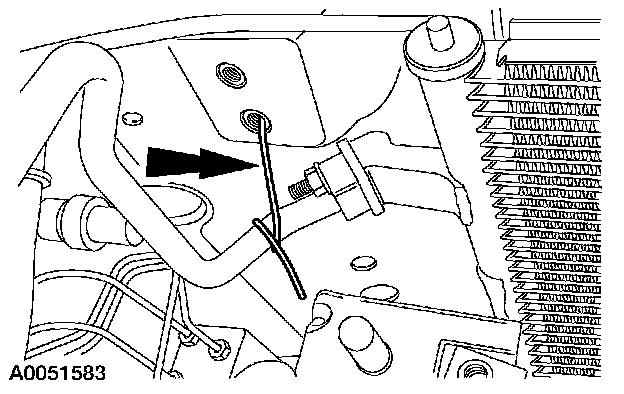
21. CAUTION: Do not allow the A/C condenser to hang freely or damage to the A/C lines could occur.
NOTE: LH side shown, RH side similar.
Using mechanic's wire, support both sides of the A/C condenser.
22. NOTE: It is not necessary to evacuate the A/C system. The A/C condenser can remain in the vehicle.
NOTE: It will be necessary to lift the A/C condenser up off the lower support. Move the A/C condenser toward the front of the vehicle.
Remove the radiator and transmission cooler as an assembly and place it on a bench.
23. Remove the bolts and the transmission cooler.
^ To install, tighten to 10 Nm (89 inch lbs.).
24. Remove the 2 push pins and the splash shield.
25. Loosen the clamp and disconnect the hose.
26. Remove the bolts and the RH radiator bracket, the LH radiator bracket and the hose as an assembly.
^ Tighten to 12 Nm (9 ft. lbs.).
27. To install, reverse the removal procedure.