Intake Manifold: Service and Repair
Intake ManifoldMaterial:
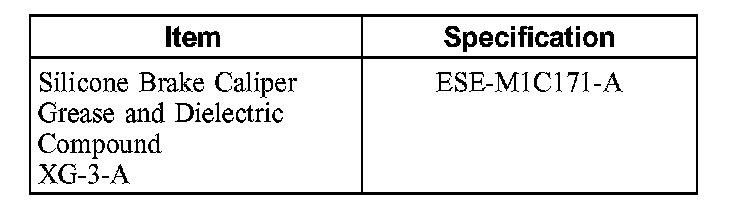
Material
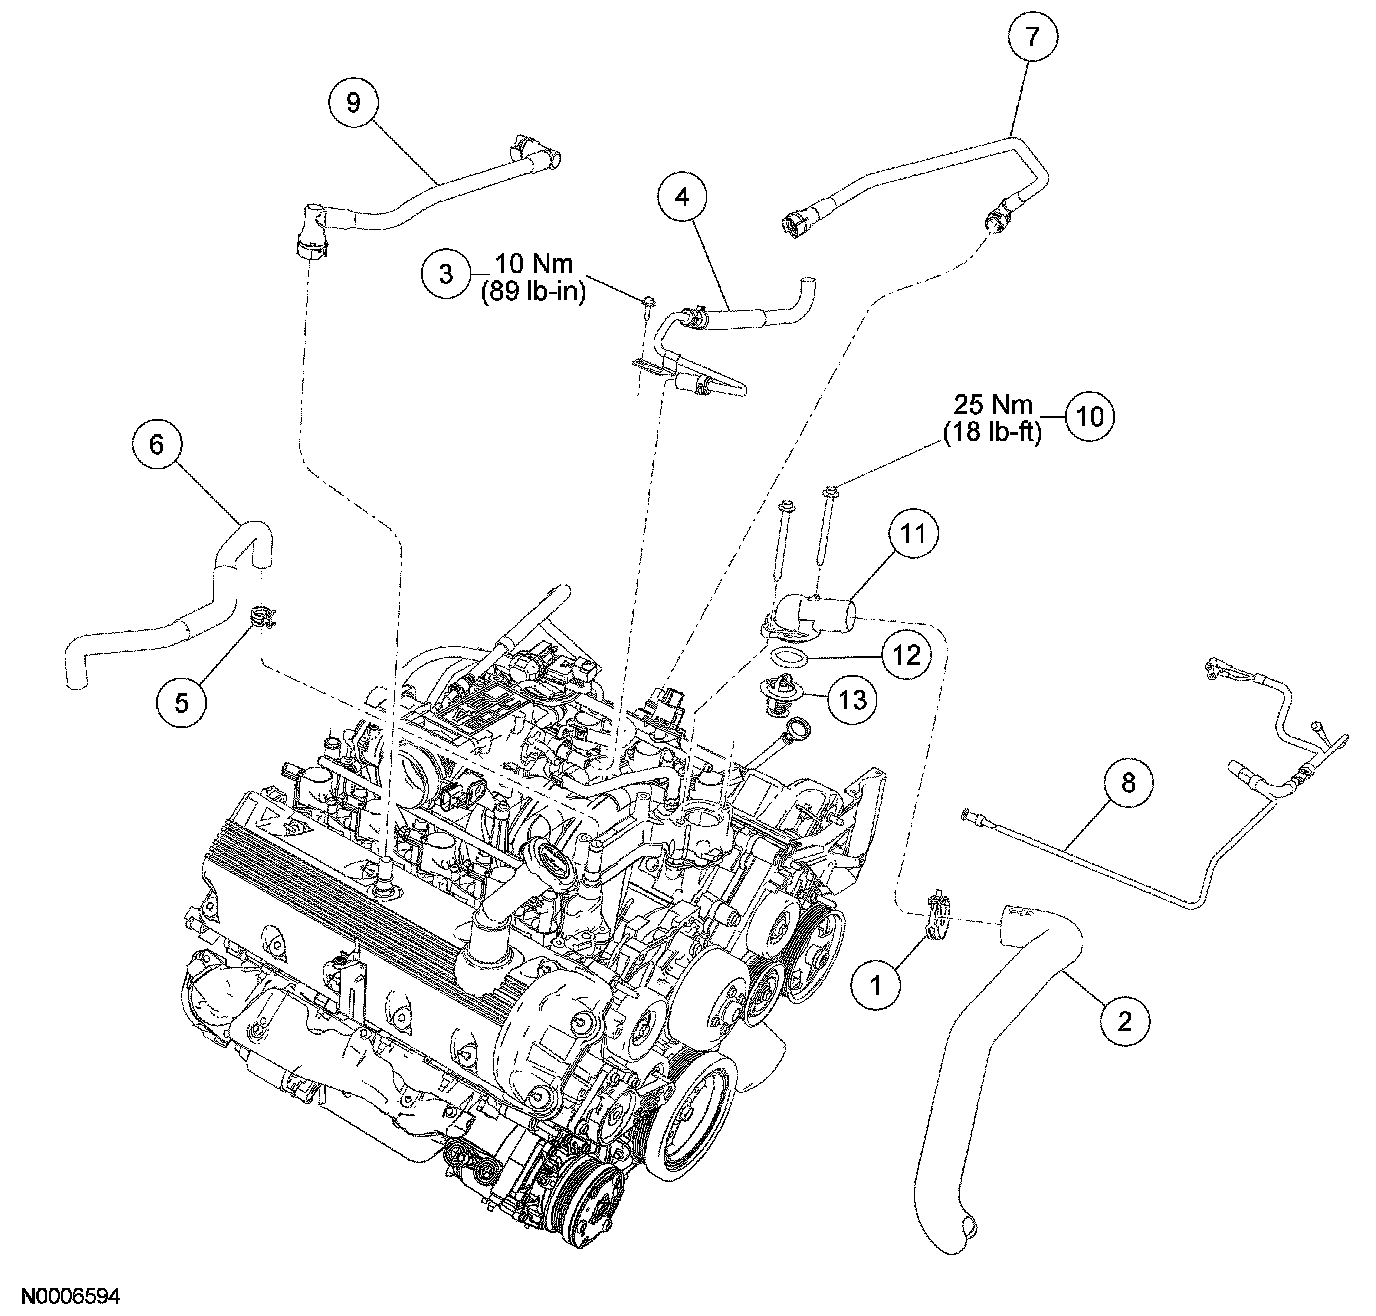
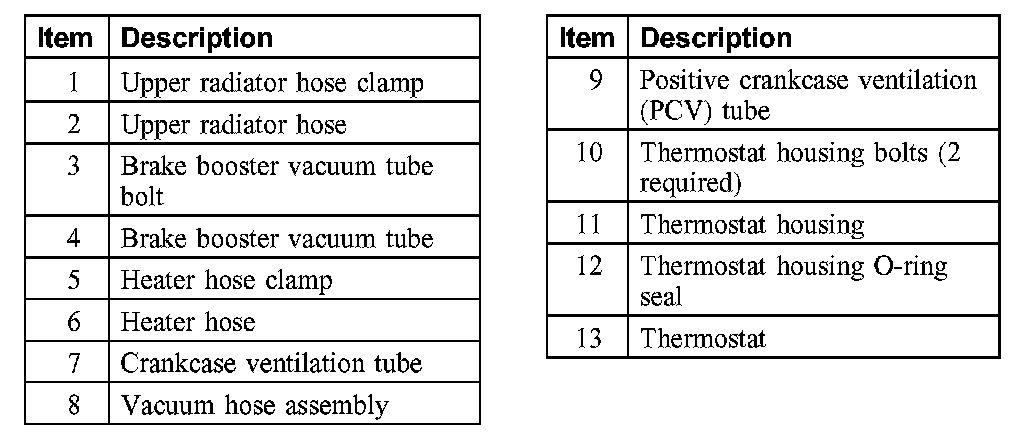
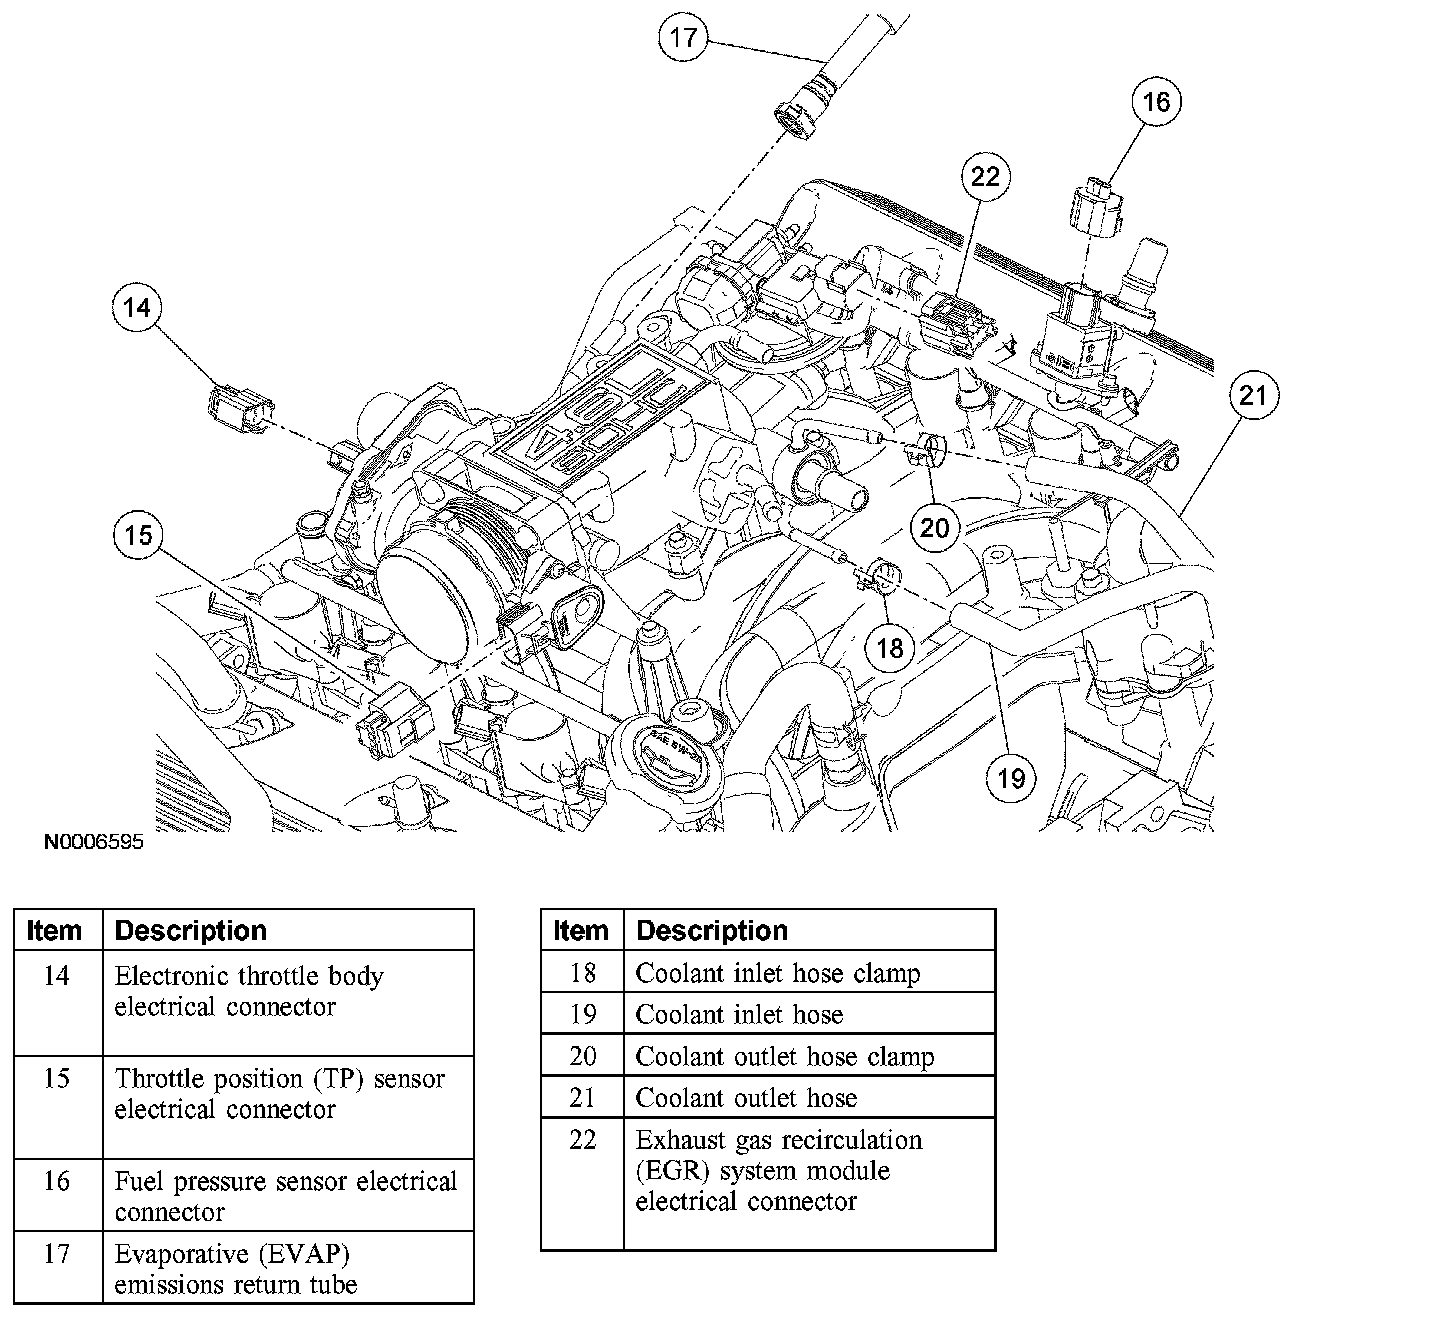
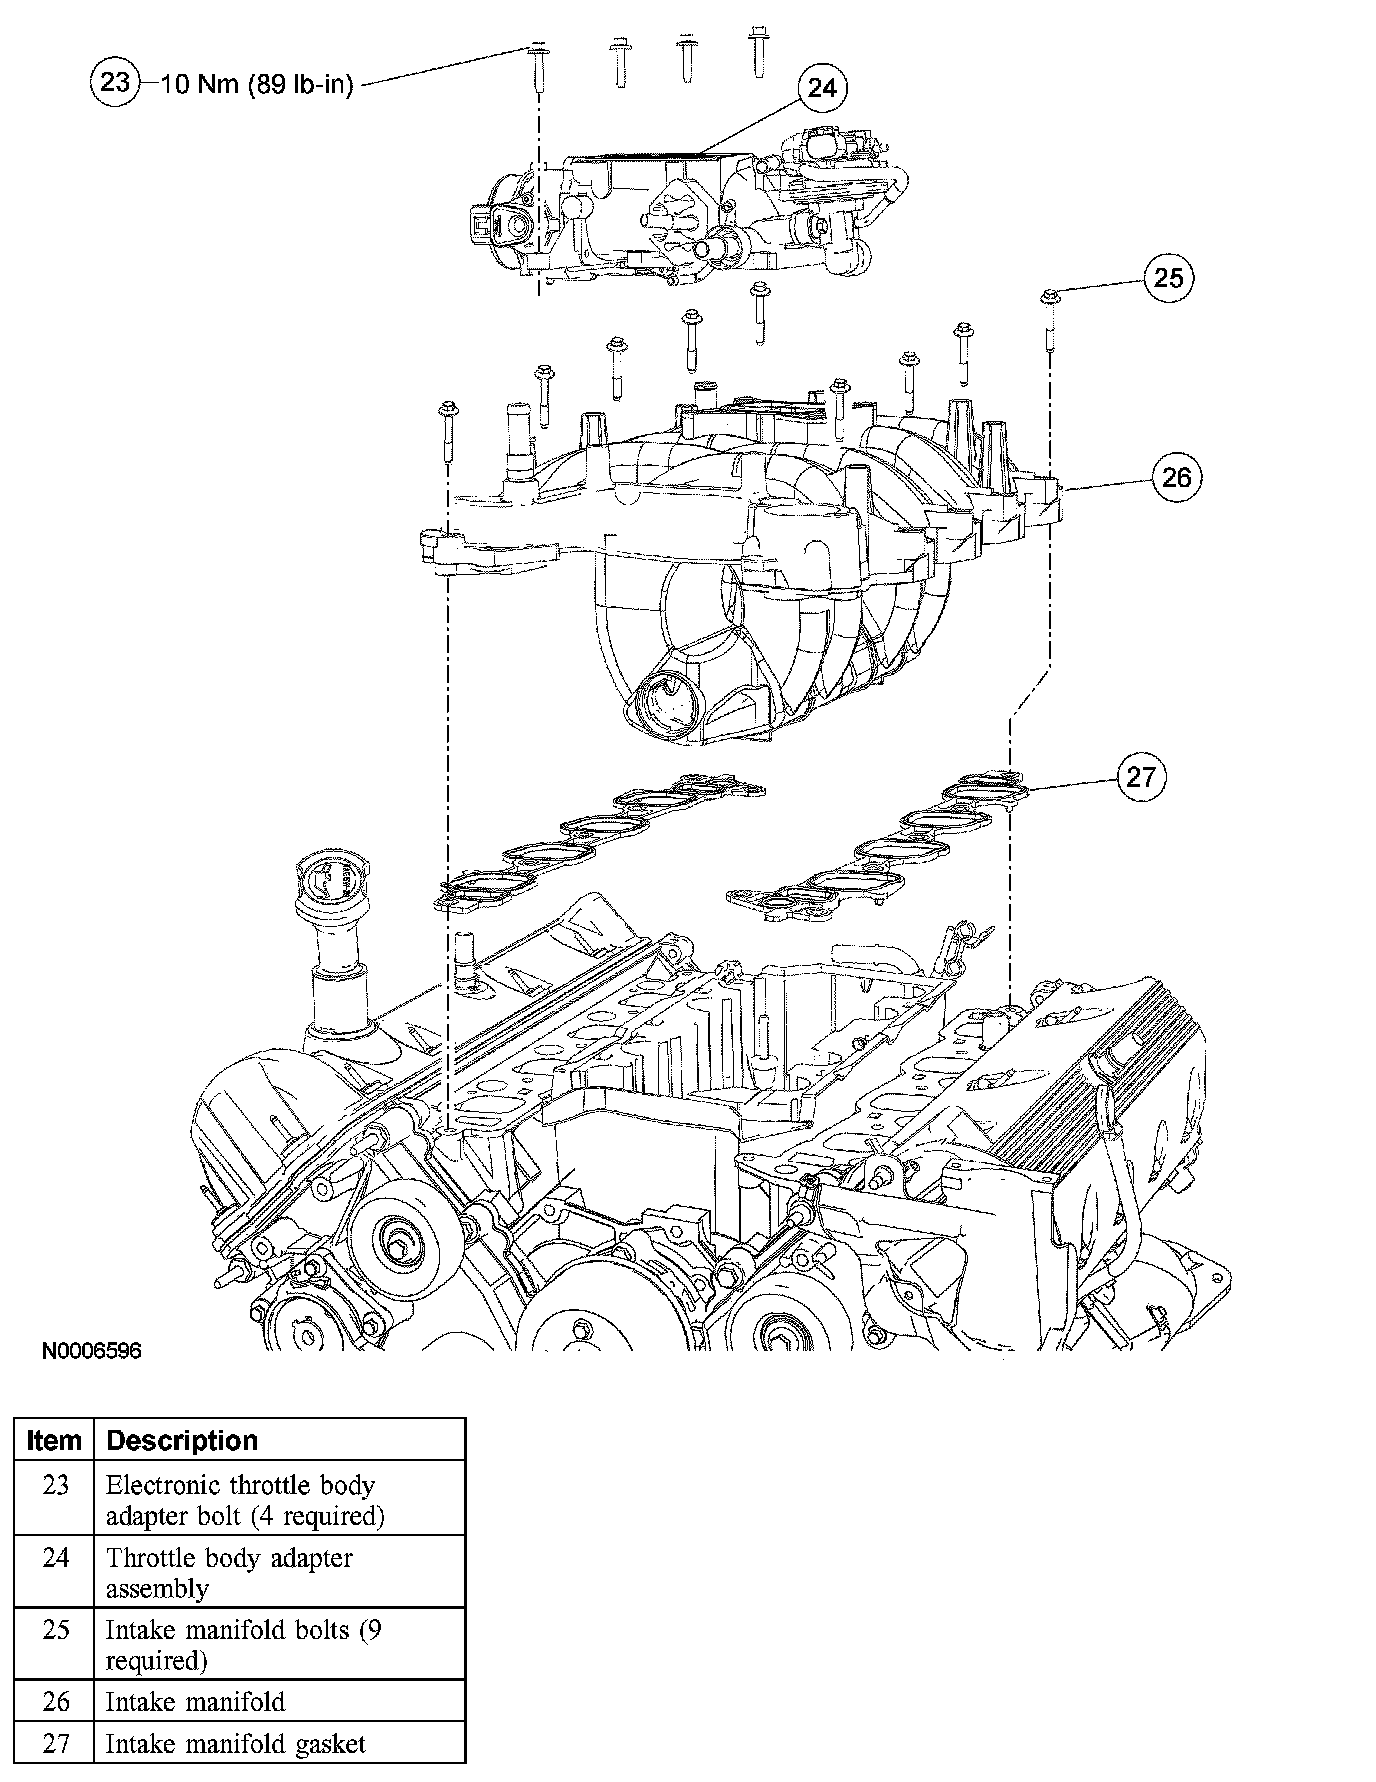
Removal
WARNING: Do not smoke or carry lighted tobacco or open flame of any type when working on or near any fuel related components. Highly flammable mixtures are always present and can be ignited. Failure to follow these instructions may result in personal injury.
1. With the vehicle in NEUTRAL, position it on a hoist.
2. Release the fuel system pressure.
3. Disconnect the battery ground cable.
4. Drain the cooling system.
5. Remove the engine air cleaner outlet pipe.
6. Remove the Exhaust Gas Recirculation (EGR) tube.
7. Remove the generator.
8. Disconnect the fuel tube spring lock coupling.
9. Release the clamp and disconnect the upper radiator hose from the thermostat housing.
10. Remove the brake booster vacuum tube bracket bolt and disconnect the tube from the throttle body adapter. Position the tube aside.
11. Release the clamp and disconnect the heater hose from the intake manifold.
12. Disconnect the crankcase breather tube from the valve cover and remove the tube.
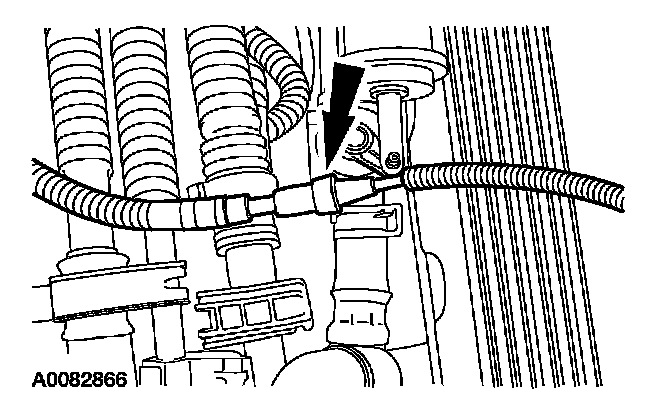
13. Disconnect the heater control vacuum hose fitting.
14. Disconnect the vacuum tube from the throttle body adapter.
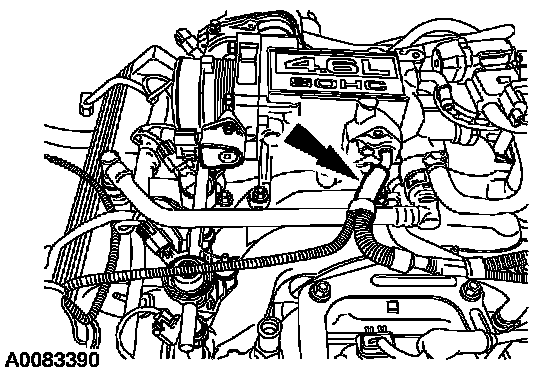
15. Disconnect the EGR system module and fuel pressure sensor vacuum fittings.
^ Remove the vacuum harness from the engine.
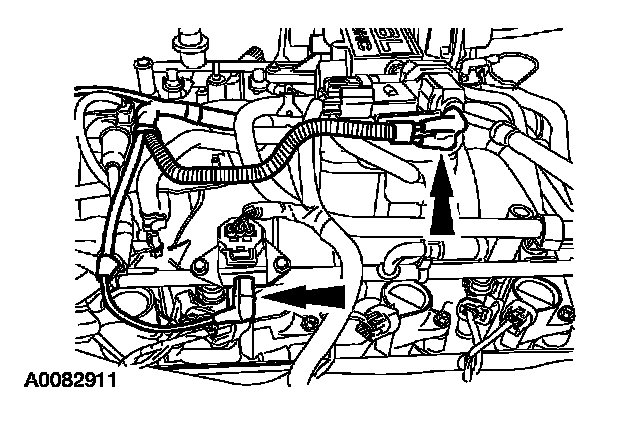
16. Remove the Positive Crankcase Ventilation (PCV) valve tube.
17. Remove the 2 bolts, the thermostat housing cover, the O-ring seal and the thermostat.
18. Disconnect the electronic throttle body and Throttle Position (TP) sensor electrical connectors.
19. Disconnect the fuel pressure sensor electrical connector.
20. Disconnect the Evaporative Emissions (EVAP) tube from the throttle body adapter.
21. Release the clamp and disconnect the heated PCV coolant inlet hose.
22. Release the clamp and disconnect the heated PCV coolant outlet hose.
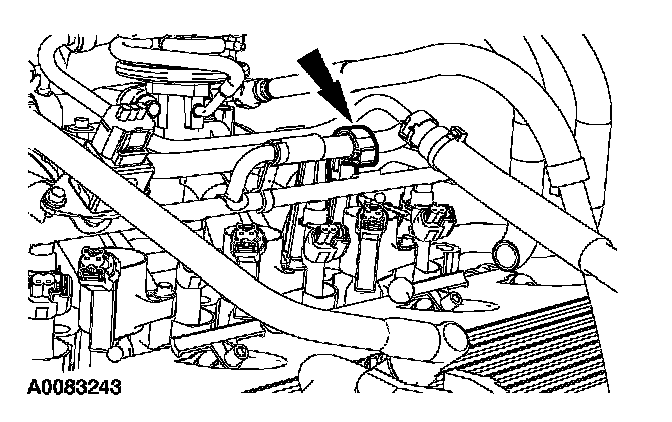
23. Separate the coolant outlet hose anchor from the fuel rail stud.
24. Disconnect the EGR system module electrical connector.
25. Remove the 4 bolts and the throttle body adapter.
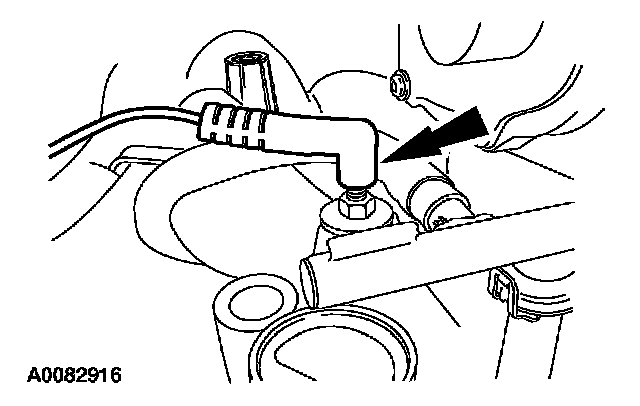
26. Disconnect the ground wire.
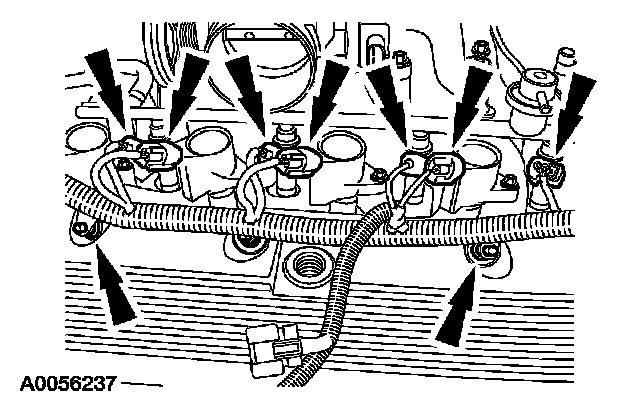
27. Disconnect the RH fuel injector, coil pack electrical connectors and the wiring harness retainers.
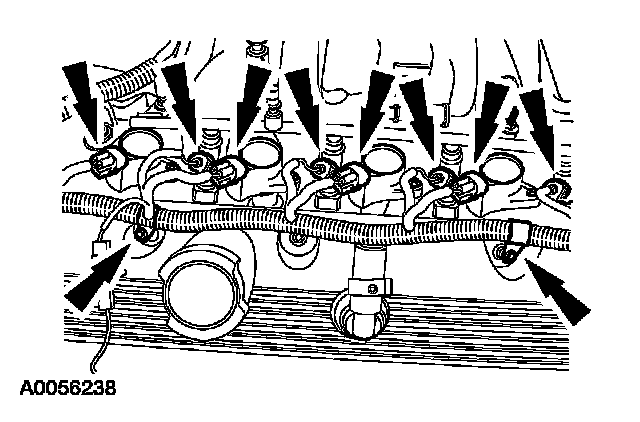
28. Disconnect the LH fuel injector and coil pack electrical connectors and the fuel charging wiring harness retainers.
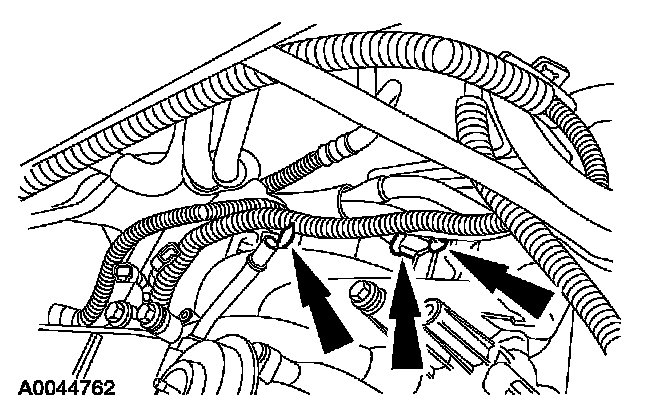
29. Separate the wire harness locators and the knock sensor (KS) electrical connector from the back of the intake manifold.
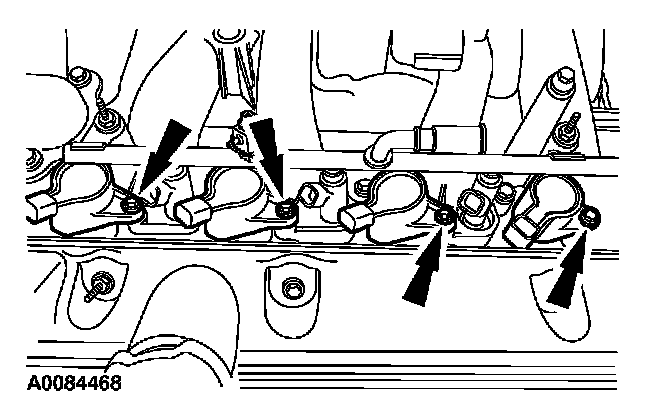
30. NOTE: LH shown, RH similar.
Remove the bolts and all 8 ignition coils.
31. Remove the 9 bolts, the intake manifold and the gaskets. Discard the gaskets.
Installation
1. Position the intake manifold gaskets and the intake manifold. Install the bolts finger tight.
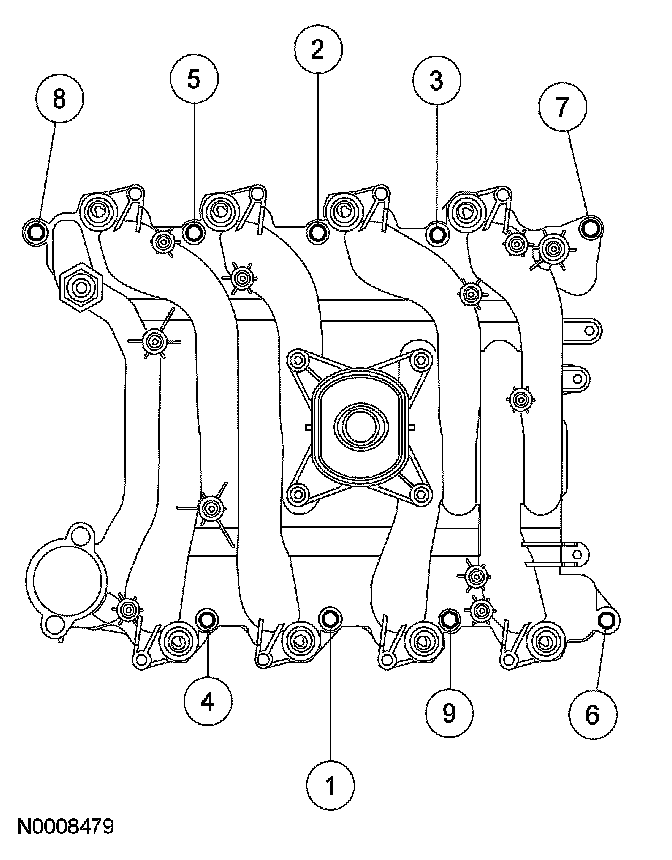
2. Tighten the bolts in the sequence shown to 25 Nm (18 ft. lbs.).
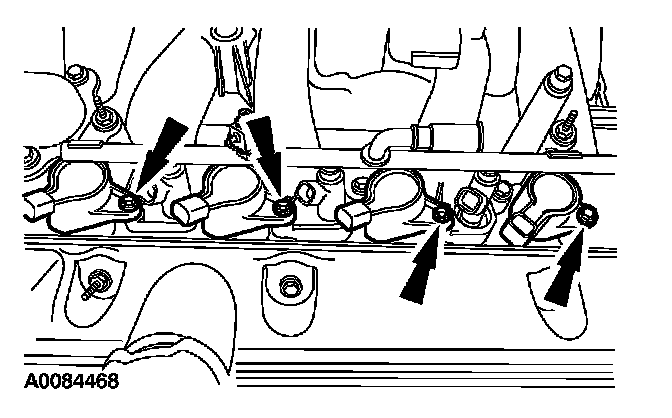
3. NOTE: Apply dielectric compound to the inside of the coil boots.
Install all 8 ignition coils and the bolts.
^ Tighten to 6 Nm (53 inch lbs.).
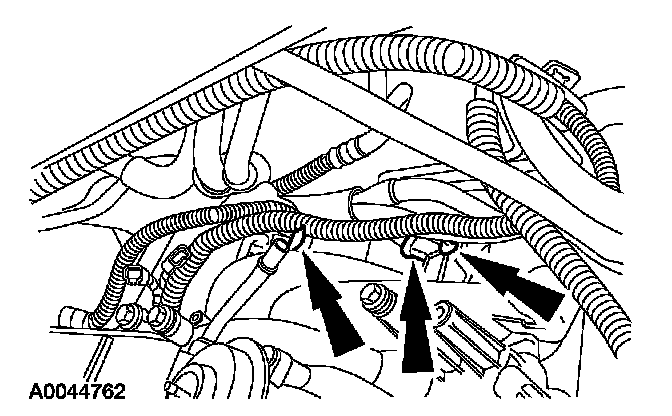
4. Attach the wire harness locators and the KS electrical connector to the back of the intake manifold.
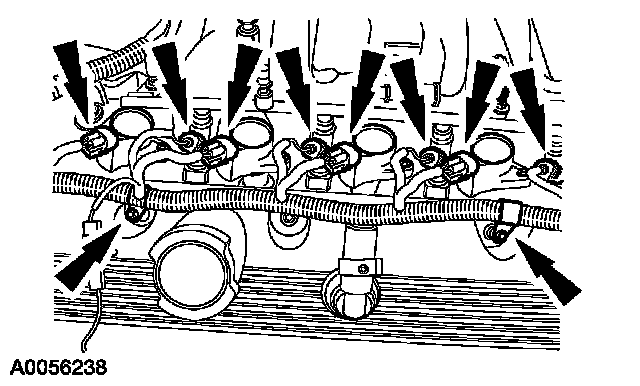
5. Connect the LH fuel injector and coil pack electrical connectors and the fuel charging wiring harness retainers.
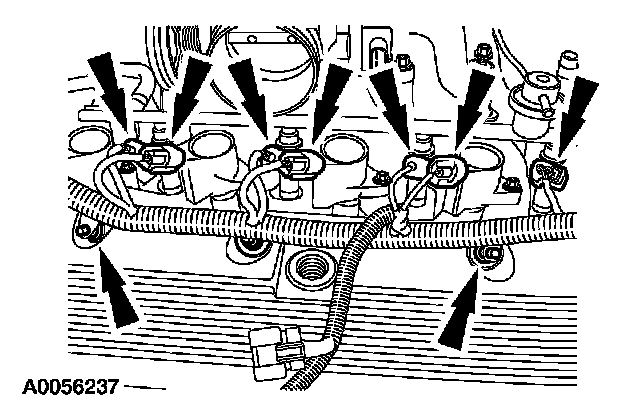
6. Connect the RH fuel injector, coil pack electrical connectors and the wiring harness retainers.
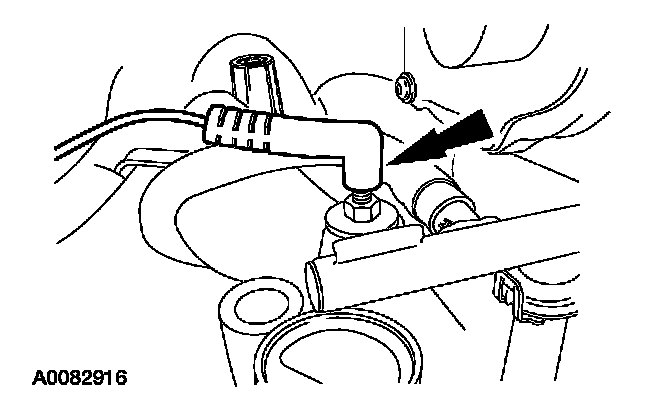
7. Connect the ground wire.
8. Position the throttle body adapter and install the bolts.
^ Tighten to 10 Nm (89 inch lbs.).
9. Connect the EGR system module electrical connector.
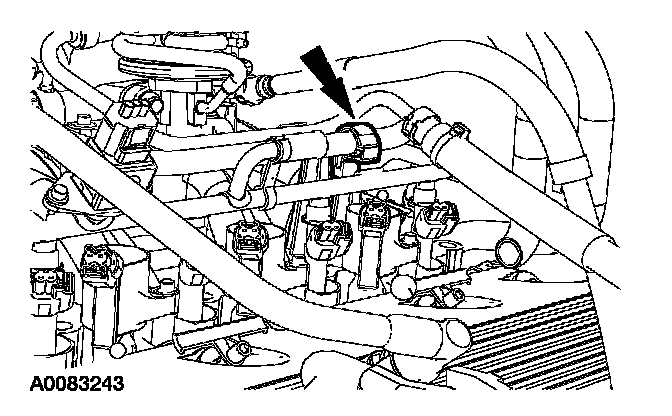
10. Install the coolant outlet hose anchor to the fuel rail stud.
11. Connect the heated PCV coolant outlet hose and position the clamp.
12. Connect the heated PCV coolant inlet hose and position the clamp.
13. Connect the EVAP hose to the throttle body adapter.
14. Connect the fuel pressure sensor electrical connector.
15. Connect the TP sensor and the electronic throttle body electrical connectors.
16. Install the thermostat.
17. NOTE: Inspect the thermostat O-ring seal and install a new seal if necessary.
Install the thermostat O-ring seal, the thermostat housing cover and the 2 bolts.
^ Tighten to 25 Nm (18 ft. lbs.).
18. Install the PCV valve tube.
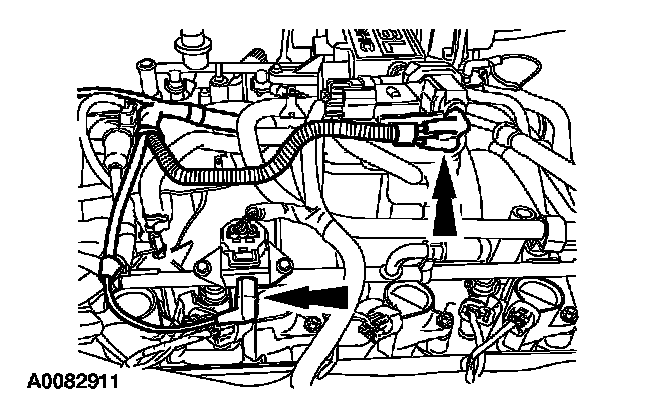
19. Position the vacuum harness and connect the fuel pressure sensor and EGR system module vacuum fittings.
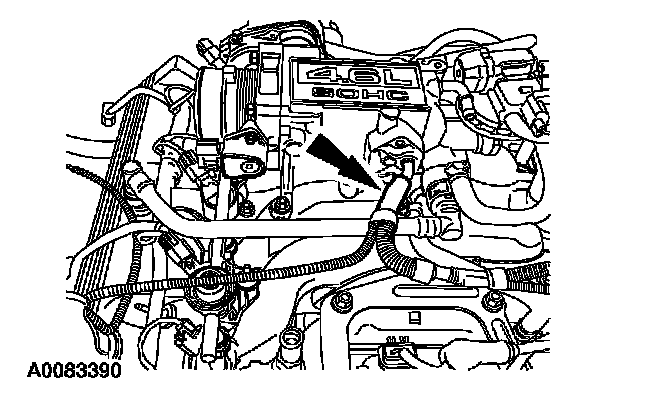
20. Connect the vacuum tube to the throttle body adapter.
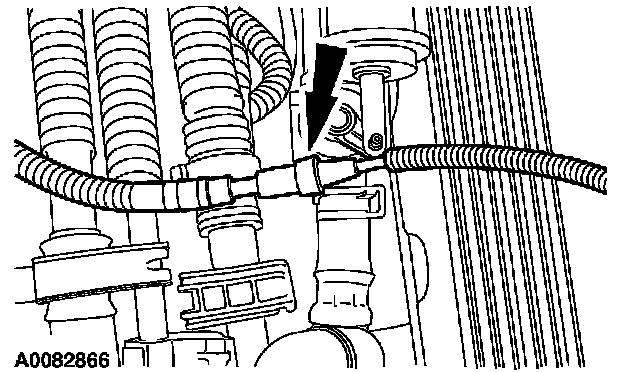
21. Connect the heater control vacuum hose fitting.
22. Position the crankcase breather tube and connect it to the valve cover.
23. Connect the heater hose and position the clamp.
24. Position the brake booster vacuum tube and connect it to the throttle body adapter. Install the brake booster vacuum tube bracket bolt.
^ Tighten to 10 Nm (89 inch lbs.).
25. Connect the upper radiator hose to the thermostat housing and position the clamp.
26. Connect the fuel tube spring lock coupling.
27. Install the generator.
28. Install the EGR tube.
29. Install the air cleaner outlet pipe.
30. Connect the battery ground cable.
31. Fill and bleed the engine cooling system.