Oil Pan: Service and Repair
Oil PanMaterial:
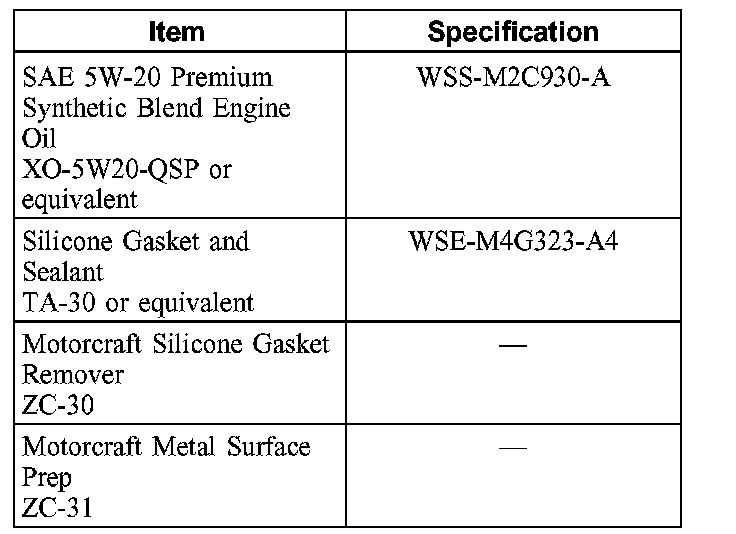
Material
Removal
1. Remove the front axle, if equipped.
2. Remove the stabilizer bar.
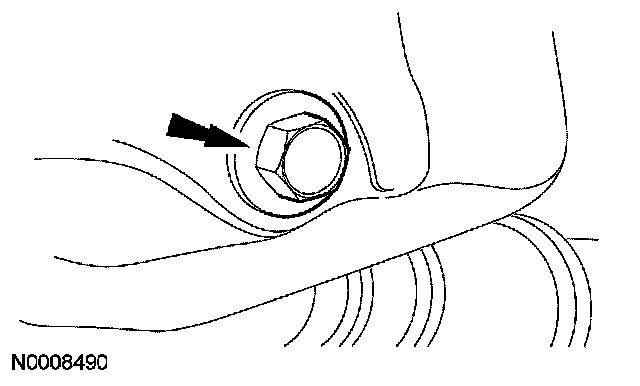
3. Remove the drain plug and drain the engine oil. Install the drain plug when finished.
^ Tighten to 14 Nm (10 ft. lbs.).
4. Remove the bolts, the oil pan and the gasket.
^ Discard the gasket.
Installation
1. CAUTION: Do not use metal scrapers, wire brushes, power abrasive discs or other abrasive means to clean the sealing surfaces. These may cause scratches and gouges resulting in leak paths. Use a plastic scraper to clean the sealing surfaces. Failure to follow these directions can cause future oil leaks.
Clean and inspect the sealing surfaces with silicone gasket remover, metal surface prep and a plastic scraper. Follow the directions on the packaging.
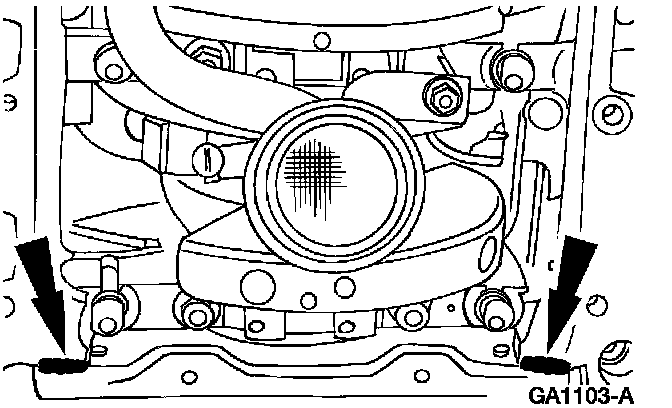
2. NOTE: If the oil pan and gasket are not secured within 4 minutes of sealer application, the sealant must be removed and the sealing surfaces cleaned with silicone gasket remover and metal surface prep. Follow the directions on the packaging.
Apply silicone gasket and sealant in 2 places.
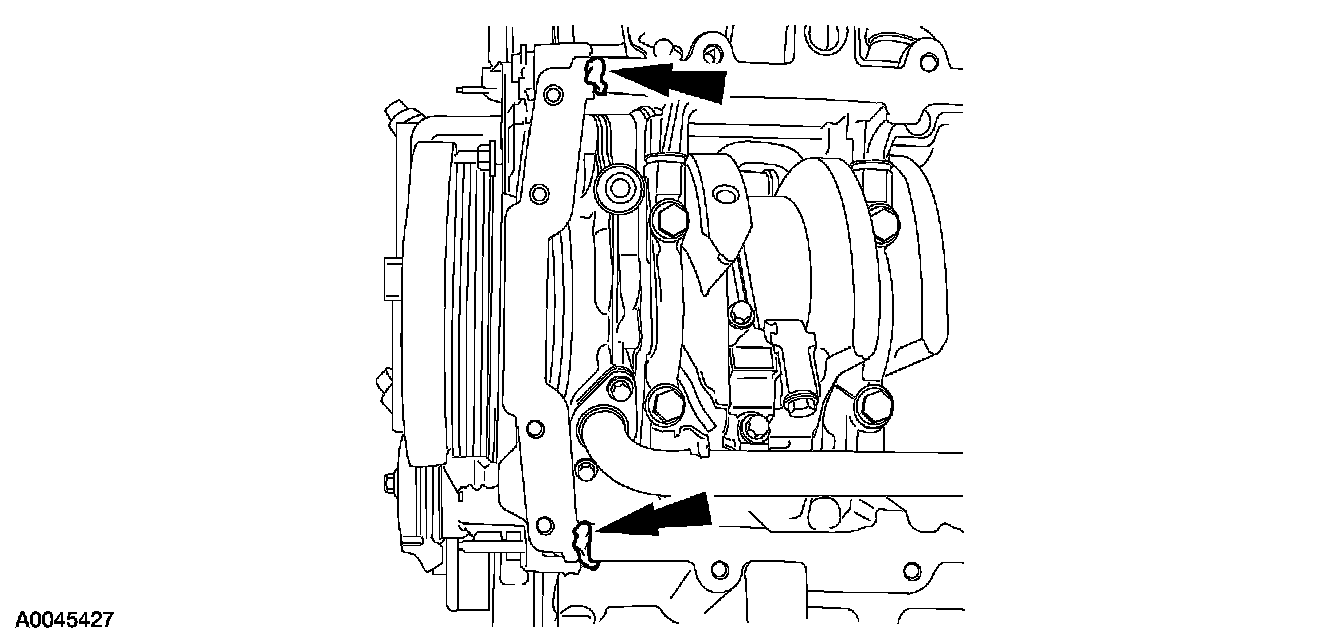
3. NOTE: If the oil pan and gasket are not secured within 4 minutes of sealer application, the sealant must be removed and the sealing surfaces cleaned with silicone gasket remover and metal surface prep. Follow the directions on the packaging.
Apply silicone gasket and sealant in 2 places.
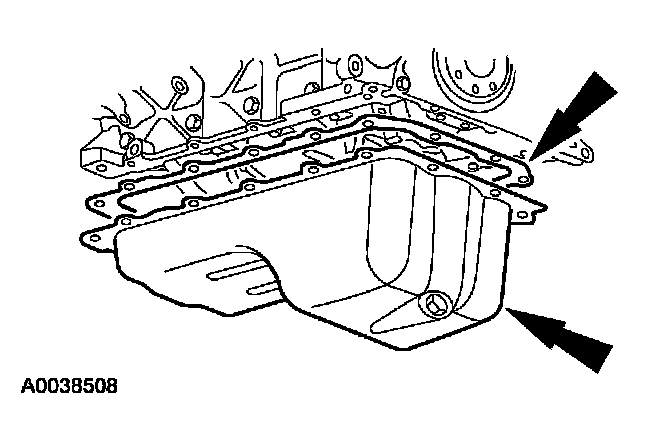
4. Position the new oil pan gasket and the oil pan and loosely install the bolts.
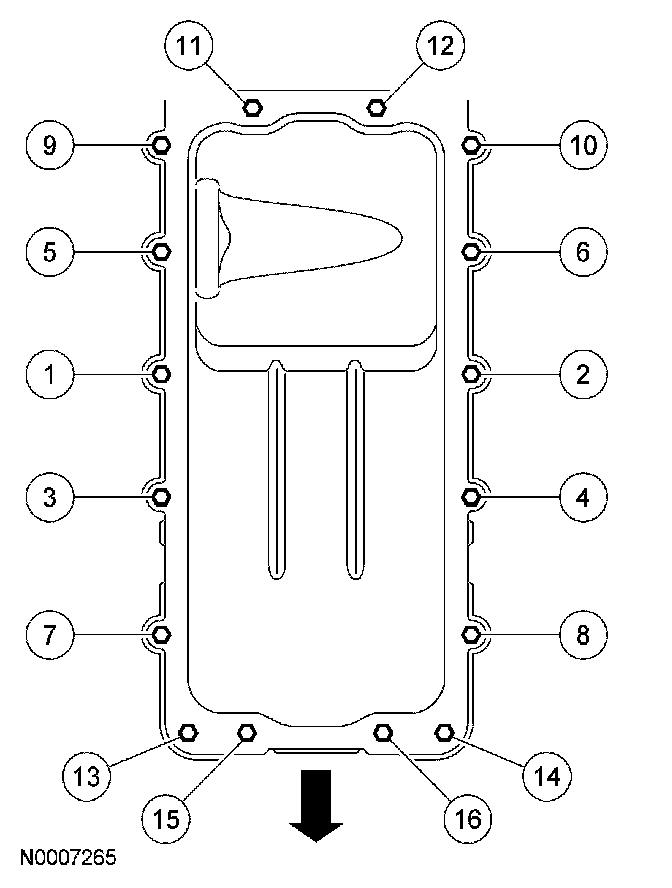
5. Tighten the bolts in 3 stages in the sequence shown.
^ Stage 1: Tighten to 2 Nm (18 inch lbs.).
^ Stage 2: Tighten to 20 Nm (15 ft. lbs.).
^ Stage 3: Tighten an additional 60 degrees.
6. Install the stabilizer bar.
7. Install the front axle, if equipped.
8. Fill the engine with clean engine oil.