Front Door Latch: Service and Repair
FRONT DOOR LATCHRemoval and Installation
NOTE: The LH side is shown, the RH side is similar.
1. Remove the front door trim panel.
2. Position the watershield aside.
3. Disconnect the exterior front door handle actuating rod.
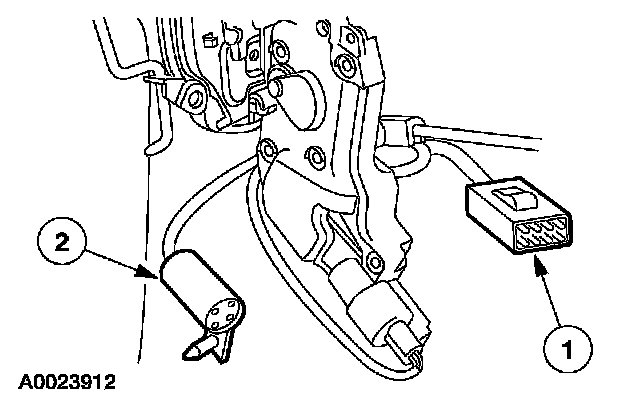
4. Disconnect the front door latch jumper harness electrical connectors.
1 Disconnect the door harness electrical connector.
2 If equipped, disconnect the disarm switch electrical connector and separate the locator from the door frame.
5. Remove the front door speaker.
- Remove the 4 bolts.
- Disconnect the speaker electrical connector.
6. Open the clip and disconnect the front door lock lever rod from the interior door handle.
7. Remove the bolt and position the interior front door handle away from the door frame.
- To install, tighten to 2 Nm (18 lb-in).
8. Release the interior front door handle cable from the locators.
9. Remove the 3 front door latch screws.
- To install, tighten to 12 Nm (9 lb-ft).
10. Disconnect the front door ajar switch electrical connector and remove the front door latch.
11. To install, reverse the removal procedure.
- Lubricate the front door latch after installation.