Floor Door
VACUUM CONTROL MOTOR - FLOOR DOORPart 1:
Part 2:
Part 3:
Removal and Installation
1. Depower the supplemental restraint system (SRS).
2. Remove the RH and LH A-pillar trim panels.
3. Remove the cowl panel grille.
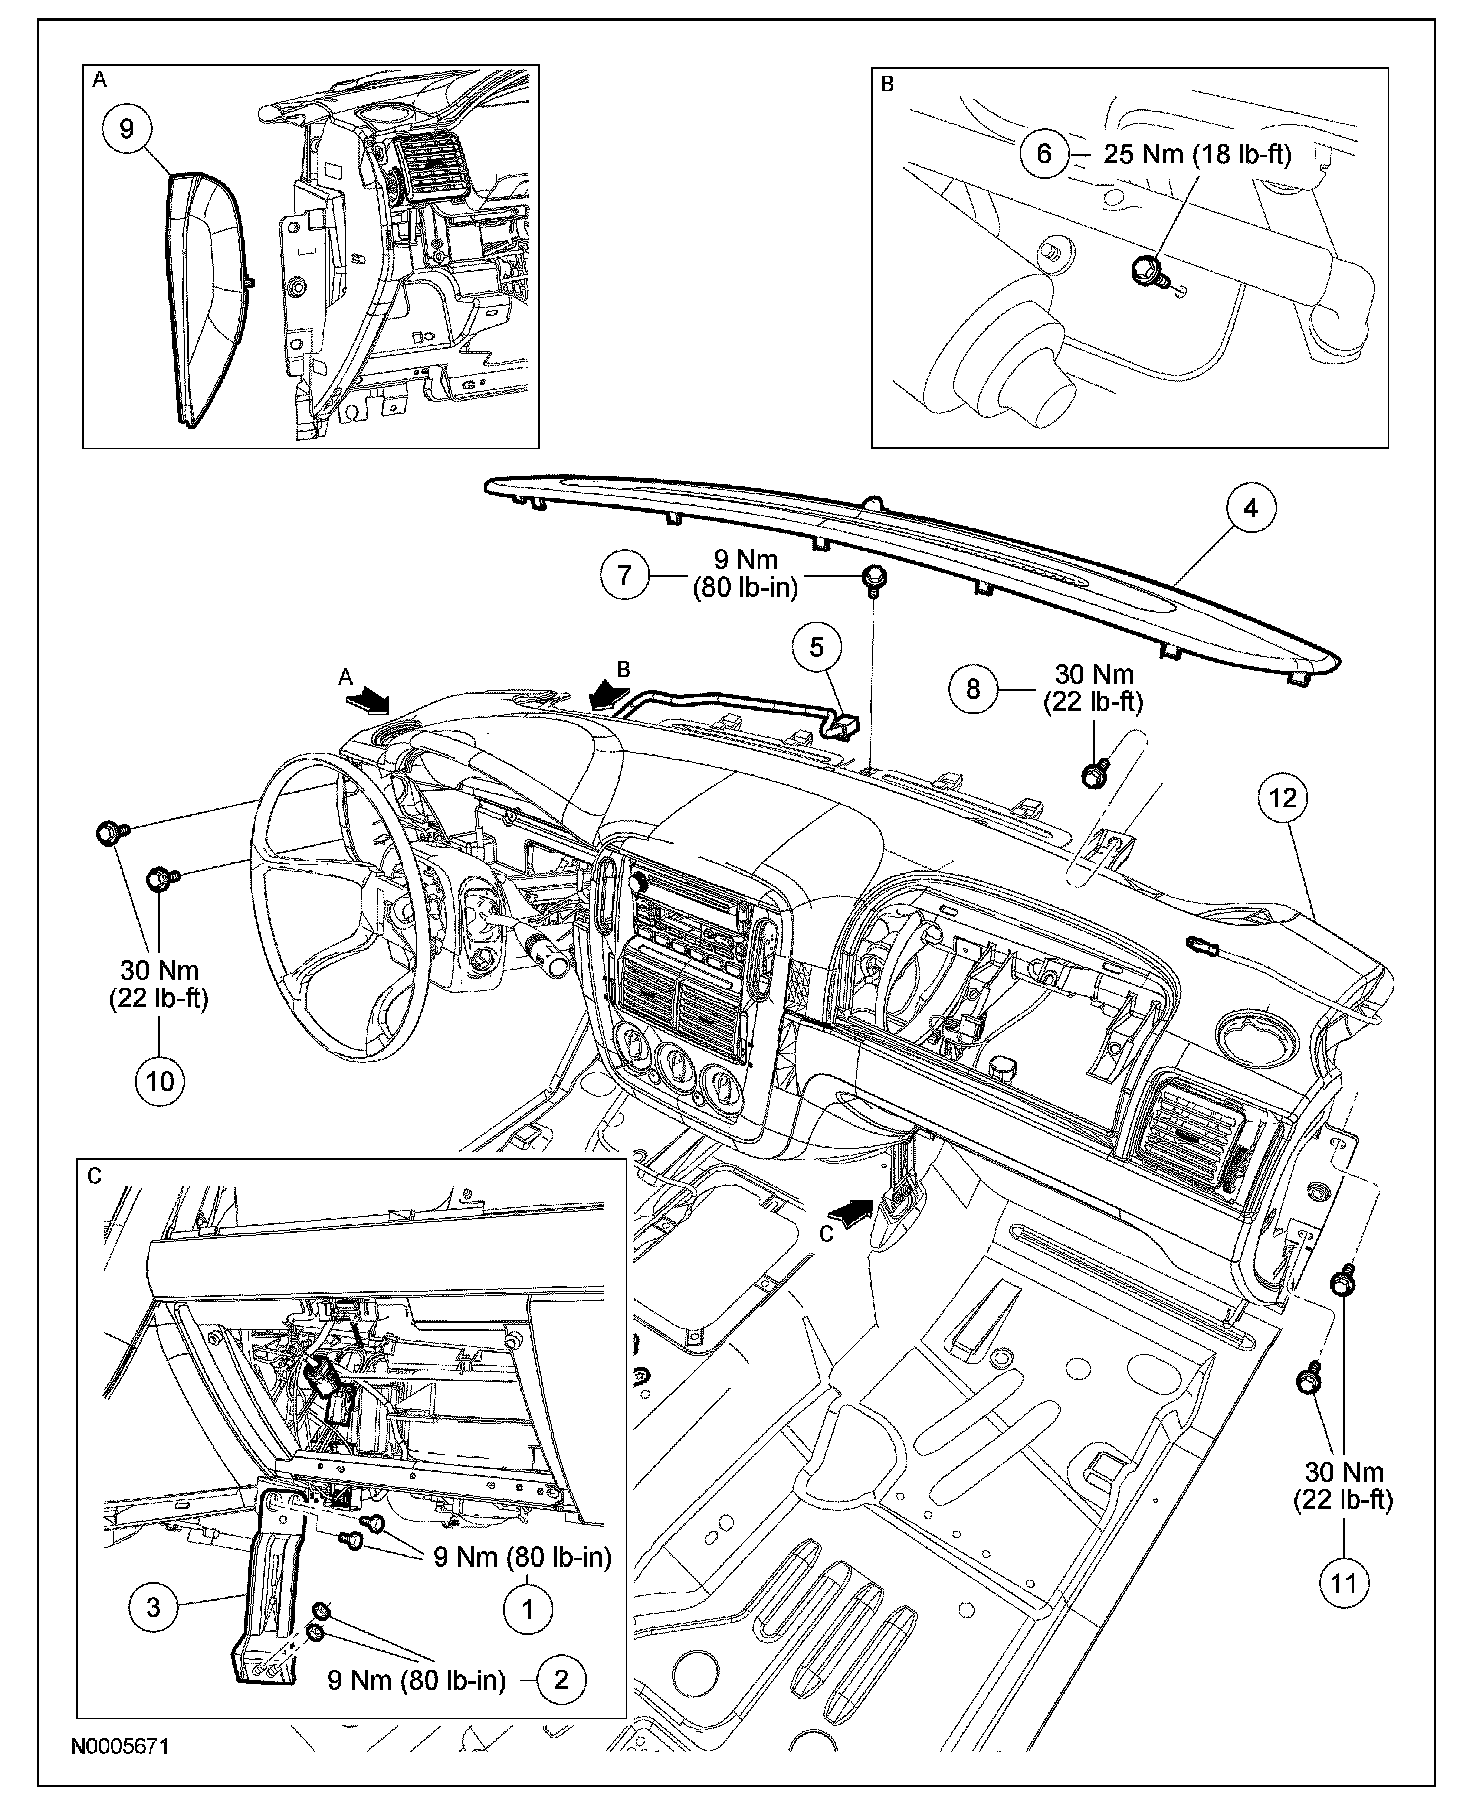
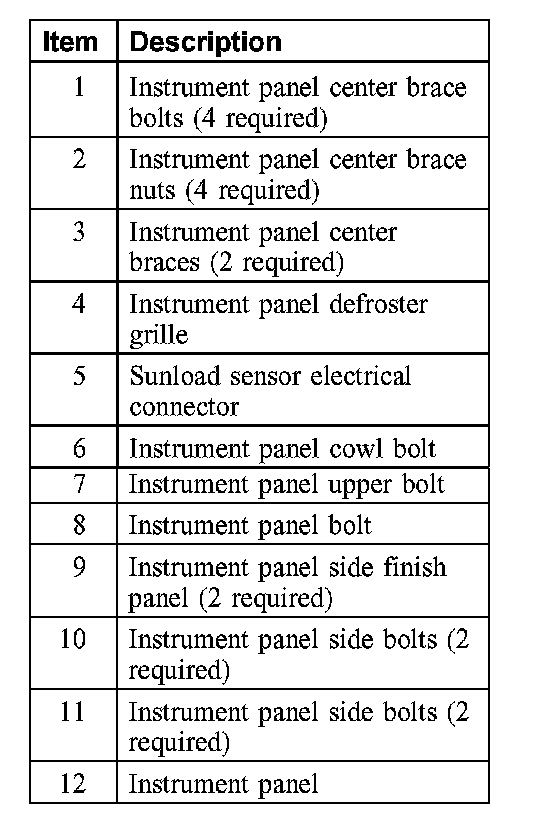
4. Remove the 4 instrument panel center brace bolts.
- To install, tighten to 9 Nm (80 lb-in).
5. Remove the 4 instrument panel center brace nuts.
- To install, tighten to 9 Nm (80 lb-in).
6. Remove the 2 instrument panel center braces
7. CAUTION: To avoid damaging the sunload sensor electrical connector, remove the grille just enough to access the connector.
Remove the instrument panel defroster grille.
8. NOTE: The instrument panel cowl bolt must be removed from outside the vehicle.
Remove the instrument panel cowl bolt.
- To install, tighten to 25 Nm (18 lb-ft).
9. Remove the instrument panel upper bolt.
- To install, tighten to 9 Nm (80 lb-in).
10. Remove the instrument panel bolt.
- To install, tighten to 25 Nm (18 lb-ft).
11. Remove the 2 instrument panel side finish panels.
12. NOTE: Do not completely remove the instrument panel bolts.
Loosen the 2 LH instrument panel side bolts enough to allow the RH side of the instrument panel to be moved away from the dash panel when the RH instrument panel side bolts are removed.
- To install, tighten to 30 Nm (22 lb-ft).
13. CAUTION:
- Be sure the instrument panel is properly supported to avoid possible damage to the instrument panel wiring and components.
- To avoid damage to the instrument panel wiring or components, do not use excessive force when moving the instrument panel away from the dash panel.
NOTE: The instrument panel may be supported by installing threaded rods or equivalent, with the same diameter and thread pitch, in place of the RH instrument panel support bolts.
Correctly support the instrument panel and remove the 2 RH instrument panel support bolts to allow the instrument panel to be pulled away from the dash panel.
- To install, tighten to 30 Nm (22 lb-ft).
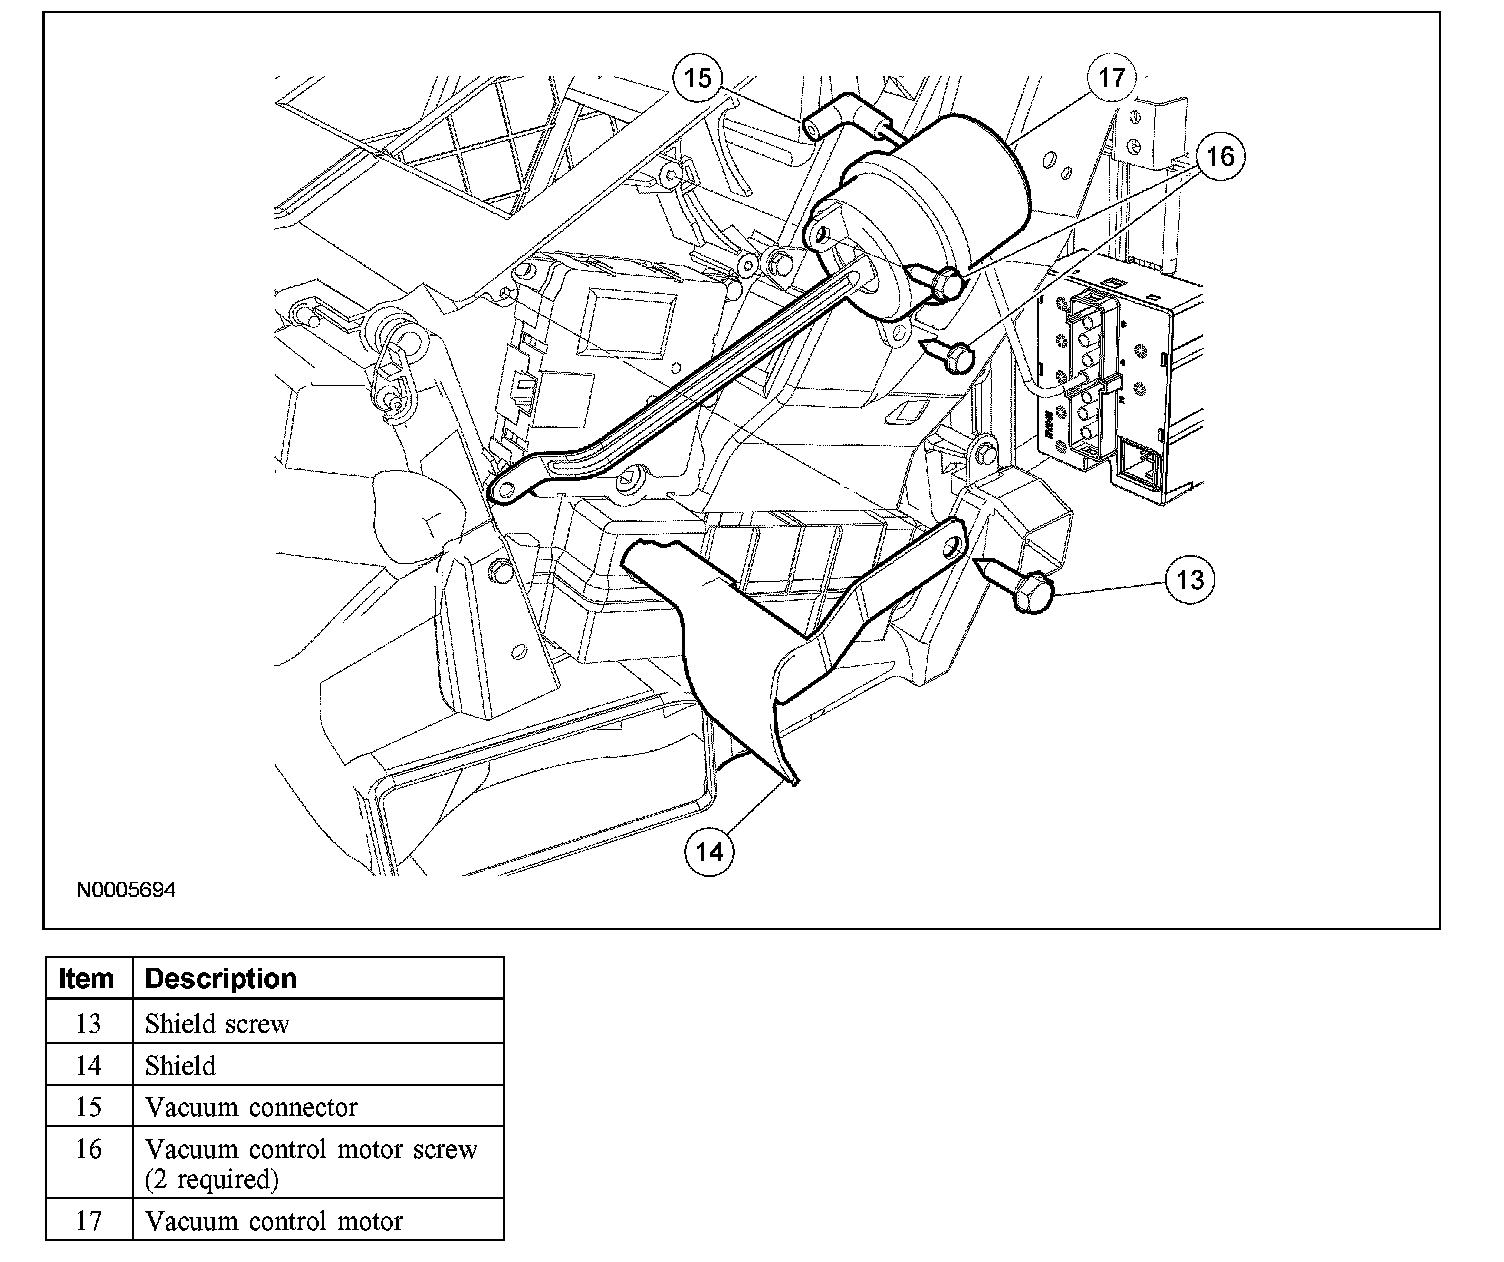
14. Remove the shield screw.
15. Remove the shield.
16. Disconnect the vacuum connector.
17. Remove the 2 vacuum control motor screws.
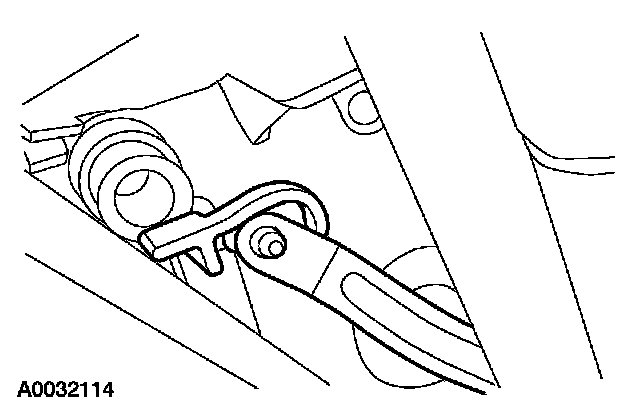
18. Rotate the vacuum control motor until it clears the retaining arm and remove the vacuum control motor.
19. To install, reverse the removal procedure.