Auxiliary Transmission Fluid Cooler
Auxiliary Transmission Fluid Cooler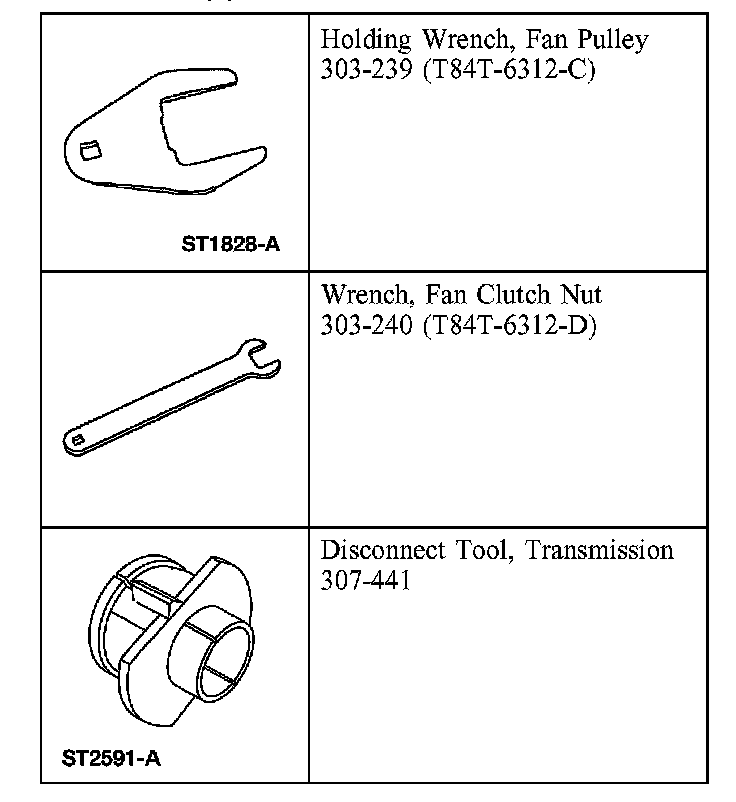
Special Tool(s)
Removal
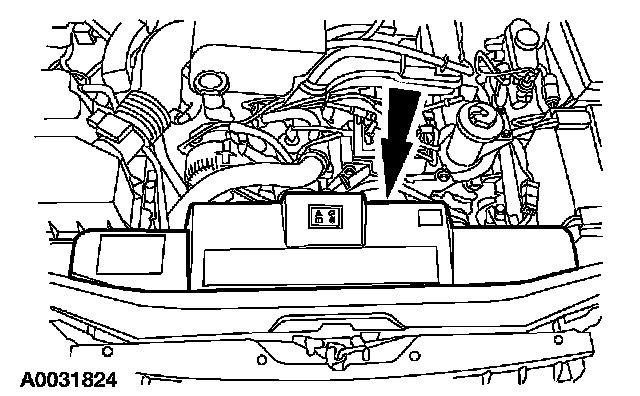
1. Remove the upper air deflector.
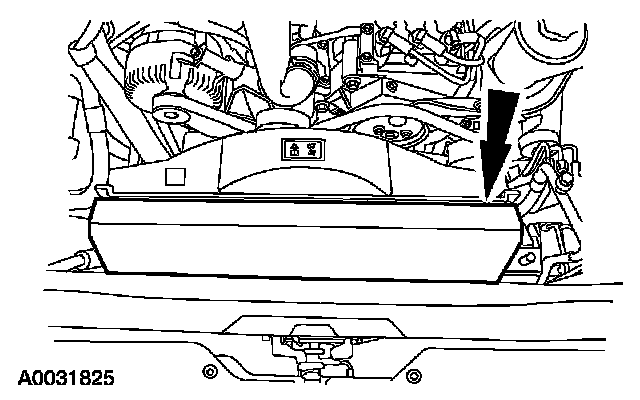
2. Remove the inner air deflector.
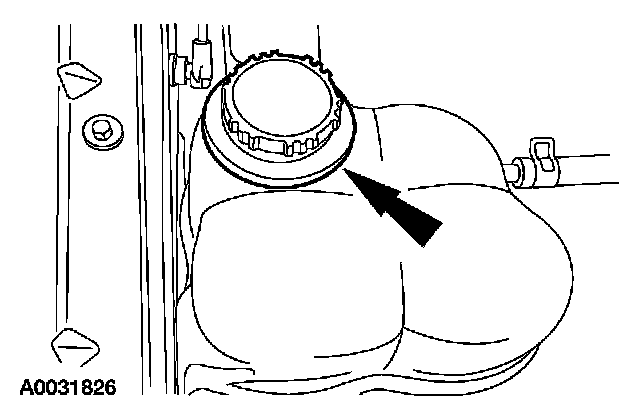
3. Remove the degas bottle cap.
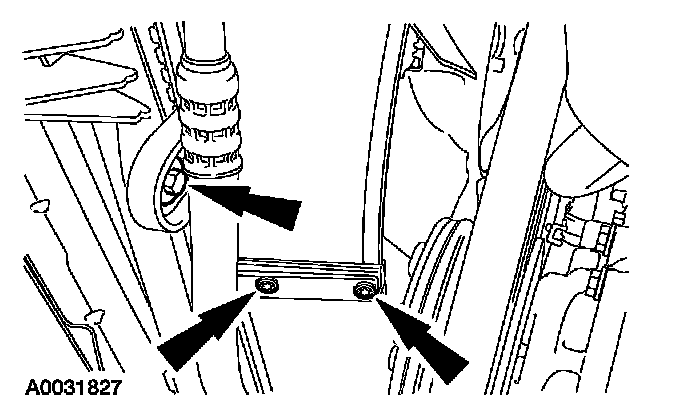
4. Remove and discard the screws. Remove the bolt from the left side of the fan shroud.
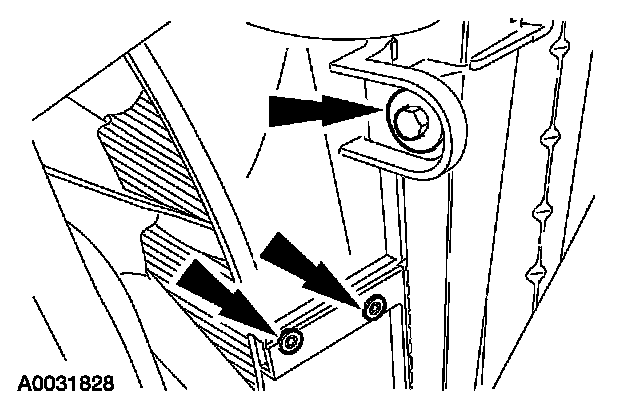
5. Remove and discard the screws. Remove the bolt from the right side of the fan shroud.
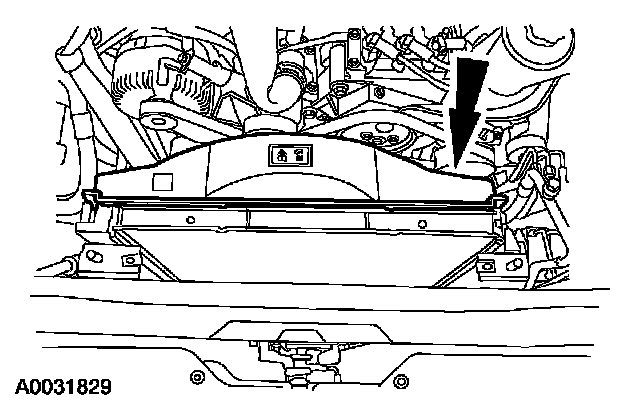
6. Remove the upper radiator fan shroud.
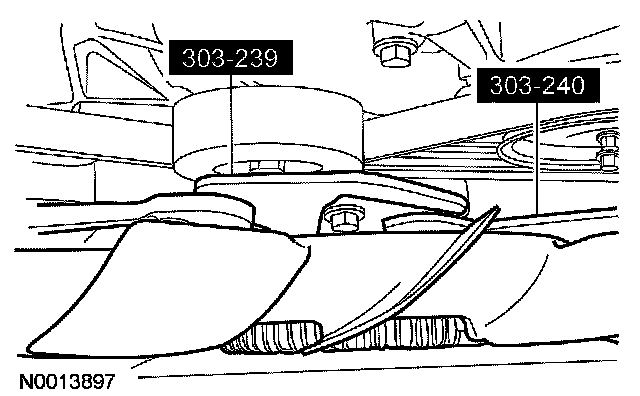
7. Using the special tools, remove the cooling fan.
8. With the vehicle in NEUTRAL, position the vehicle on a hoist.
9. Drain the engine coolant.
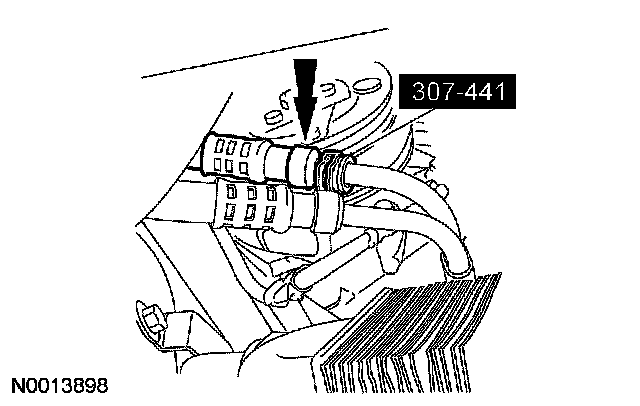
10. NOTE: If equipped, remove the safety retainer from the connector.
Disconnect the cooler line.
^ If equipped, use the special tool to disconnect the quick connect coupler.
^ If equipped, loosen and remove the screw clamp from the hose.
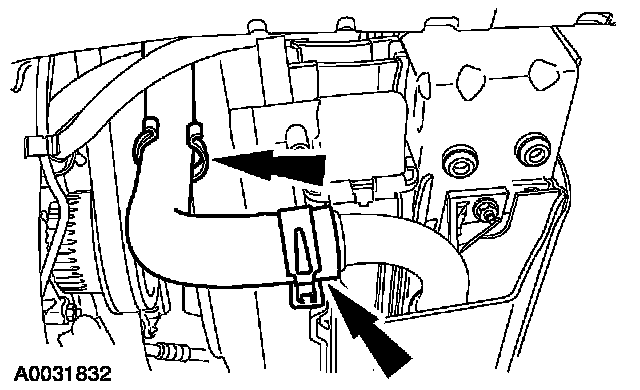
11. Remove the right lower radiator hose from the radiator, remove the hose from the retainer and position it aside.
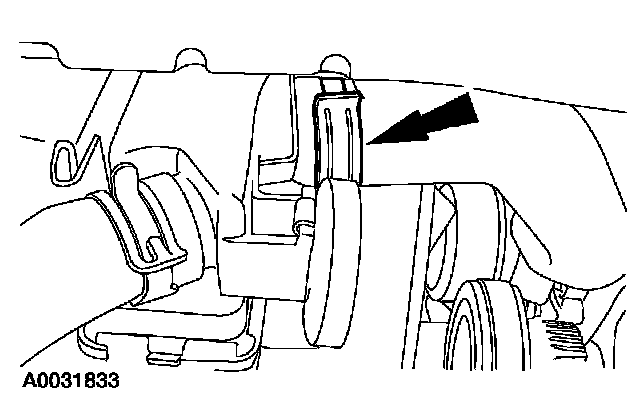
12. Remove the left lower radiator hose from the radiator and position it aside.
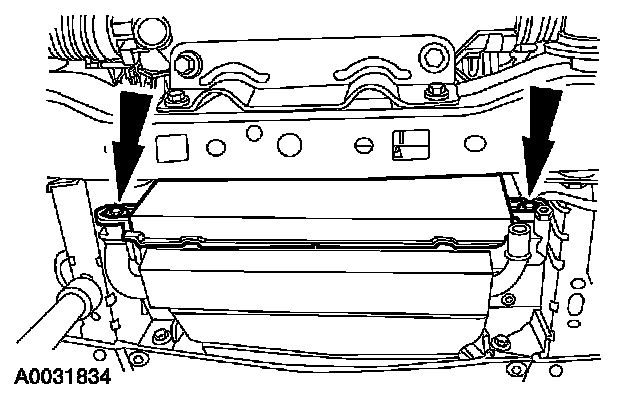
13. Remove the bolts and the lower fan shroud.
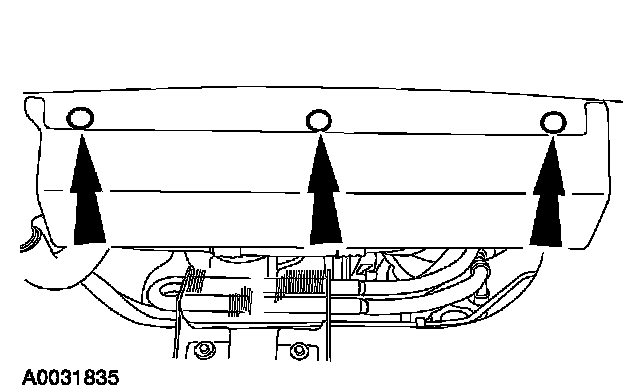
14. Disconnect the lower air dam push pins.
15. Position the vehicle.
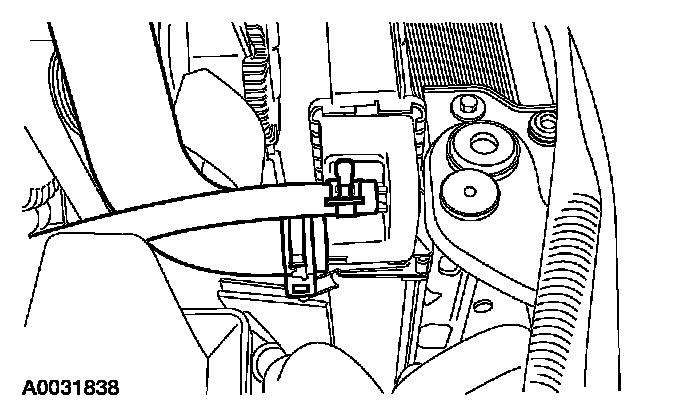
16. Remove the degas bottle hose and upper radiator hose.
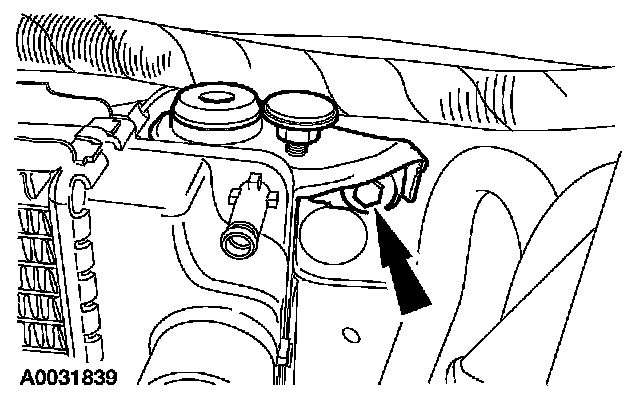
17. Remove the right radiator support bracket.
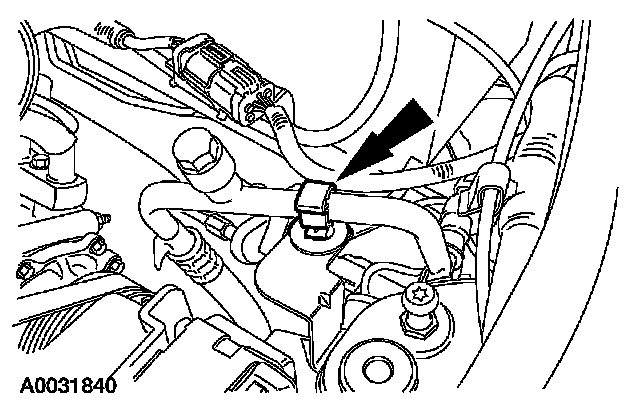
18. Remove the A/C line retainer cliff.
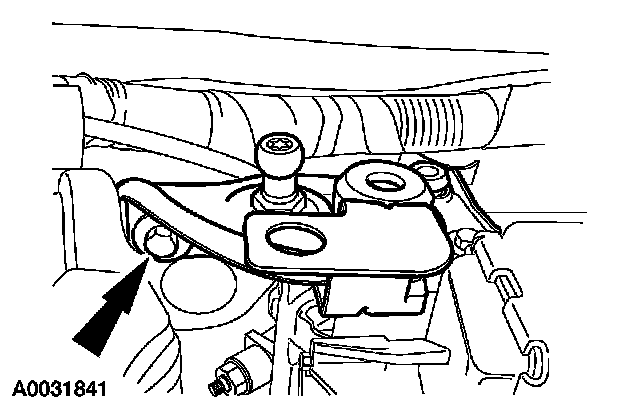
19. Remove the left radiator support bracket.
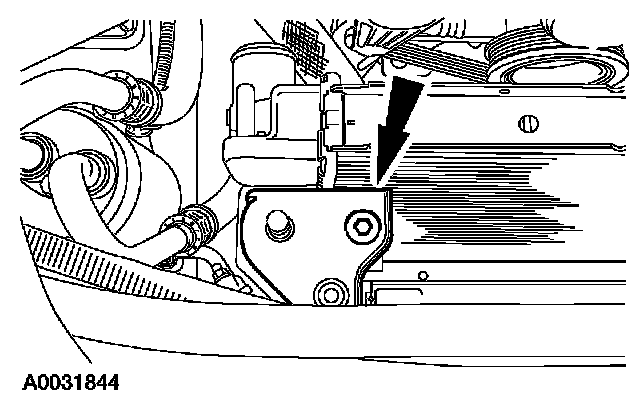
20. Remove the right A/C condenser support bracket.
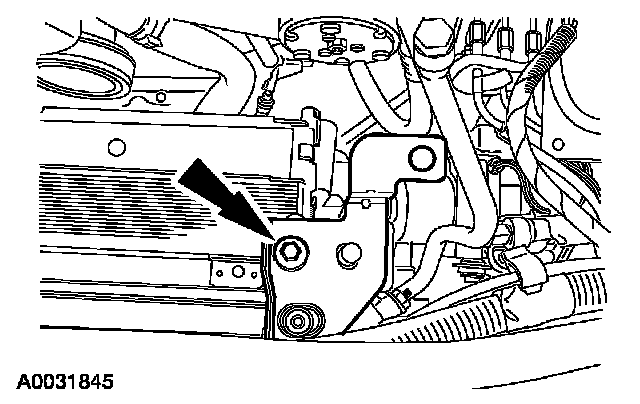
21. Remove the left A/C condenser support bracket.
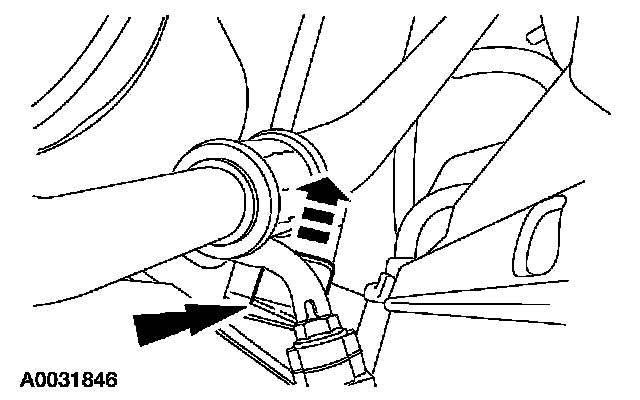
22. NOTE: It will be necessary to lift the radiator assembly from the mounts and set it on the frame in order to separate the A/C condenser from the radiator. Right side shown; left side similar.
Remove the radiator from the mount and set it on the frame.
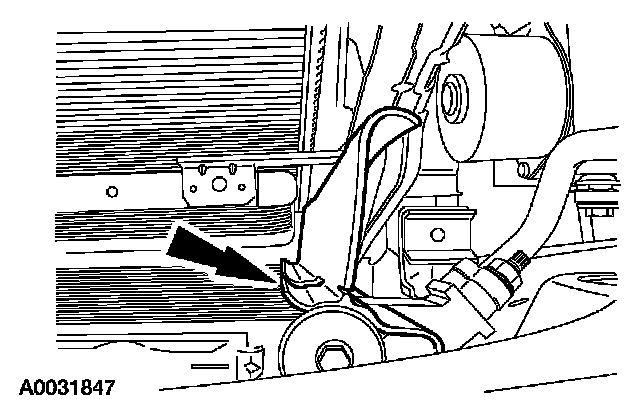
23. Remove the left inner air deflector from the A/C condenser.
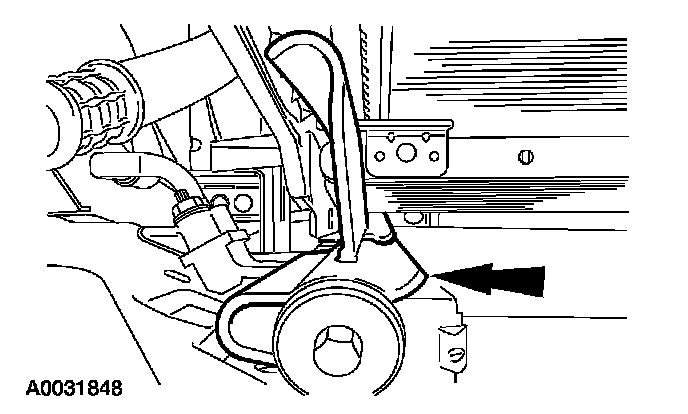
24. Remove the right inner air deflector from the A/C condenser.
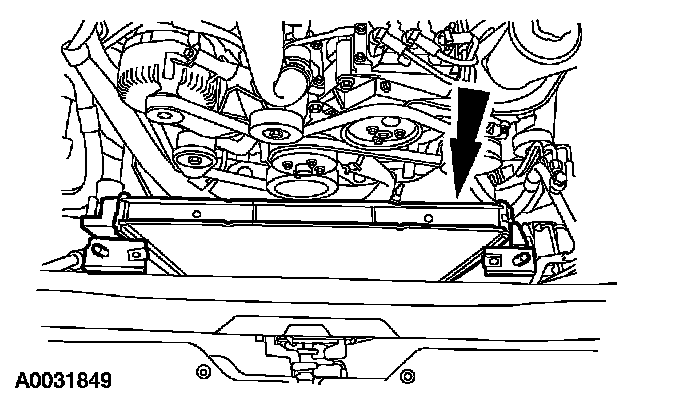
25. NOTE: It is not necessary to evacuate the A/C system, the A/C condenser can remain in the vehicle.
NOTE: It will be necessary to lift the A/C condenser from the lower support. Move the A/C condenser toward the front of the vehicle.
Remove the radiator and transmission cooler as an assembly and place it on a bench.
26. CAUTION: Do not allow the A/C condenser to hang freely or damage to the A/C lines can occur.
Using mechanic's wire, support the A/C condenser to the frame.
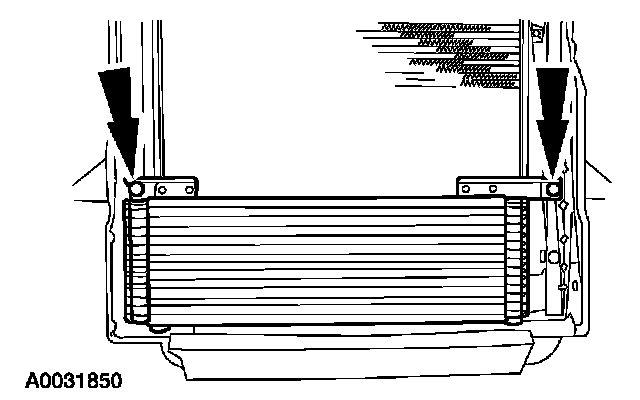
27. Remove the bolts and the transmission cooler.
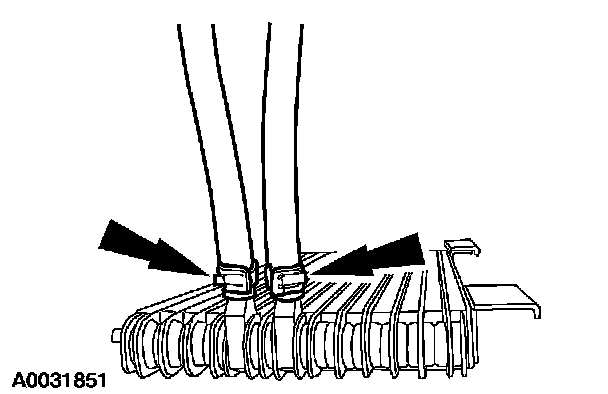
28. Remove the transmission cooler lines.
Installation
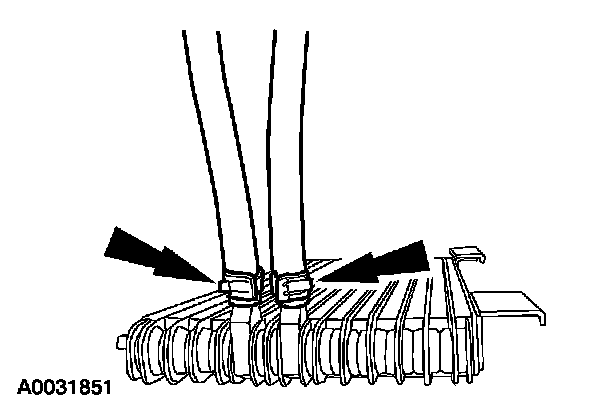
1. Install the transmission cooler lines.
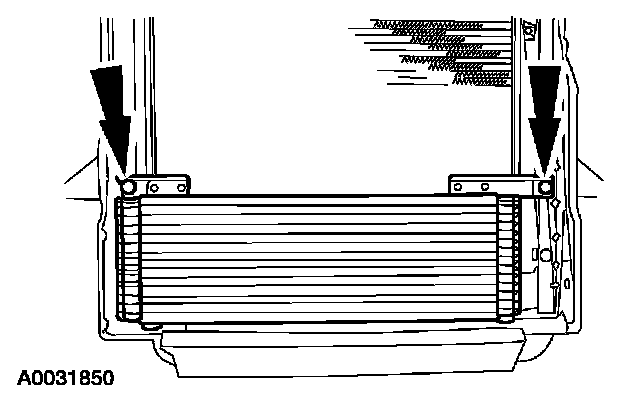
2. Install the transmission cooler and bolts.
^ Tighten to 10 Nm (89 inch lbs.).
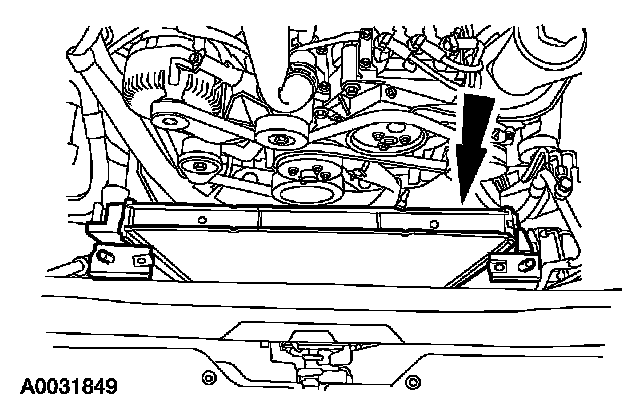
3. NOTE: Remove the mechanic's wire from the A/C condenser.
NOTE: Do not set the radiator assembly in the mounts at this time. Set the radiator assembly on the frame.
Install the radiator and transmission cooler into the vehicle as an assembly.
4. Set the lower A/C condenser mounts into the radiator assembly.
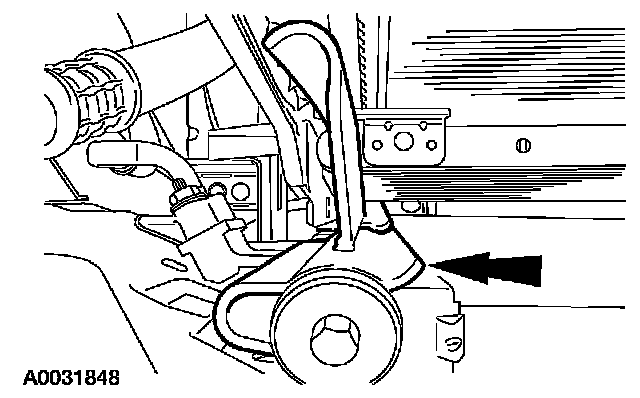
5. Install the right inner A/C air deflector shield.
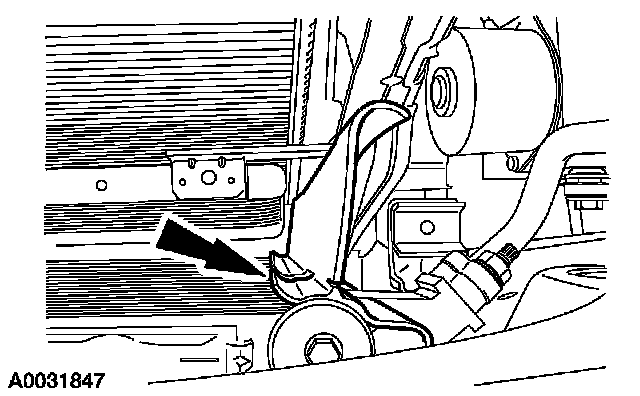
6. Install the left inner A/C air deflector shield.
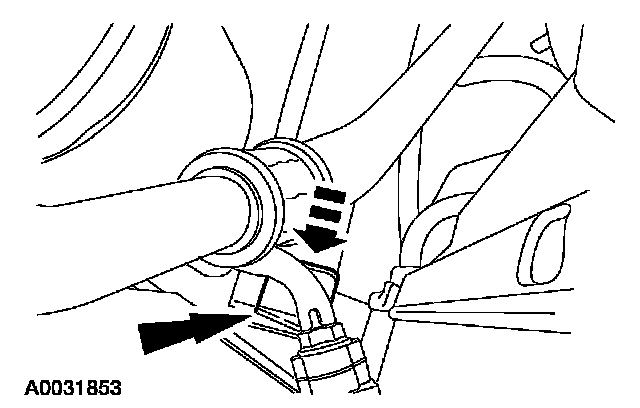
7. Set the radiator assembly onto the support mounts.
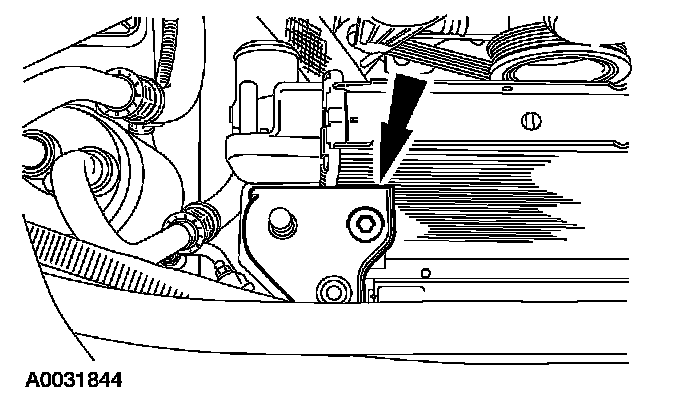
8. Install the right A/C condenser mounting bracket.
^ Tighten to 10 Nm (89 inch lbs.).
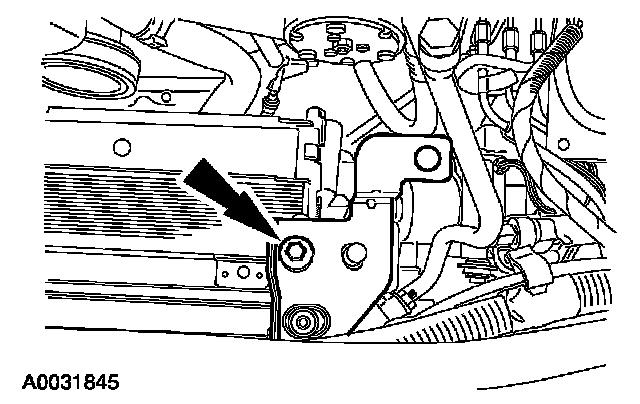
9. Install the left A/C condenser mounting bracket.
^ Tighten to 10 Nm (89 inch lbs.).
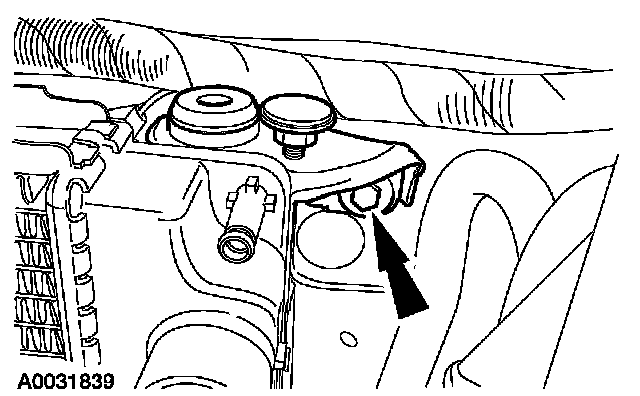
10. Install the right radiator support bracket and bolt.
^ Tighten to 12 Nm (9 ft. lbs.).
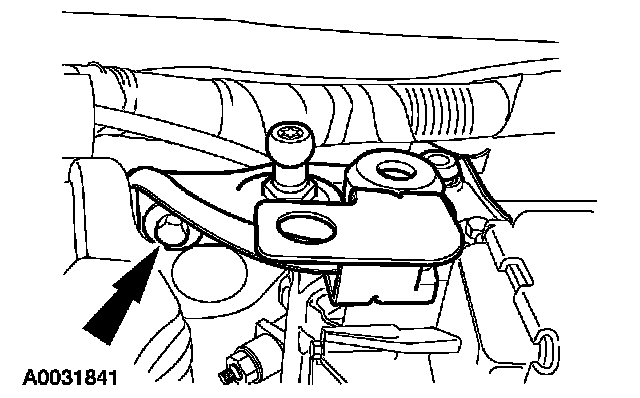
11. Install the left radiator support bracket and bolt.
^ Tighten to 12 Nm (9 ft. lbs.).
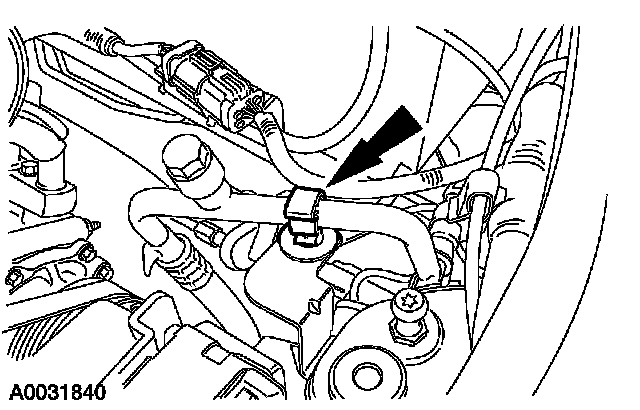
12. Install the A/C line retainer.
13. With the range selector in NEUTRAL, position the vehicle on a hoist.
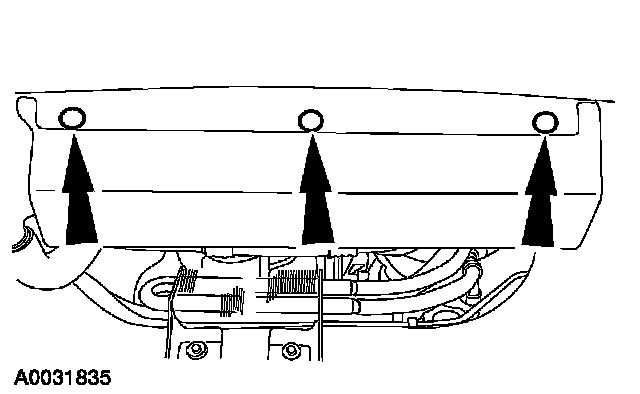
14. Install the lower front air dam push pins.
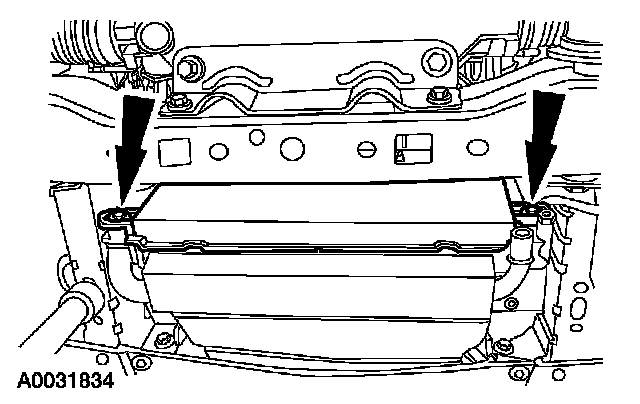
15. Install the lower fan shroud and bolts.
^ Tighten to 7 Nm (62 inch lbs.).
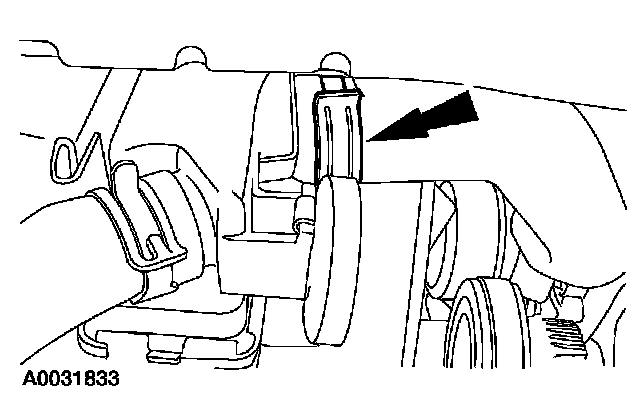
16. Connect the left lower radiator hose.
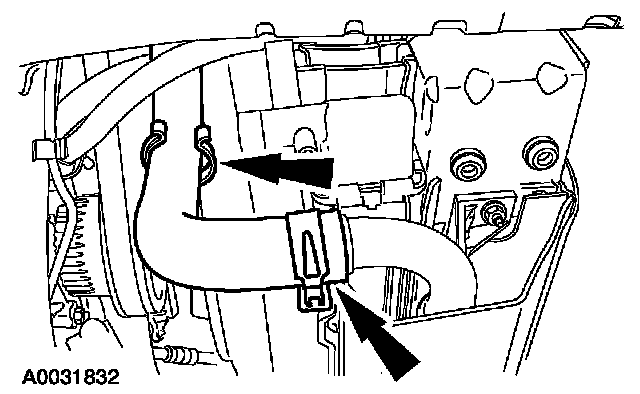
17. Connect the right lower radiator hose to the radiator and position it into the retainer.
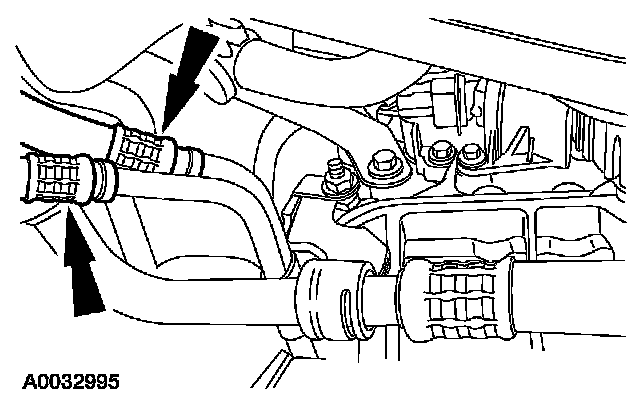
18. Connect the transmission cooler lines.
^ If equipped, install the safety retainer on the connector.
^ If equipped, install the screw clamp on the hose.
19. Position the vehicle.
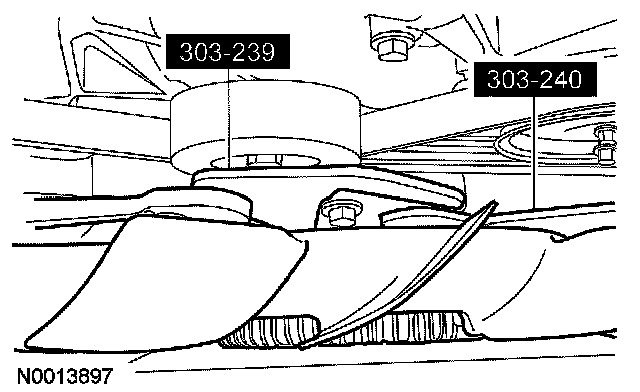
20. Using the special tools, install the fan.
^ Tighten to 55 Nm (41 ft. lbs.).
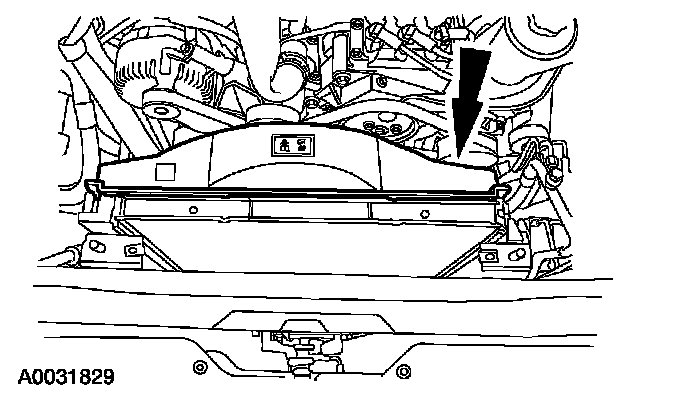
21. Install the upper fan shroud.
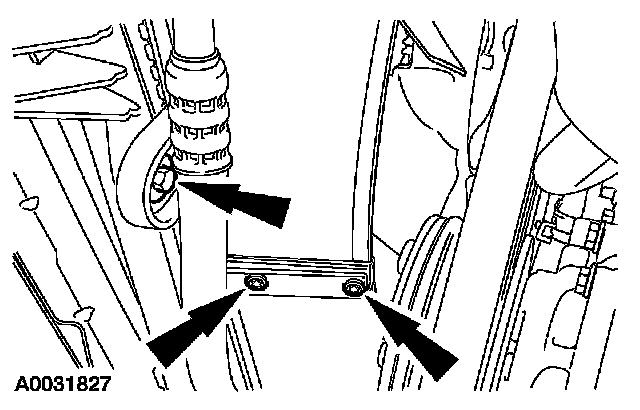
22. Install the bolt and screws on the left side of the fan shroud.
^ Tighten to 7 Nm (62 inch lbs.).
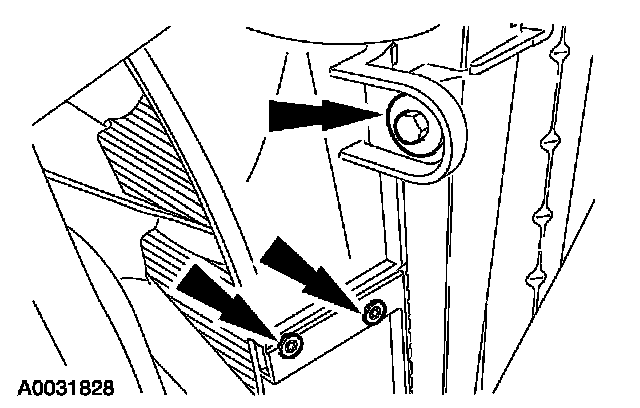
23. Install the bolt and screws on the right side of the fan shroud.
^ Tighten to 7 Nm (62 inch lbs.).
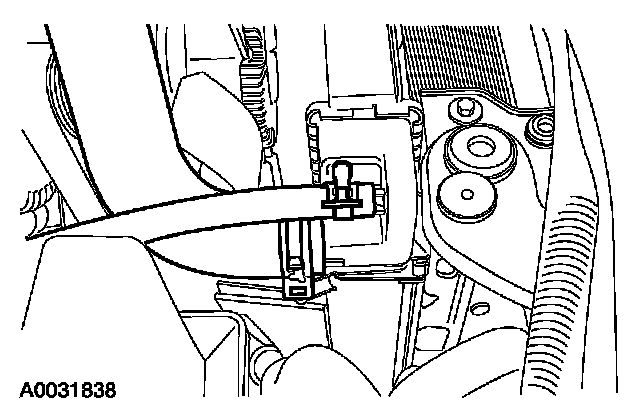
24. Connect the upper radiator hose and the degas bottle hose.
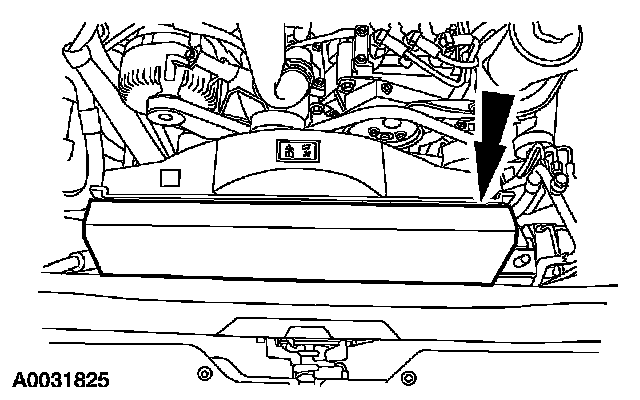
25. Install the inner air deflector.
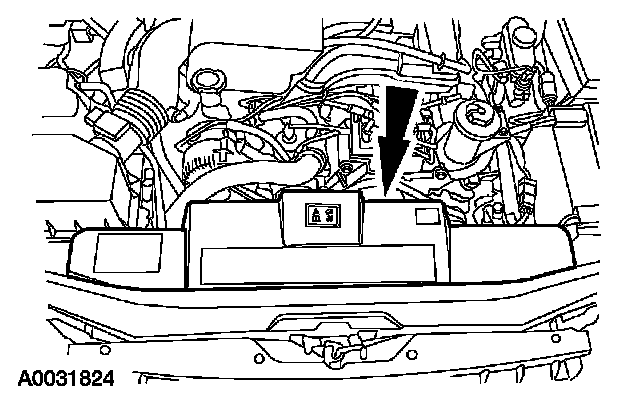
26. Install the upper air deflector.
27. Fill the cooling system.
28. Fill and check the transmission fluid.