Rear Suspension Shock Absorber
Removal and InstallationRSU-7 Component (Part 1):
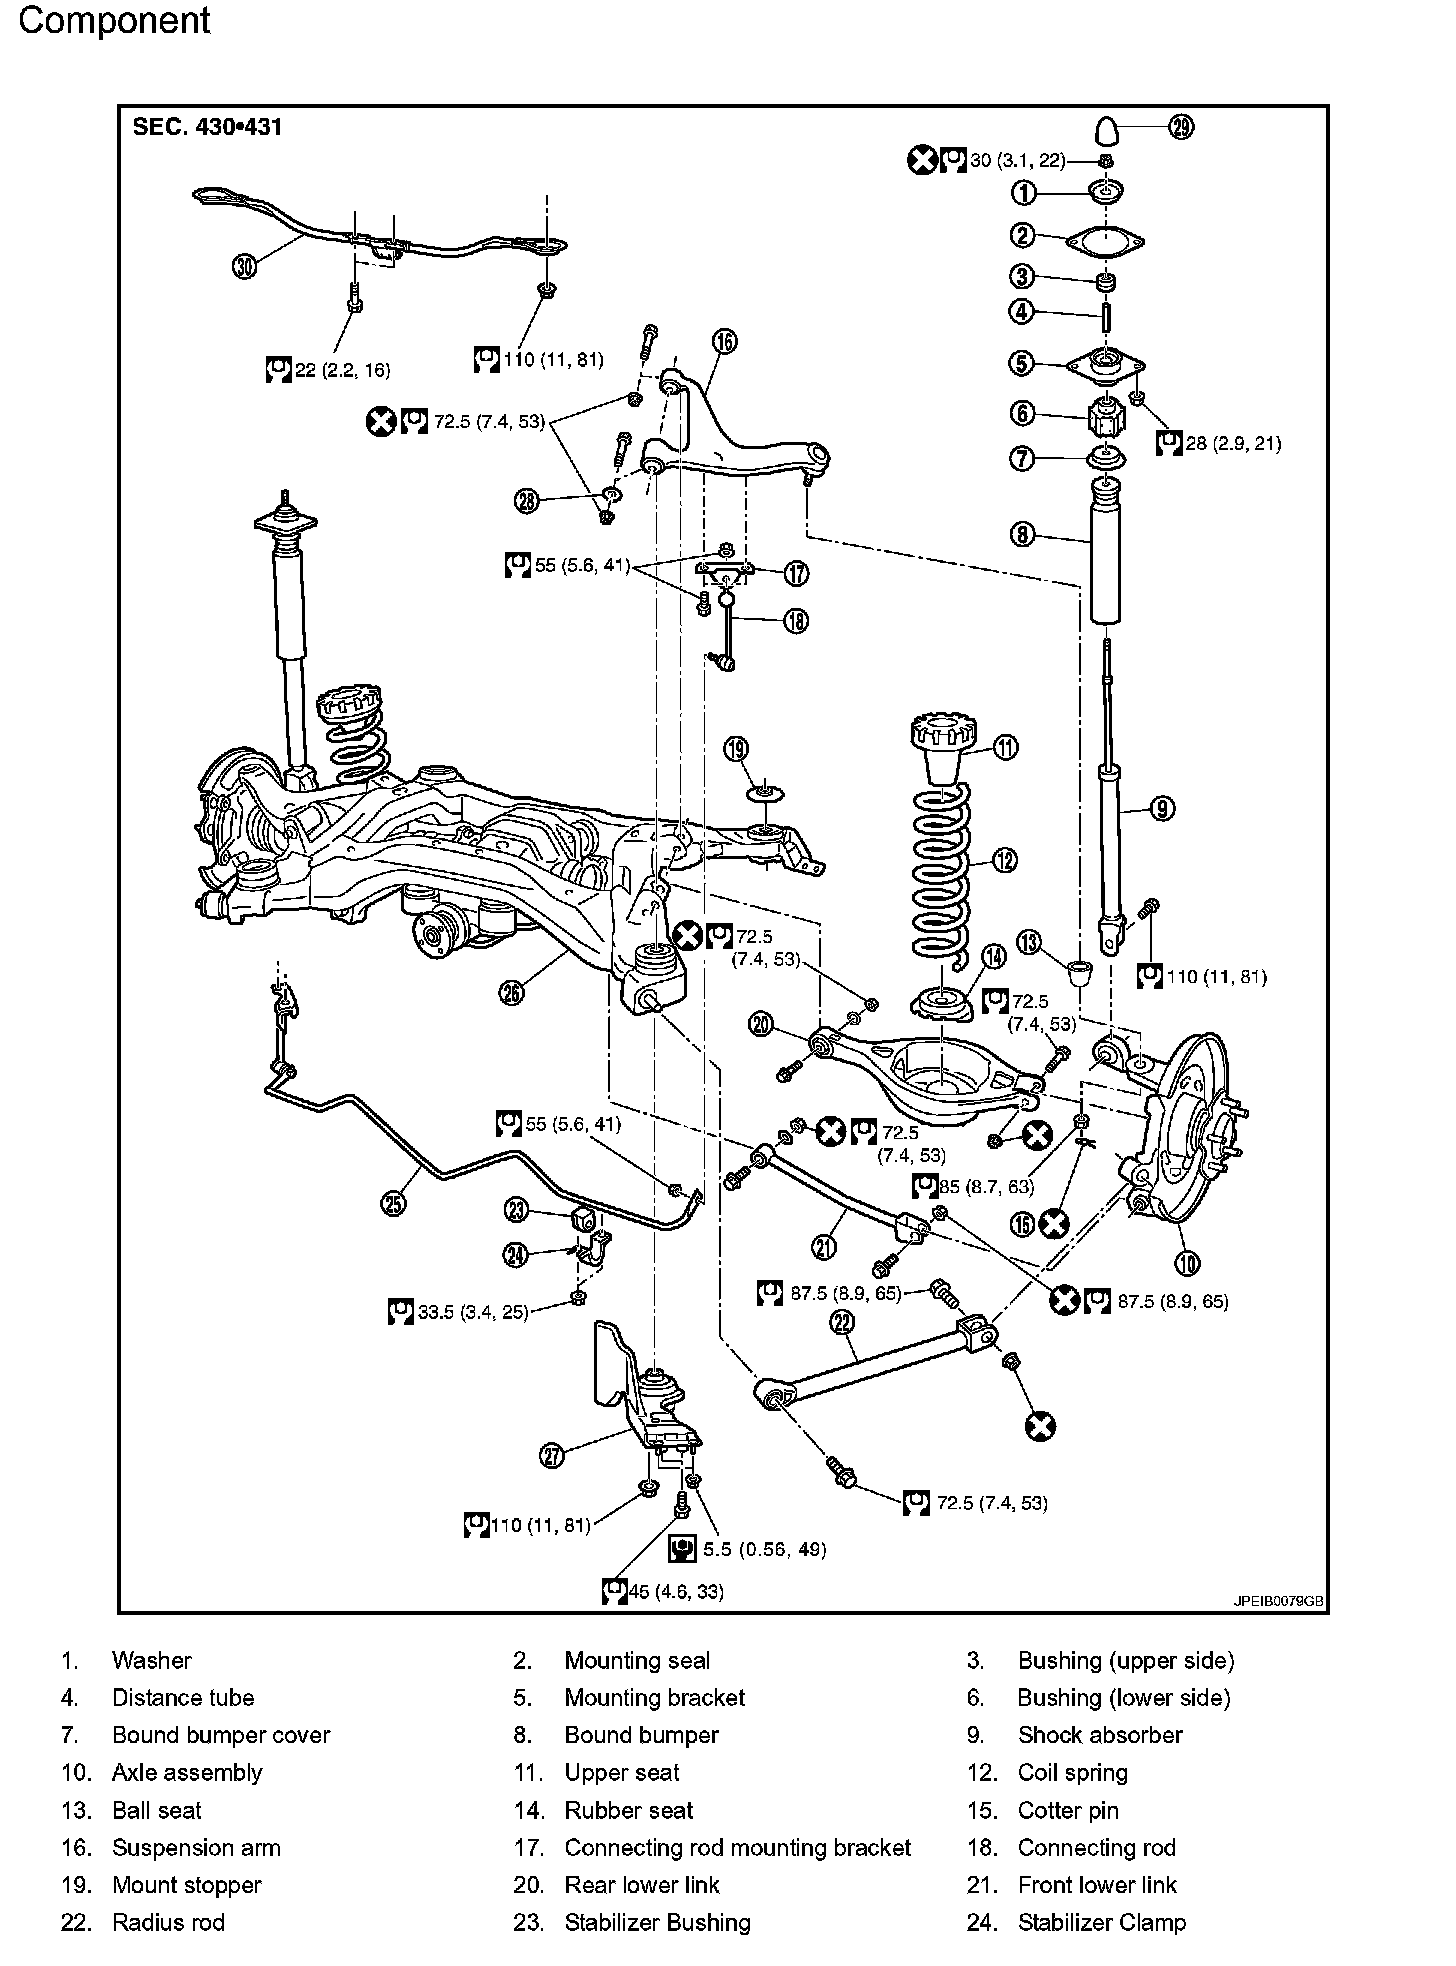
RSU-7 Component (Part 2):

REMOVAL
1. Remove tires from vehicle with a power tool.
2. Set a jack under rear lower link to relieve the coil spring tension.
3. Remove shock absorber lower end bolt with a power tool.
4. Gradually lower the jack to remove it from rear lower link.
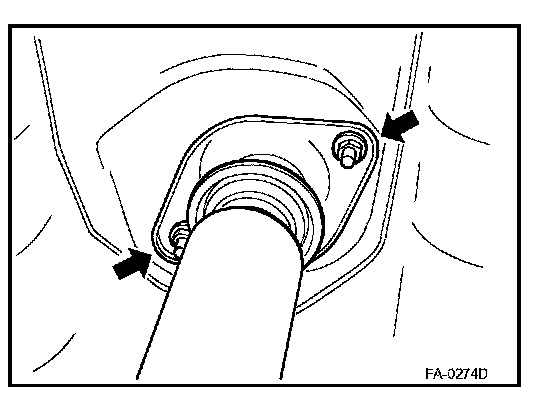
5. Remove shock absorber assembly upper end nuts with a power tool, and then remove shock absorber assembly from vehicle.
INSPECTION AFTER REMOVAL
^ Check shock absorber assembly for deformation, cracks, damage, and replace if there are.
^ Check welded and sealed areas for oil leakage, and replace if there are.
INSTALLATION
^ Installation is the reverse order of removal. For tightening torque. Refer to "Component".
CAUTION: Do not reuse non-reusable parts.
^ Perform final tightening of shock absorber assembly lower side (rubber bushing) under unladen condition with tires on level ground. Check wheel alignment. Refer to RSU-5, "Wheel Alignment Inspection". Rear Suspension
^ Adjust neutral position of steering angle sensor after checking the wheel alignment. Refer to BRC-8, "Adjustment of Steering Angle Sensor Neutral Position". Testing and Inspection