Brake Booster
Removal and InstallationBR-17 COMPONENTS:
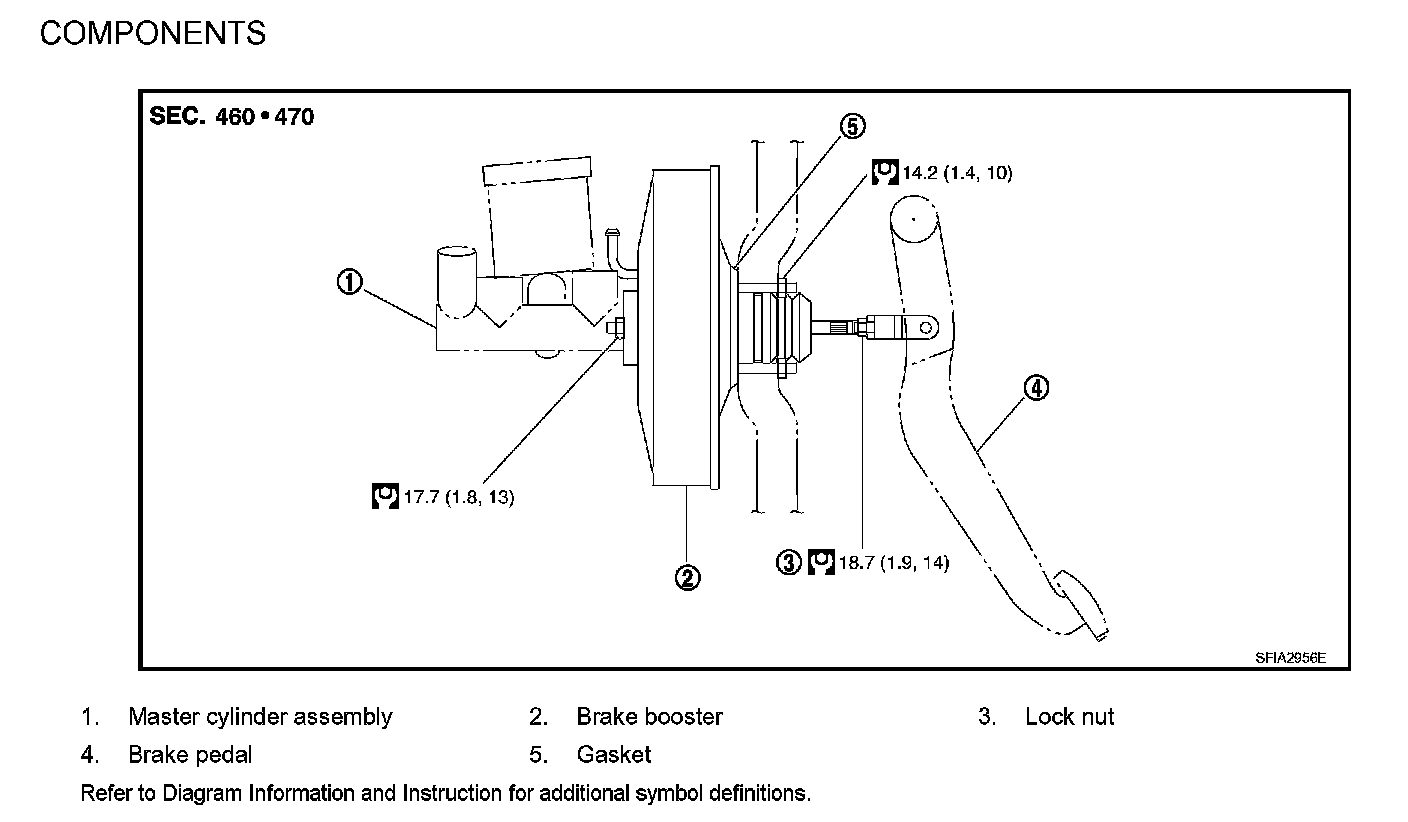
CAUTION:
^ Be careful not to deform or bend brake tube while removing and installing brake booster.
^ Replace clevis pin if it is damaged.
^ Be careful not to damage brake booster stud bolt threads. If brake booster is tilted during installation, the dash panel may damage the threads.
REMOVAL
1. Remove cowl top.
2. Remove brake master cylinder.
3. Disconnect front left brake tube from ABS actuator and electric unit (control unit). Refer to, "Hydraulic Circuit". Diagrams
4. Remove vacuum hose from brake booster.
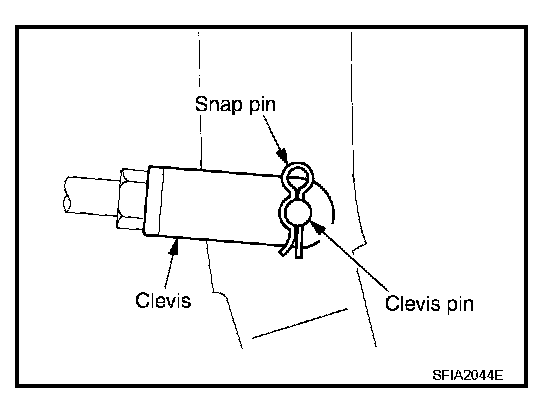
5. Remove snap pin and clevis pin from inside vehicle.
6. Remove nuts on brake booster and brake pedal assembly.
7. Remove brake booster from dash panel in engine room side.
INSTALLATION
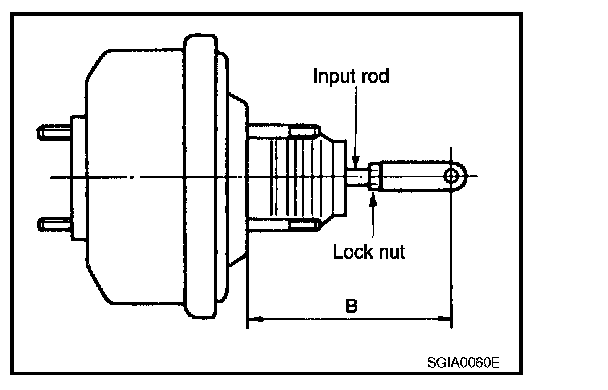
1. Loosen lock nut to adjust input rod length so that length "B" (in the figure) satisfies the specified value.
Length "B": 125 mm (4.92 in)
2. After adjusting "B", temporarily tighten lock nut to install booster assembly to vehicle. At this time, make sure that a gasket between booster assembly and dash panel is installed.
CAUTION: Always install gasket between brake booster and dash panel.
3. Connect brake pedal with clevis of input rod.
4. Install brake pedal bracket mounting nuts and bolt, and tighten them to the specified torque.
5. Install vacuum hose into brake booster.
6. Install master cylinder to brake booster.
7. Adjust the brake pedal height and the play of the brake pedal. Refer to, "Inspection and Adjustment". Testing and Inspection
8. Tighten lock nut of input rod to the specified torque. Refer to "COMPONENTS".
9. Connect front left brake tube to ABS actuator and electric unit (control unit). Refer to, "Hydraulic Circuit". Diagrams
10. Install cowl top.
11. Refill new brake fluid and bleed air.