DTC C1852-18 (62-01): Solenoid Valve Circuit Low Current
NOTE: Before you troubleshoot, HOW TO TROUBLESHOOT THE REAL TIME AWD SYSTEM (AWD) .
| DTC Description | DTC | Freeze Frame |
|---|---|---|
| C1852-18: Solenoid Valve Circuit Low Current |
DTC (Real Time AWD)
- Problem verification (with engine idling)
- 1. Turn the vehicle to the ON mode.
- 2. Clear the DTC with the HDS.
- 3. Start the engine.
- 4. Check for DTCs with the HDS.
DTC Description DTC Freeze Frame C1852-18: Solenoid Valve Circuit Low Current Is DTC C1852-18 indicated?
YES
The failure is duplicated. Go to step 3.
NO
Go to step 2.
- Problem verification (with rear differential pump motor running)
- 1. Clear the DTC with the HDS.
- 2. Select the ADJUSTMENT in the REAL TIME AWD with the HDS.
- 3. With the engine running, do the AIR BLEEDING in the ADJUSTMENT with the HDS.
Air Bleeding
Check for DTCs with the HDS.
DTC Description DTC Freeze Frame C1852-18: Solenoid Valve Circuit Low Current Is DTC C1852-18 indicated?
YES
The failure is duplicated. Go to step 3.
NO
Intermittent failure, the system is OK at this time. If the freeze data/on-board snapshot of this DTC is recorded, try to reproduce the failure under the same conditions with the Freeze data/on-board snapshot.
- Determine possible failure area (GND line, others)
- 1. Check for continuity between test points 1 and 2.
Test condition Vehicle ON mode (idling) Test point 1 Rear differential body Test point 2 Body ground Is there continuity?
YES
Go to step 6.
NO
Go to step 4.
- Open wire check (GND line)
- 1. Turn the vehicle to the OFF (LOCK) mode.
- 2. Disconnect the following connector.
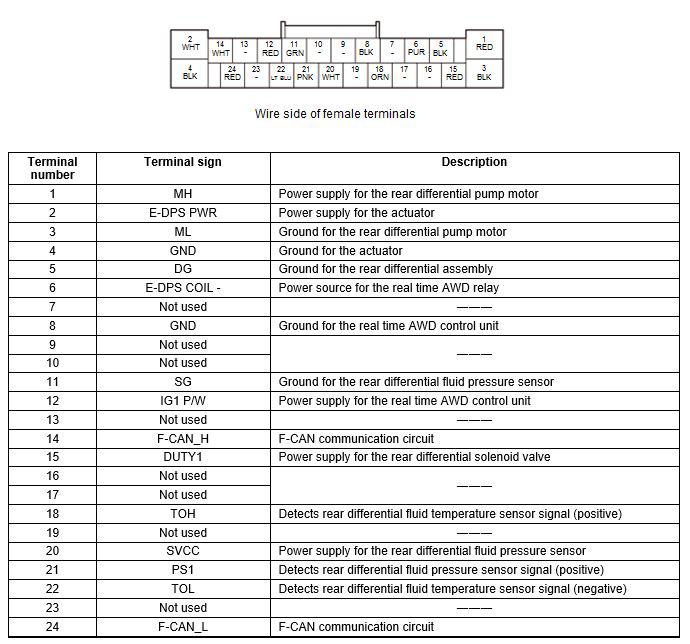
Real time AWD control unit 24P connector - 3. Check for continuity between the following test points 1 and 2 individually (see table).
Test condition Vehicle OFF (LOCK) mode AWD control unit 24P connector: disconnected Connector Test point 1 Test point 2 No. 4
Body groundNo. 8 Is there continuity?
YES
The GND wires are OK. Go to step 5.
NO
Repair an open in the GND wires between the real time AWD control unit and ground (G603).
- Open wire check (DG line)
- 1. Check for continuity between test points 1 and 2.
Test condition Vehicle OFF (LOCK) mode Real time AWD control unit 24P connector: disconnected Test point 1 Test point 2 Rear differential body Is there continuity?
YES
Update the real time AWD control unit if it does not have the latest software , or substitute a known-good real time AWD control unit , and recheck. If the symptom/indication goes away with the updated real time AWD control unit, troubleshooting is complete. If the symptom/indication goes away with a known-good real time AWD control unit, replace the original real time AWD control unit .
NO
Check for poor connections or loose terminals between the real time AWD control unit and the rear differential body ground (T7). If the connections are OK, repair an open in the DG wire between the rear differential body and the real time AWD control unit.
- Determine possible failure area (DUTY1 line, others)
- 1. Turn the vehicle to the OFF (LOCK) mode
- 2. Disconnect the following connector.
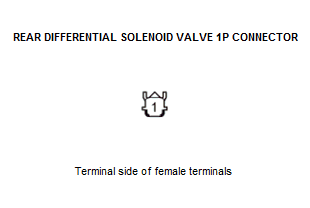
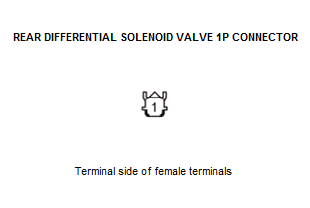
Rear differential solenoid valve 1P connector - 3. Turn the vehicle to the ON mode.
- 4. Wait for 10 seconds.
- 5. Measure the voltage between test points 1 and 2.
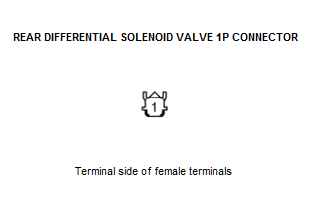
Test condition Vehicle ON mode Rear differential solenoid valve 1P connector: disconnected Test point 1 Rear differential solenoid valve 1P connector No. 1 Test point 2 Body ground Is there about 0.1 V or less?
YES
Go to step 8.
NO
Go to step 7.
- Shorted wire check (DUTY1 line to power)
- 1. Turn the vehicle to the OFF (LOCK) mode.
- 2. Disconnect the following connector.
Real time AWD control unit 24P connector - 3. Turn the vehicle to the ON mode.
- 4. Measure the voltage between test points 1 and 2.
Test condition Vehicle ON mode Rear differential solenoid valve 1P connector: disconnected Real time AWD control unit 24P connector: disconnected Test point 1 Rear differential solenoid valve 1P connector No. 1 Test point 2 Body ground Is there about 0.1 V or less?
YES
Update the real time AWD control unit if it does not have the latest software , or substitute a known-good real time AWD control unit , and recheck. If the symptom/indication goes away with the updated real time AWD control unit, troubleshooting is complete. If the symptom/indication goes away with a known-good real time AWD control unit, replace the original real time AWD control unit .
NO
Repair a short to power in the DUTY1 wire between the rear differential solenoid valve and the real time AWD control unit.
- Rear differential solenoid valve check
- 1. Turn the vehicle to the OFF (LOCK) mode.
- 2. On the solenoid valve side, measure the resistance between test points 1 and 2.
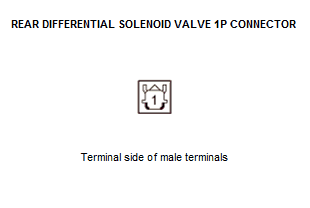
Test condition Vehicle OFF (LOCK) mode Rear differential solenoid valve 1P connector: disconnected Test point 1 Rear differential solenoid valve 1P connector No. 1 Test point 2 Rear differential solenoid valve body Is there about 100 Ω or less?
YES
The rear differential solenoid valve is OK. Go to step 9.
NO
Replace the rear differential solenoid valve - Refer to: REAR DIFFERENTIAL REMOVAL & INSTALLATION(4WD) or REAR DIFFERENTIAL REMOVAL & INSTALLATION(AWD) .
- Shorted wire check (DUTY1 line)
- 1. Disconnect the following connector.
Real time AWD control unit 24P connector - 2. Check for continuity between test points 1 and 2.
Test condition Vehicle OFF (LOCK) mode Rear differential solenoid valve 1P connector: disconnected Real time AWD control unit 24P connector: disconnected Test point 1 Test point 2 Body ground Is there continuity?
YES
Repair a short to ground in the DUTY1 wire between the rear differential solenoid valve and the real time AWD control unit.
NO
The DUTY1 wire is not shorted. Go to step 10.
- Open wire check (DUTY1 line)
- 1. Check for continuity between test points 1 and 2.
Test condition Vehicle OFF (LOCK) mode Rear differential solenoid valve 1P connector: disconnected Real time AWD control unit 24P connector: disconnected Test circuit DUTY1 Test point 1 Rear differential solenoid valve 1P connector No. 1 Test point 2 Is there continuity?
YES
Update the real time AWD control unit if it does not have the latest software , or substitute a known-good real time AWD control unit , and recheck. If the symptom/indication goes away with the updated real time AWD control unit, troubleshooting is complete. If the symptom/indication goes away with a known-good real time AWD control unit, replace the original real time AWD control unit .
NO
Repair an open in the DUTY1 wire between the rear differential solenoid valve and the real time AWD control unit.