BOSCH ROBLD020 Dual Mode Refrigerant Gas Leak Detector (18-073)
WARNING: This page is about the CR-V EX, Eng CD K24V1, which is a different variant/trim than selected.
Publication date: 2018-07-10Reference number: 18-073
BOSCH ROBLD020 DUAL MODE REFRIGERANT GAS LEAK DETECTOR
TECHNICAL SERVICE BULLETIN
Reference Number(s): 18-073, Date of Issue:
July 10, 2018
| HONDA: | All Models |
AFFECTED VEHICLES
All Models
GENERAL INFORMATION
The LD 020 is a dual mode leak detector featuring both electronic sensor and patented UV detection modes. The long life solid electrolyte sensor technology is designed to detect both R-134a and the new R-1234yf refrigerant. The LD 020 is highly sensitive to all HCFC, HFC, blends, and HC refrigerants. The digital display is independent from the audio alarm and sensitivity level, allowing the precise pinpointing of the leak source. The LD 020 does not require rechargeable batteries.
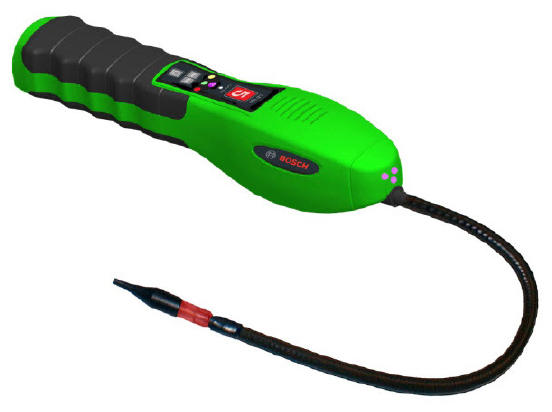
FEATURES
- SAE J2791 and SAE J2913 certified
- Long life, stable sensor
- UV LED's emit optimum UV wavelength
- Unique numeric leak size indicator
- Automatic calibration and reset to ambient levels
- 3 adjustable sensitivity levels
- Visual LED leak alarm located near sensor
- True mechanical pump
- Low battery indicator
- Uses 4 AA alkaline batteries (Included)
- Audio mute function
- Comfortable neoprene grip
- CE Certified
- Made in USA
- Rugged carrying case included
SPECIFICATIONS
PART SPECIFICATIONS
| Sensitivity | .05 oz/yr R-134a &.025 oz/yr R-1234yf |
| Sensor Life | > 10 years |
| Response Time | Instantaneous |
| Power Supply | 4 AA Alkaline batteries |
| Battery Life | 4-6 hours continuous |
| Warm Up Time | < 20 seconds |
| Probe Length | 17 inches |
| Numerical Display | 7 segment digital display (1 to 9) |
| Weight | 1.5 lbs |
ORDERING
- To order online, go to iN > Service > Quick Links > Tool and Equipment Program, then search by model number.
- To order by phone, call 1-888-424-6857. Customer service representatives are available from 7:30 AM to 7:00 PM CT, Monday through Friday.
WARRANTY
Two years (includes sensor)
ROBLD020 TIPS
Here are some useful tips. Refer to the operator's manual for complete operating instructions.
- The detector automatically starts heating the sensor when it's turned on and the digital leak size indicator will flash 0; the detector will also make a slow "beep" sound. Warm up is usually less than 20 seconds.
- The detector is ready to use when the flashing stops and the green sensitivity LED turns on.
- Move the sensor tip along the A/C lines and fittings no further away then 10 mm and no faster than 75 mm a second. If the detector detects a leak, make smaller sweeps back and forth until the leak source can be pin-pointed.
- If he leak detector has not been used for an extended period (weeks or months), turn on the detector and allow it to come out of warm up. Run it with the sensitivity level in the Hi (high) position for several minutes before testing it with the Leak Test Vial. This will guarantee that the sensor is fully conditioned for maximum response to refrigerant gas.
GENERAL TIPS WHEN CHECKING FOR LEAKS
- If the system is very low on refrigerant, charge it to normal capacity. Some leaks are impossible to find unless the system is operating at normal pressures.
- Refrigerant leaks are also oil leaks. The easiest way to spot a leak is to look for joints or components coated with oily dust. Check for damage and corrosion at the same time.
- When checking the service ports for leaks, be sure the cap seals are in place and the caps are tight. The cap is used as the final seal in the system, not just to keep dirt out of the schrader valve.
- Check the whole system in a continuous path; don't stop the first time the detector indicates a leak. Check all fittings, couplings, service ports, pressure switches, welded areas, and areas around attachment points on lines and components.
- When checking the crimped metal ends on a rubber hose, wiggle the hose around.
- Check the low-pressure side when the system is not running. Check the high-pressure side when the system is running and also right after turning it off. (The air from the cooling fans may give you false alarms.) Since the compressor and the evaporator are in both sides of the system, check these components when the system is running and when it's off.
- Verify apparent leaks by blowing the area with compressed air, then recheck for leaks. In case of a very large leak, blowing out the area may help pinpoint the exact source of the leak.
END