Right Rear Seat Does Not Fold Properly (16-104)
WARNING: This page is about the CR-V EX, Eng CD K24V1, which is a different variant/trim than selected.
Publication date: 2016-12-08Reference number: 16-104
RIGHT REAR SEAT DOES NOT FOLD PROPERLY
TECHNICAL SERVICE BULLETIN
Reference Number(s): 16-104, Date of Issue:
December 8, 2016
| HONDA: | 2015-2016 CR-V |
AFFECTED VEHICLES
AFFECTED VEHICLES
| Year | Model | Trim | VIN Range |
|---|---|---|---|
| 2015 | CR-V | 2WD | 2HKRM3...FH512304 thru END |
| 5J6RM3...FL007921 thru END | |||
| AWD | 2HKRM4...FH620499 thru END | ||
| 5J6RM4...FL026962 thru END | |||
| 2016 | CR-V | 2WD | 2HKRM3...GH500001 thru 2HKRM3...GH500271 |
| 5J6RM3...GL000001 thru 5J6RM3...GL000564 | |||
| AWD | 2HKRM4...GH600001 thru 2HKRM4...GH600271 | ||
| 5J6RM4...GL00001 thru 5J6RM4...GL04441 |
NOTE:
Vehicles with VINs beginning with 3CZ, built in Mexico, are not affected.
BACKGROUND
When the right rear seat release lever is pulled, the seat bottom is slow to flip up, causing the rear seat to not fold correctly.
POSSIBLE CAUSE
The right rear lower seat bracket is binding.
CORRECTIVE ACTION
Adjust the seat bracket.
WARRANTY CLAIM INFORMATION
The normal warranty applies.
WARRANTY CLAIM INFORMATION
| Operation Number | Description | Flat Rate Time | Defect Code | Symptom Code | Template ID | Failed Part Number |
|---|---|---|---|---|---|---|
| 8533A2 | Adjust the lower seat bracket. | 0.4 hr | 07403 | 03214 | 16-104A | 82212-T0A-A01 |
Skill Level: Repair Technician
DIAGNOSIS
Check that the right rear seat (40 portion) folds properly by pulling the release lever.
- If the seat bottom is slow to fold up, causing the seat back to make contact and not complete the seat folding sequence, continue to REPAIR PROCEDURE .
- If the seat folds normally, this bulletin does not apply.
REPAIR PROCEDURE
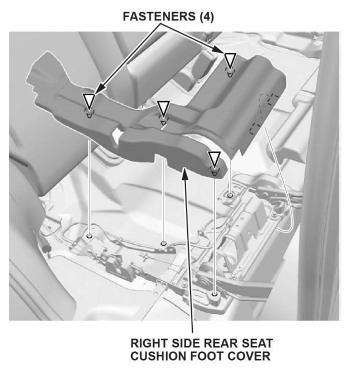
- Remove the right side rear seat cushion foot cover.
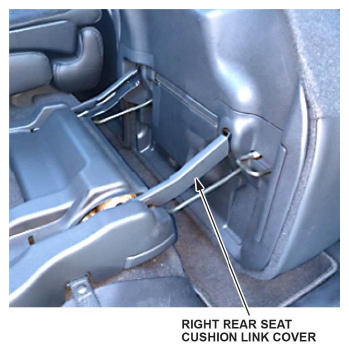
- Remove the right rear seat cushion link cover.
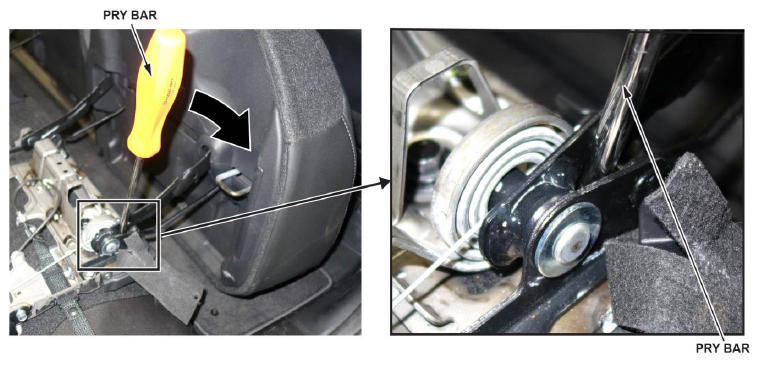
- Place a pry bar between the right seat cushion outer link and the bracket, and apply pressure in the direction shown.
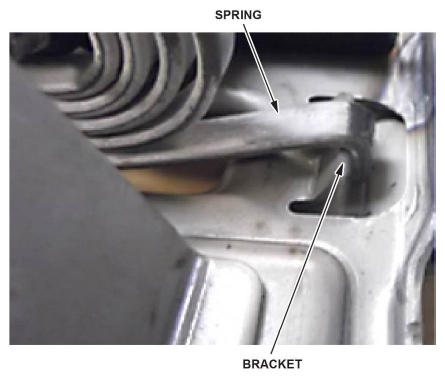
- Check that the seat drops freely. Lift the seat bottom until the spring touches the bracket, then let the seat bottom drop.
END