Front Damper/Spring Disassembly, Reassembly, and Inspection: Reassembly
NOTE:
- When compressing the damper spring, use a commercially available strut spring compressor according to the manufacturer's instructions.
- Refer to the Exploded View as needed during the following procedure.
- 1. Damper/Spring - Reassemble
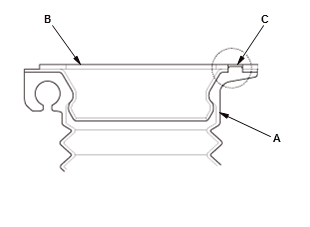
1. Install the dust cover (A) on the upper spring seat (B) by aligning the ledge portion (C).
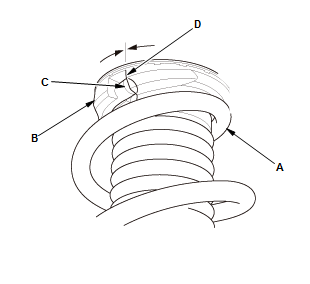
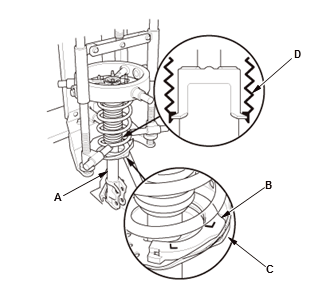
2. Install the damper spring (A) on the upper spring mounting cushion (B), then align the upper end (C) of the damper spring with the cushion stop (D). 3. Install all the parts except the self-locking nut and the cap onto the damper unit (A) by referring to the Exploded View 4. Align the bottom of the damper spring (B) and the stepped part (C) of the lower spring seat on the damper unit.NOTE: After reassembling the damper/spring, install the dust cover (D) into the damper unit as shown
5. Compress the damper spring.NOTE: Do not compress the spring excessively.
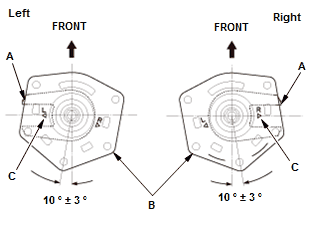
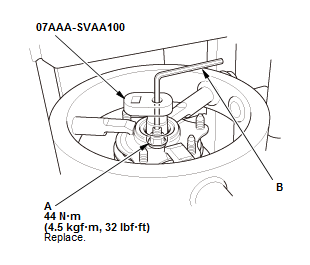
6. Align the damper bracket (A) and the damper mounting base (B) so that "Triangle" stamp (C) on it is toward the outside of the vehicle. 7. Install the new self-locking nut (A) 8. Hold the damper shaft using a hex wrench (B), and tighten the self-locking nut
9. Remove the damper/spring from the strut spring compressor.
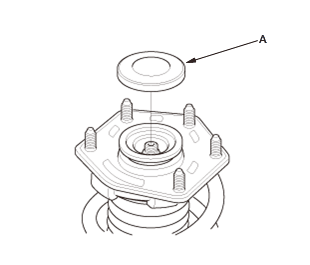
10.Install the cap (A).