Removal & Installation
- 1. Vehicle - Lift
- 2. Rear Wheel - Remove
- 3. Knuckle - Support
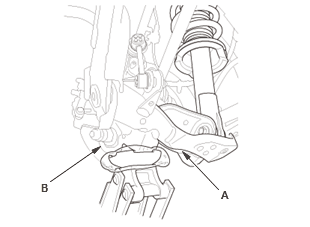
1. Position a floor jack at the connecting point of the trailing arm (A) and the knuckle (B)
2. Raise the floor jack until the suspension begins to compress.
- 4. Trailing Arm - Remove
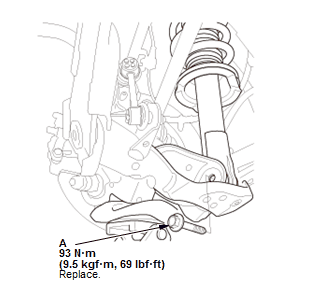
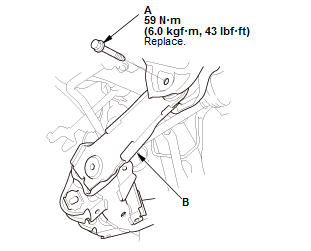
1. Remove the damper mounting bolt (A).
NOTE: Use new damper mounting bolt during reassembly.
2. Disconnect the stabilizer link from the trailing arm .
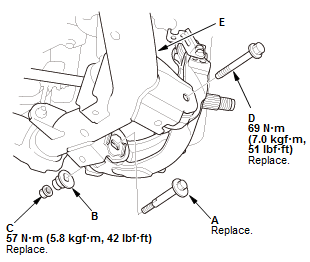
3. Mark the cam positions of the adjusting bolt (A) with the frame
4. Mark the cam positions of the adjusting cam plate (B) with the frame
5. Remove the self-locking nut (C), the adjusting cam plate, and the adjusting bolt.
NOTE: Use a new self-locking nut and a new adjusting bolt during reassembly
6. Remove the flange bolt (D).
NOTE: Use a new flange bolt during reassembly
7. Disconnect the knuckle from the trailing arm (E).
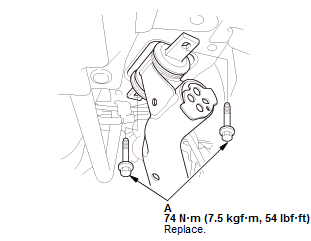
8. Remove the trailing arm front mounting bolts (A). Use new mounting bolts during reassembly.
9. Remove the trailing arm rear mounting bolt (A).
NOTE: Use a new mounting bolt during reassembly
10. Lower the jack, and remove the trailing arm (B).
- 5. All Removed Parts - Install the trailing arm in the reverse order of removal.
NOTE:
- Align the cam positions of the adjusting bolt and the adjusting cam plate with the marked positions.
- Loosely install nuts and/or bolts to install the bushings, load the suspension with the vehicle's weight, and then tighten the nuts and/or bolts to the specified torque.
- 6. Wheel Alignment - Check