Removal & Installation
SRS components are located in this area. Review the SRS component locations and the precautions and procedures before doing repairs or service.
- 1. 12 Volt Battery Terminal - Disconnect
NOTE: Wait at least 3 minutes before starting work.
- 2. B-Pillar Lower Trim - Remove - Refer to: Interior Trim Removal and Installation - Pillar AreasInterior Trim Removal and Installation - Tailgate AreasInterior Trim Removal and Installation - Cargo AreasInterior Trim Removal and Installation - Rear Side AreaInterior Trim Removal and Installation - Door Areas
- 3. Front Seat Belt Lower Anchor Bolt - Remove
Without Lap Belt Tensioner
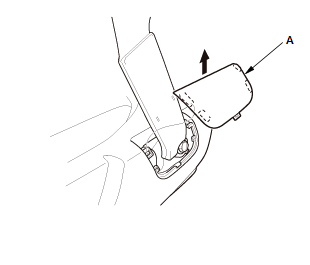
1. Slide the front seat forward fully, then remove the anchor cover (A).
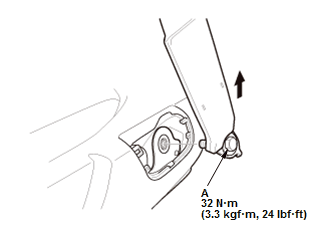 Courtesy of HONDA, U.S.A., INC.
2. Remove the lower anchor bolt (A).
 Courtesy of HONDA, U.S.A., INC.
With Lap Belt Tensioner
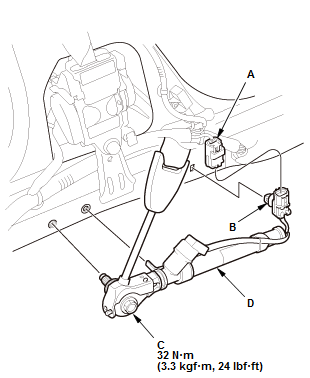
1. Disconnect the connector (A)
2. Detach the connector clip (B), then remove the anchor bolt (C)
3. Remove the front driver's lap belt tensioner (D).
- 4. Front Seat Belt Upper Anchor Bolt - Remove
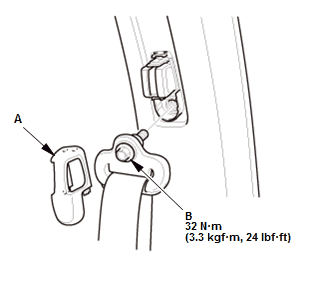
1. Remove the front seat belt shoulder anchor adjuster cap (A)
2. Remove the front seat belt upper anchor bolt (B).
- 5. Front Seat Belt Assembly - Remove
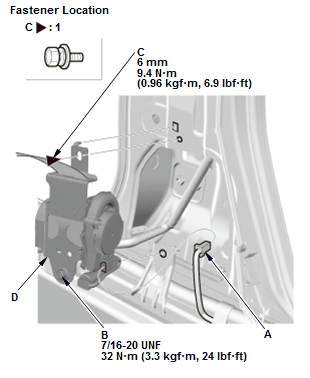 Courtesy of HONDA, U.S.A., INC.
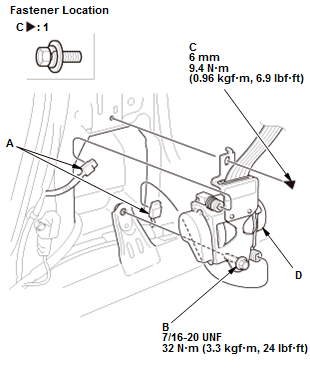
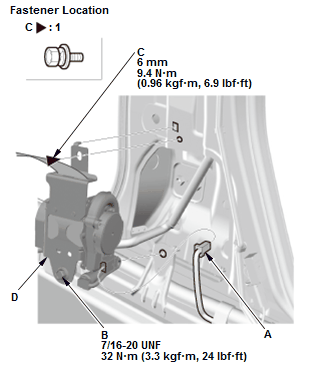 Courtesy of HONDA, U.S.A., INC.Fig 6: Front Seat Belt Assembly With Lap Belt Tensioner - Passenger's Side With Torque Specifications
 Courtesy of HONDA, U.S.A., INC.
1. Disconnect the connector(s) (A)
2. Remove the bolts (B, C)
3. Remove the front seat belt assembly (D).
- 6. All Removed Parts - Install
Front seat belt upper anchor
Front driver's lap belt tensioner
1. Install the parts in the reverse order of removal.
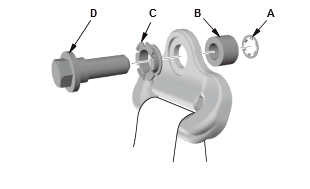
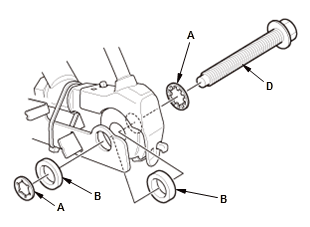
NOTE: Assemble the washer(s) (A), the collar(s) (B), and the bushing (C) on the anchor bolt (D) as shown.