Roof Molding Removal & Installation: Removal
- 1. Side Cowl Cover - Remove
- 2. Roof Molding - Remove
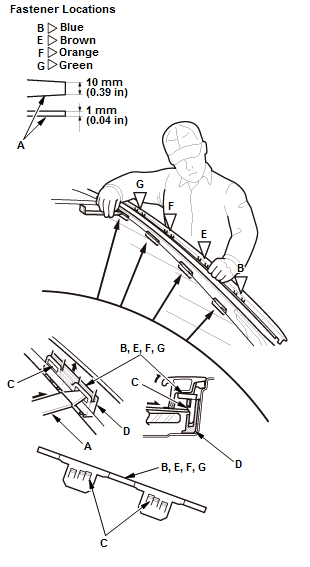
1. Carefully insert the trim tool (A) under the molding next to the lower clip (B)
2. While pulling up the clip area of the molding by hand, push each of the six small hooks (C) to release the clip from the retainer (D) on the A-pillar.
NOTE: Do not pry the trim anywhere except the retainer area
3. Gradually work your way up to release each of the upper clips (E, F, and G).
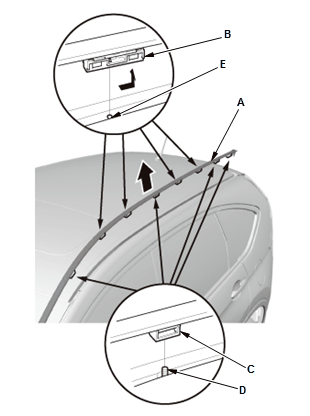
4. Start from the front to the rear; carefully insert a trim tool in under the roof molding (A) next to each of the retainers (B, C) 5. Slide and pry up the retainers to release it with the clips from the stud bolts (D) and the pins (E) on the body.
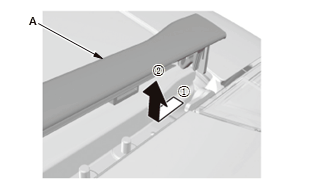
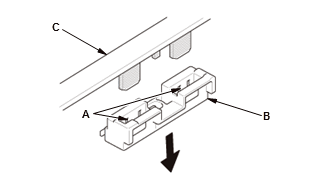
6. Slide the rear end of the roof molding (A) forward to release it from the body, then remove the roof molding from the body. 7. Pry up the middle hooks (A) with a flat-tip screw driver to release the retainer (B) from the roof molding (C). - 3. Retainer - Remove
Except USA Factory Model
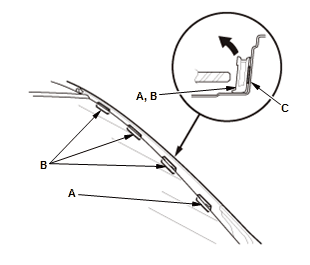
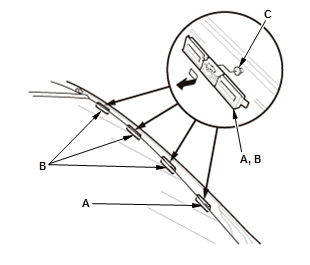
1. If necessary, remove the retainers (A, B) from the A-pillar
2. Carefully rub off the adhesive tape (C) under the retainers while heating it with a heat gun.
NOTE:
- Do not overheat the painted surface around the retainers.
- To keep the exterior plastic parts near the A-pillar from being overheated by a heat gun, wrap them with an aluminum foil.
USA Factory Model 1. If necessary, remove the retainers (A, B) from the pins (C).