Rear Door Lower Trim Removal & Installation: Removal
- 1. Rear Door Lower Trim - Remove
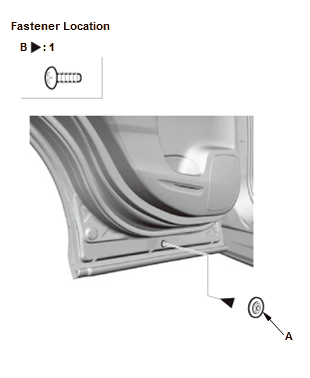
1. Remove the cap (A), then remove the screw (B).
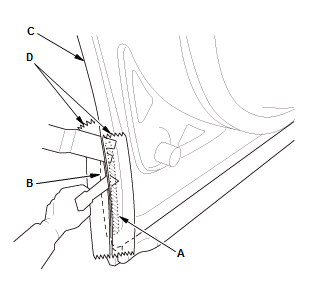
2. Cut the adhesive tape (A) along the rear edge of the door lower trim (B) with a utility knife while separating the trim from the door (C) with a trim tool. NOTE: Apply protective tape (D) around the cutting area as shown.
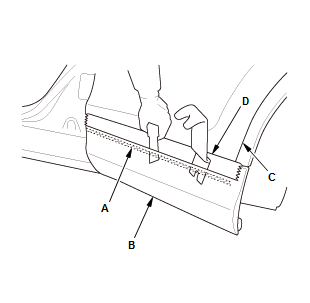
3. Cut the adhesive tape (A) along the upper edge of the door lower trim (B) with a utility knife while separating the trim from the door (C) with a trim tool. NOTE: Apply protective tape (D) around the cutting area as shown.
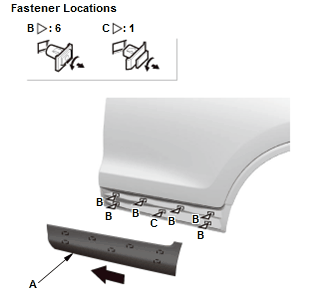
4. Slide the door lower trim (A) forward and remove it. NOTE: The clips (B, C) will stay in the door.
5. Remove the clips by turning them 45°
6. Install the clips on the door lower trim.