Front Door Lower Trim Removal & Installation: Installation
- 1. Front Door Lower Trim - Install
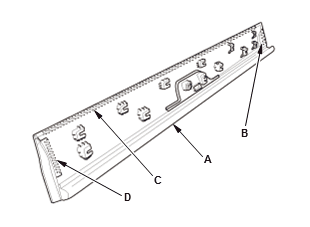
1. If you are reusing the original door lower trim (A), apply primer to the areas where new double-sided adhesive tape (B, C, and D) will be applied, then attach the new double-sided adhesive tape to the trim as shown.
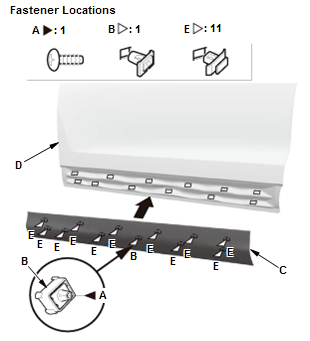
Adhesive tape (B): Thickness 1.2 mm (0.047 in) Width 8 mm (0.31 in) Length 68 mm (2.68 in) Adhesive tape (C): Thickness 1.5 mm (0.059 in) Width 6 mm (0.24 in) Length 1000 mm (39.37 in) Adhesive tape (D): Thickness 1.2 mm (0.047 in) Width 8 mm (0.31 in) Length 50 mm (1.97 in) 2. Install the screw (A) securing the clip (B) to the door lower trim (C). Hold up the trim, and first set clip B into the hole in the door (D). Fit the clips (E) into the hole in the door, then push on the trim 3. Install the cap.