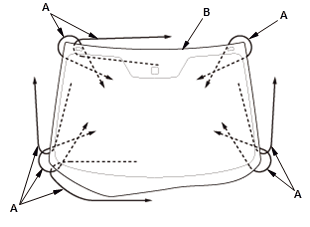
Windshield Removal & Installation: Removal
SRS components are located in this area. Review the SRS component locations and the precautions and procedures before doing repairs or service.
- 1. Center Cowl Cover - Remove
- 2. Both A-Pillar Trims - Remove - Refer to: Interior Trim Removal and Installation - Pillar AreasInterior Trim Removal and Installation - Tailgate AreasInterior Trim Removal and Installation - Cargo AreasInterior Trim Removal and Installation - Rear Side AreaInterior Trim Removal and Installation - Door Areas
- 3. Rearview Mirror - Remove
- 4. Automatic Lighting/Rain Sensor - Remove (With Auto Wiper)
- 5. Both Sunvisors - Remove
- 6. Roof Console - Remove
- 7. Headliner - Remove
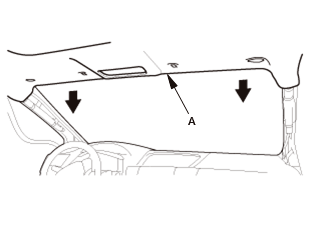
1. Detach the front area of the headliner (A) as needed.
- 8. Both Roof Moldings - Remove (Without Roof Rail)
- 9. Both Roof Rails - Remove (With Roof Rail)
- 10.Both Side Windshield Trims - Remove (With Roof Rail)
- 11.Multipurpose Camera Unit - Remove (For Some Models)
- 12. Windshield - Remove
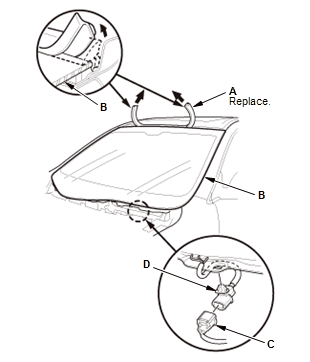
1. Remove the upper windshield molding (A) from the upper edge of the windshield (B). If necessary, cut the upper windshield molding with a utility knife
2. With heated windshield wiper area: Disconnect the connector (C), and detach the connector clip (D).
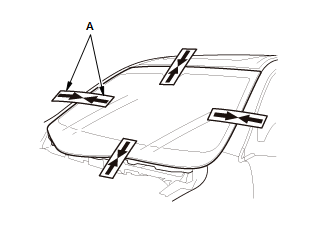
3. If the original windshield will be reinstalled, make alignment marks (A) across the glass and the body with a grease pencil.
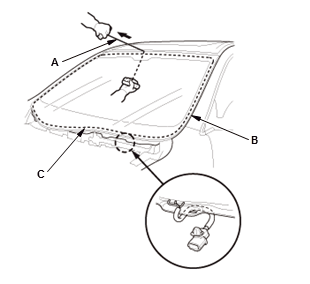
Cutting positions4. Apply protective tape along the edge of the dashboard and the body. Make a hole with an awl through the rubber dam, the adhesive, and the dashboard seal from inside of the vehicle at the corner portion of the windshield. Push a piece of piano wire through the hole, and wrap each end around a piece of wood 5. With a helper on the outside, pull the piano wire (A) back and forth in a sawing motion. Hold the piano wire as close to the windshield (B) as possible to prevent damage to the body and the dashboard. Carefully cut through the rubber dam and the adhesive (C) around the entire windshield
6. Carefully remove the windshield
7. Scrape the original adhesive smooth to a thickness of about 1 mm (0.04 in) - 2 mm (0.08 in) on the bonding surface around the entire windshield opening flange with a knife.
NOTE:
- Do not scrape down to the painted surface of the body; damaged paint will interfere with proper bonding.
- Remove the rubber dams, the dashboard seal, and the fasteners from the body.
8. Clean the body bonding surface with a shop towel dampened in isopropyl alcohol. After cleaning, keep oil, grease, and water from getting on the clean surface
9. If you are reinstalling the original windshield, scrape off all of the original adhesive, the clips, the dashboard seal, and the rubber dam from the windshield with a putty knife. Clean the boning surface on the inside face and the edge of the windshield with isopropyl alcohol. Make sure the bonding surface is kept free of water, oil, and grease.