Rear Door Lower Trim Removal & Installation: Installation
- 1. Rear Door Lower Trim - Install
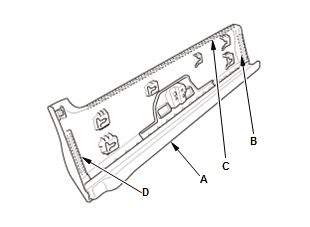
1. If you are reusing the original door lower trim (A), apply primer to the areas where new double-sided adhesive tape (B, C, and D) will be applied, then attach the new double-sided adhesive tape to the trim as shown.
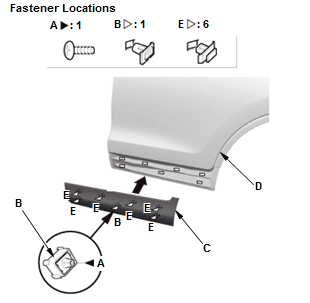
Adhesive tape (B): Thickness 1.2 mm (0.047 in) Width 8 mm (0.31 in) Length 68 mm (2.68 in) Adhesive tape (C): Thickness 1.5 mm (0.059 in) Width 6 mm (0.24 in) Length 555 mm (21.85 in) Adhesive tape (D): Thickness 1.6 mm (0.063 in) Width 10 mm (0.39 in) Length 114 mm (4.49 in) 2. Install the screw (A) securing the clip (B) to the door lower trim (C). Hold up the trim, and first set clip B into the hole in the door (D). Fit the clips (E) into the hole in the door, then push on the trim 3. Install the cap.