Removal & Installation
SRS components are located in this area. Review the SRS component locations and the precautions and procedures before doing repairs or service.
- 1. 12 Volt Battery Terminal - Disconnect
- 2. Both A-Pillar Trims - Remove - Refer to: Interior Trim Removal and Installation - Pillar Areas Interior Trim Removal and Installation - Tailgate Areas Interior Trim Removal and Installation - Cargo Areas Interior Trim Removal and Installation - Rear Side Area Interior Trim Removal and Installation - Door Areas
- 3. Both B-Pillar Upper/Lower Trims - Remove - Refer to: Interior Trim Removal and Installation - Pillar Areas Interior Trim Removal and Installation - Tailgate Areas Interior Trim Removal and Installation - Cargo Areas Interior Trim Removal and Installation - Rear Side Area Interior Trim Removal and Installation - Door Areas
- 4. Both Quarter Pillar Trims - Remove - Refer to: Interior Trim Removal and Installation - Pillar Areas Interior Trim Removal and Installation - Tailgate Areas Interior Trim Removal and Installation - Cargo Areas Interior Trim Removal and Installation - Rear Side Area Interior Trim Removal and Installation - Door Areas
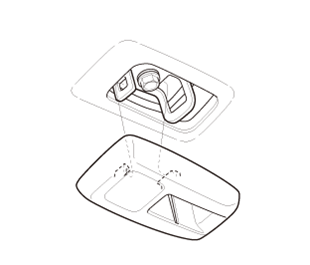
- 5. Roof Console - Remove
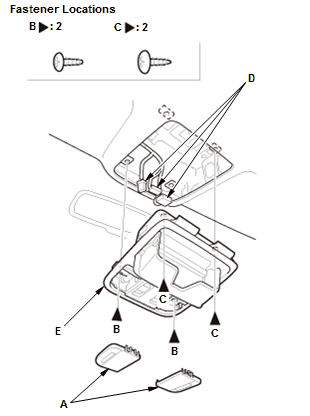
1. Remove the lenses (A), then remove the screws (B)
2. Open the console, then remove the screws (C)
3. Disconnect the connectors (D), then remove the roof console (E).
NOTE: The positions and number of connectors vary depending on models.
- 6. Ceiling Light - Remove
- 7. Cargo Area Light - Remove
- 8. Grab Handles - Remove
- 9. Both Sunvisors and Sunvisor Holders - Remove
- 10. Both Tether Anchor Cover - Remove (For Some Models)
NOTE: Repeat this procedure on the opposite side.
- 11.Connector (Rearview Mirror) - Disconnect (For Some Models)
- 12.Connector (Automatic Lighting/Rain Sensor) - Disconnect (With Auto Wiper)
- 13.Connector (Multipurpose Camera Unit) - Disconnect (With ACC)
- 14. Headliner - Remove
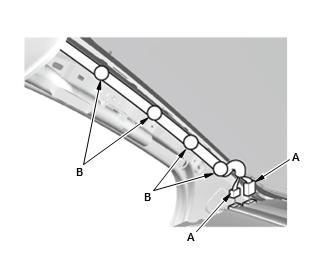
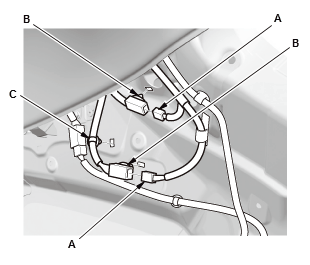
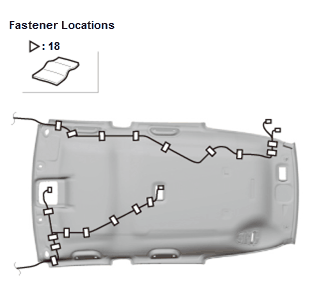
1. Without moonroof: Disconnect the connectors (A), and detach the harness clips (B) from the driver's side A-pillar.
NOTE: The positions and number of connectors vary depending on models.
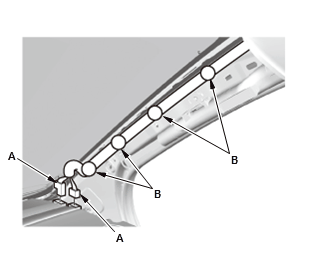
2. Disconnect the connectors (A), and detach the harness clips (B) from the passenger's side A-pillar. NOTE: The positions and number of connectors vary depending on models.
3. At the right quarter pillar, disconnect the connectors (A), and detach the connector clips (B) and the harness clip (C). Without moonroof With moonroof
4. Slide the front seats all the way back, and recline the seat-back fully 5. Fold down the rear seats
6. With the help of an assistant, lower the headliner.
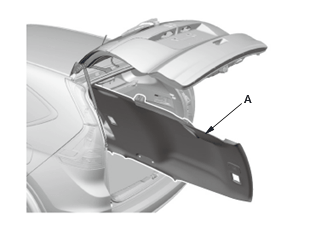
7. With the help of an assistant, remove the headliner (A) through the tailgate opening. NOTE: Do not bend the headliner. Bending the headliner will crease and damage it.
- 15. Grab Handle Bracket - Remove
Front
Rear
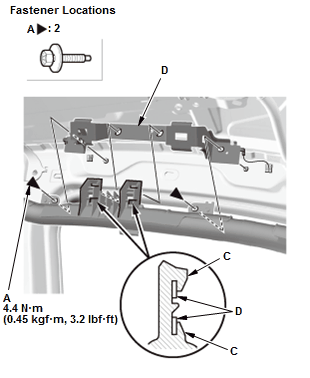
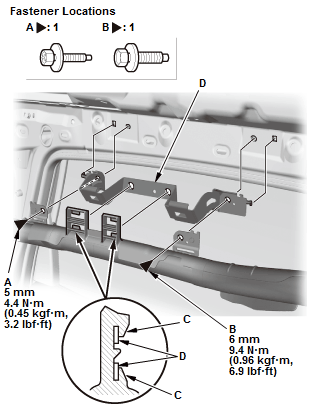
1. If necessary, remove the bolts (A, B)
2. Detach the hooks (C), then remove the grab handle bracket (D).
- 16. Headliner Cushion Tape - Remove
1. If necessary, remove the cushion tapes.
- 17. Headliner - Check
Without moonroof
With moonroof
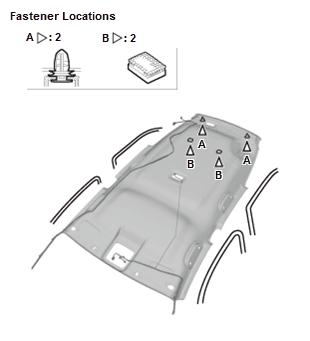
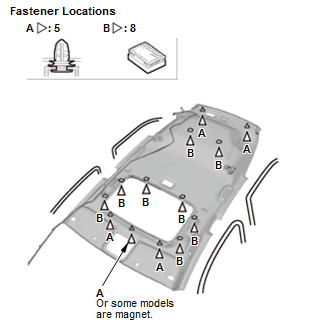
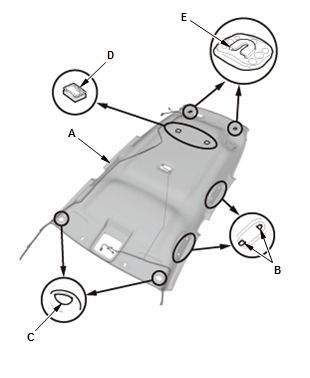
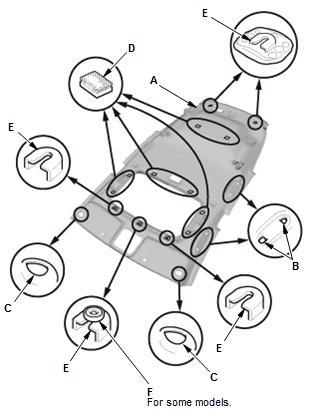
1. If the side curtain airbag has deployed, replace the headliner (A), along with the other parts listed for side curtain airbag deployment
2. To prevent the side curtain airbags from deploying improperly and possibly causing injury, inspect the headliner and all removed trim. Replace any pieces with the following damage:
- Any creases or tears in the headliner
- Any damages around the grab handle holes (B) or the sunvisor holes (C) in the headliner
- Any fastener bases (D), the clip bases (E), and the magnet (F) which have come off the headliner
- 18. All Removed Parts - Install the parts in the reverse order of removal.