Moonroof Frame and Drain Tube Removal and Installation: Replacement
SRS components are located in this area. Review the SRS component locations and the precautions and procedures before doing repairs or service.
Moonroof Frame
- 1. Headliner - Remove
- 2. Moonroof Frame - Remove
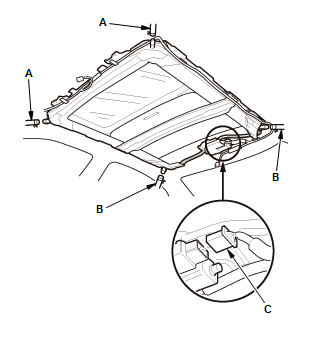
1. Disconnect the front drain tubes (A), the rear drain tubes (B), and the connector (C).
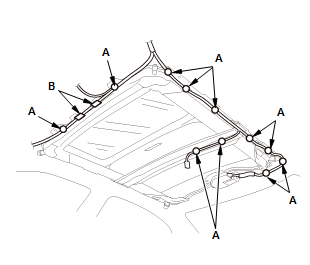
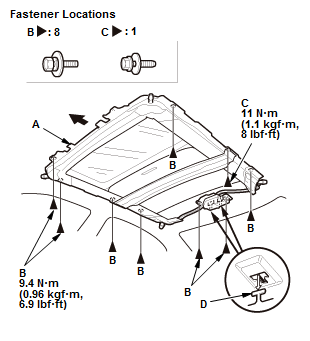
2. Detach the harness clips (A), and remove the cushion tapes (B). 3. With an assistant holding the frame (A), remove the bolts (B, C) starting at the rear, and release the hooks (D) by moving the frame forward, then carefully remove the frame. - 3. All Removed Parts - Install - Install the parts in the reverse order of removal.
NOTE
- Before installing the frame, clear the drain tubes and the drain valves using compressed air.
- Check the frame seal.
- When installing the frame, first attach the rear hook into the body holes.
- When connecting the drain tubes, slide them over the frame nozzles at least 10 mm (0.39 in).
- 4. Moonroof Control Unit - Reset
Front Drain Tube
- 1. Both Kick Panels - Remove - Refer to: Interior Trim Removal and Installation - Pillar AreasInterior Trim Removal and Installation - Tailgate AreasInterior Trim Removal and Installation - Cargo AreasInterior Trim Removal and Installation - Rear Side AreaInterior Trim Removal and Installation - Door Areas
- 2. Glove Box - Remove
- 3. Headliner - Remove
- 4. Front Drain Tube - Remove
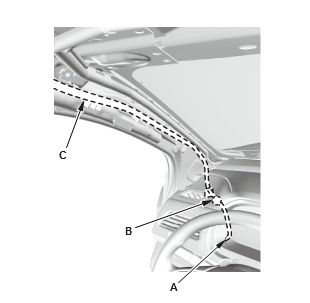
1. Pull the front drain valve (A) out of the body hole
2. Remove the clip (B),
3. Tie a string to the top end of the front drain tube (C), then pull the drain tube down out of the pillar. Leave the string in the pillar to use when reinstalling the drain tube.
- 5. All Removed Parts - Install
1. Install the parts in the reverse order of removal.
NOTE
- To install a new drain tube, tie the string left in the body during drain tube removal to the top end of the new drain tube, and pull it up into the roof.
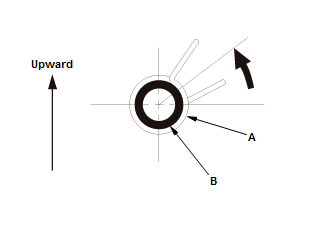
- Install the tube clips (A) on the drain tubes (B) as shown.
- When connecting the drain tubes, slide them over the frame nozzles at least 10 mm (0.39 in).
Rear Drain Tube
- 1. Rear Side Trim Panel - Remove - Refer to: Interior Trim Removal and Installation - Pillar AreasInterior Trim Removal and Installation - Tailgate AreasInterior Trim Removal and Installation - Cargo AreasInterior Trim Removal and Installation - Rear Side AreaInterior Trim Removal and Installation - Door Areas
- 2. Headliner - Remove
- 3. Rear Drain Tube - Remove
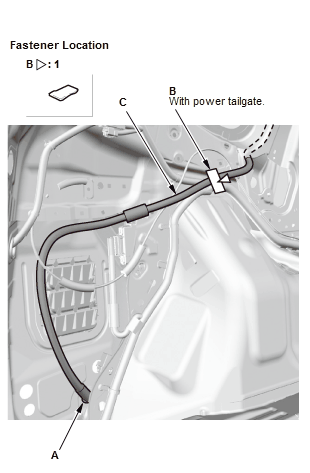
1. Pull the rear drain valve (A) out of the body hole
2. With power tailgate: Detach the cushion tape (B)
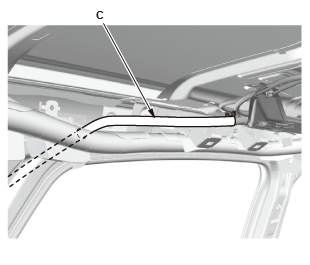
3. Tie a string to the top end of the rear drain tube (C), then pull the drain tube down out of the pillar. Leave the string in the pillar to use when reinstalling the drain tube.
- 4. All Removed Parts - Install
1. Install the parts in the reverse order of removal.
NOTE
- To install a new drain tube, tie the string left in the body during drain tube removal to the top end of the new drain tube, and pull it up into the roof.
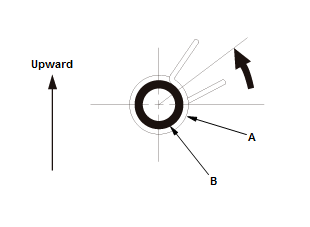
- Install the tube clips (A) on the drain tubes (B) as shown.
- When connecting the drain tubes, slide them over the frame nozzles at least 10 mm (0.39 in).