Rear Brake Pad Removal & Installation: Installation

Frequent inhalation of brake pad dust, regardless of material composition, could be hazardous to your health.
- Avoid breathing dust particles.
- Never use an air hose or brush to clean brake assemblies. Use an OSHA-approved vacuum cleaner.
- 1. Brake Pad - Install
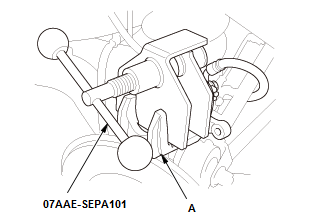
1. Install the brake caliper piston compressor tool on the caliper body (A)
2. Press in the piston with the brake caliper piston compressor tool.
NOTE: Be careful when pressing in the piston; brake fluid might overflow from the master cylinder's reservoir. If brake fluid gets on any painted surface, wash it off immediately with water
3. Remove the brake caliper piston compressor tool.
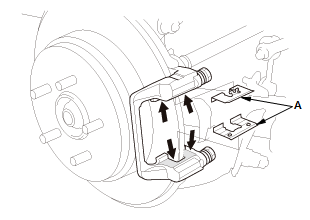
4. Apply a thin coat of M-77 grease to the retainer mating surface of the caliper bracket (indicated by the arrows) 5. Install the upper and lower pad retainers (A).
NOTE:
- The upper and lower pad retainers are different. Make sure the pad retainers are in the proper positions.
- Wipe off the excess grease from the retainers. Keep the grease away from the brake disc/drum and the brake pads.
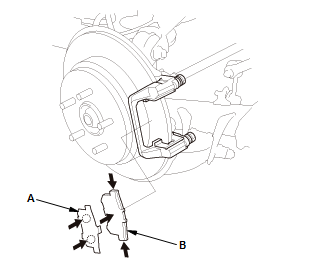
6. Apply a thin coat of Molykote M-77 grease to the pad side of the shims (A), the back of the brake pads (B), and the other areas indicated by the arrows. NOTE: Wipe off the excess assembly paste from the pad shims and brake pads friction material
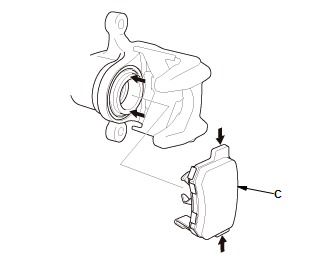
7. Install the brake pads and the pad shims.
NOTE: Install the brake pad with the wear indicator (C) on the bottom inside position.
- 2. Caliper Body - Install
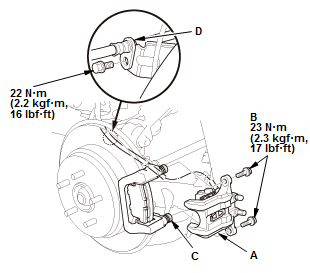
1. Install the caliper body (A)
2. Install the flange bolts (B) while holding respective caliper pins (C) with a wrench.
NOTE: Be careful not to damage the pin boot
3. Install the brake hose (C)
4. Press the brake pedal several times to make sure the brakes work.
NOTE: Engagement may require a greater pedal stroke immediately after the brake pads have been replaced as a set. Several applications of the brake pedal will restore the normal pedal stroke.
- 3. Rear Wheels - Install
- 4. Brake Fluid - Refill
1. Add brake fluid as needed
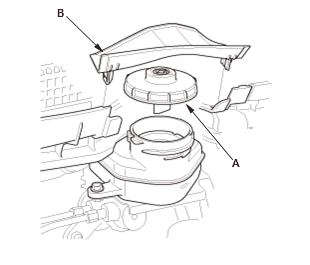
2. Install the reservoir cap (A)
3. Install the master cylinder maintenance lid (B).