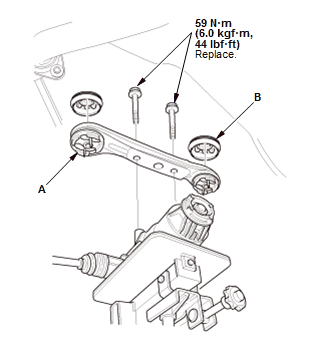
Rear Differential Mount Removal & Installation(4WD): Installation
- 1. Rear Differential Mount Assembly A - Install
1. Install the rear differential mount assembly A stopper (B)
2. Install the rear differential mount assembly A
3. Raise the rear differential to the mounting level.
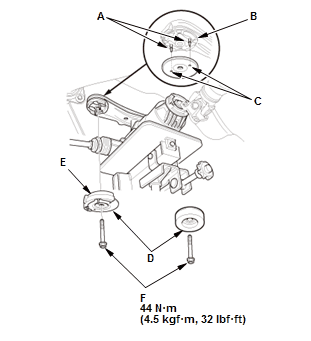
4. Align the tabs (A) of the rubber mount (B) with the holes (C) of the plates (D).
NOTE: The rubber heat insulator (E) is installed only in the right side.
5. Install the rear differential mounting bolts (F).
- 2. Rear Differential Mount Rubber- Install
 Courtesy of HONDA, U.S.A., INC.
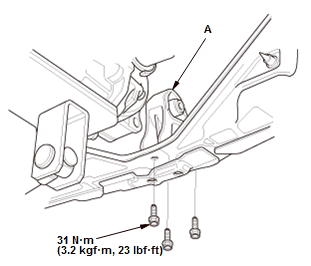
1. Install the rear differential mount rubber (A).
- 3. Rear Differential Mount Bracket- Install
 Courtesy of HONDA, U.S.A., INC.
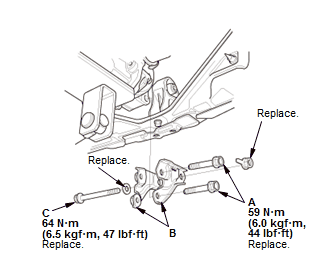
1. Install the left and right rear differential mount brackets B
2. Tighten new differential mount brackets B mounting bolts (A) to the specified torque
3. Loosely install new differential mount brackets B mounting bolt (C).
- 4. Rear Differential Mount Bolt - Tighten
1. Lower the transmission jack
2. Tighten differential mount brackets B mounting bolt to the specified torque.
- 5. No. 2 Propeller Shaft - Connect