Injector Removal & Installation: Installation
NOTE: When replacing the injector, you must replace all injectors on the fuel rail as a set.
- 1. Injector Seal - Install
1. With a paper towel, carefully wipe off any carbon from the area (A) shown.
NOTE:
- Do not wipe off the tip area (B) of the injector as it may be damaged.
- If the tip of the injector is dirty or clogged, it must be replaced. The injectors cannot be cleaned.
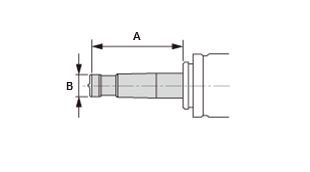
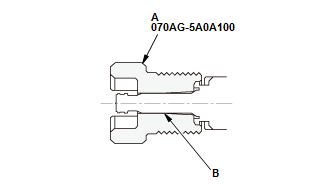
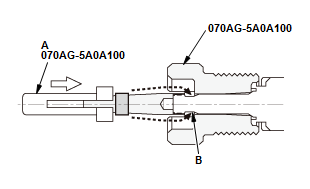
2. Install the sizing tool (A) to the injector (B) as shown. NOTE: Do not touch the tool to the top of the injector.
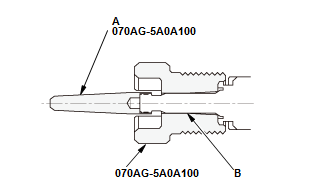
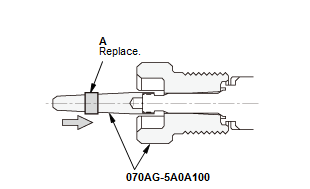
3. Install the seal guide (A) over the tip of the injector (B) as shown. 4. Slide a new seal (A) on the seal guide as shown. 5. Slide the seal installer (A) onto the seal guide, then quickly push the seal down to the groove (B) of the injector 6. Remove the seal guide and the seal installer from the injector.
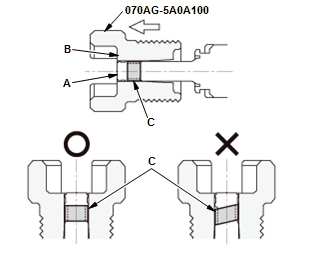
7. Move the sizing tool and align the top of the injector surface (A) and the tool's inner surface (B) as shown, and hold the tool to reform the seal for 30 seconds or more. NOTE: Make sure the seal (C) is not deformed when moving the tool.
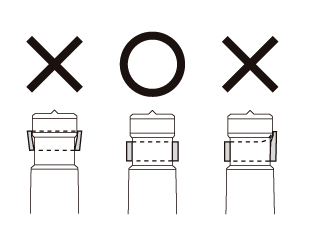
8. Remove the sizing tool, and check that the seal is installed correctly. NOTE: When cleaning the sizing tool and the seal guide, be careful not to scratch the sizing tool bore or the surface of the seal guide.
- 2. Injector - Install
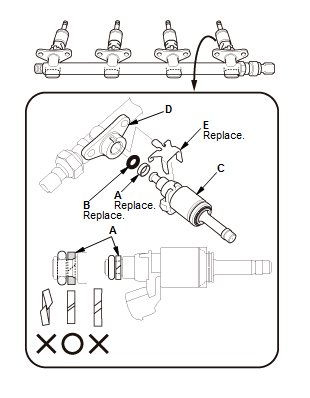
1. Install a new back-up ring (A) and a new O-ring (B) on the injector (C).
NOTE:
- Set the direction of the back-up ring as shown
- Check that the back-up ring sets correctly after installation.
2. Coat the O-ring with clean engine oil, then install the injector onto the fuel rail (D) with a new clip (E).
NOTE: When installing the injector, be sure to protect the injector from dust or debris.
- 3. Fuel Rail and Fuel Injector - Install
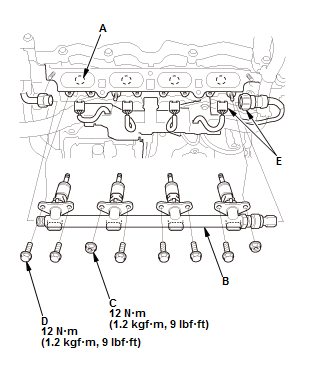
1. Coat the injector holes (A) on the cylinder head with clean engine oil
2. Carefully install the fuel rail (B) with the injectors into the cylinder head straight and equal.
NOTE: When installing the injector, protect the tip of the injector from dust or debris.
3. Install the nuts (C), and tighten slowly in an alternate pattern until the fuel rail sits on the cylinder head
4. Tighten the nuts and the bolts (D) to the specified torque
5. Connect the connectors (E).
- 4. Fuel Joint Pipe - Install
- 5. Intake Manifold - Install
- 6. Fuel Line Leak (Low Pressure Side) - Check
1. Turn the vehicle to the ON mode, but do not start the engine. After the fuel pump runs for about 2 seconds, the fuel line will be pressurized. Repeat this two or three times, then check for fuel leakage.
- 7. Fuel Line Leak (High Pressure Side) - Check