Rear Differential Removal & Installation(AWD): Installation
- 1. Rear Differential Mount - Install - Refer to: Rear Differential Mount Removal and Installation(4WD) Rear Differential Mount Removal and Installation(AWD)
- 2. Rear Driveshaft Inboard Side - Connect
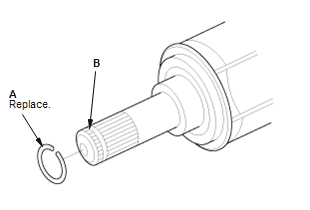
1. Install new set ring (A) into the groove (B) of the rear driveshaft inboard joint on both sides.
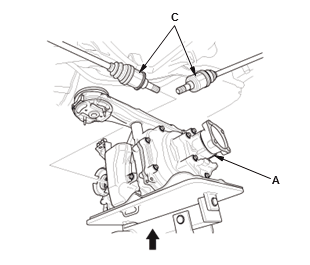
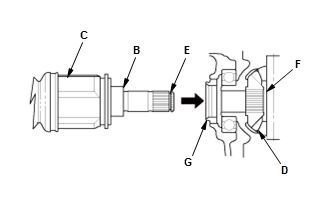
2. Lift the rear differential assembly (A) up into position 3. Insert the inboard end (B) of the rear driveshafts (C) into the differential (D) until the set ring (E) locks in the groove (F).
NOTE: Insert the driveshaft horizontally to prevent damaging the oil seals (G).
- 3. Rear Differential - Connect
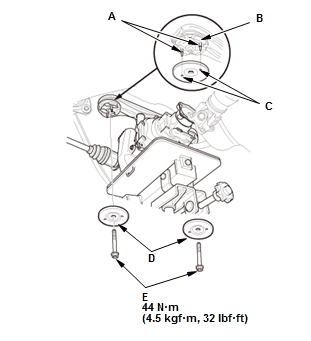
1. Align the tabs (A) of the rubber mount (B) with the holes (C) of the plates (D)
2. Install the rear differential mounting bolts (E).
 Courtesy of HONDA, U.S.A., INC.
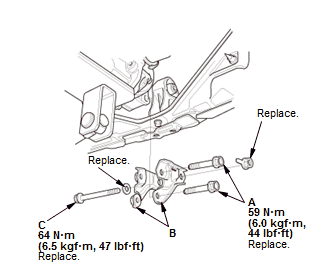
3. Install the left and right rear differential mount brackets B
4. Tighten new differential mount brackets B mounting bolts (A) to the specified torque
5. Loosely install new differential mount brackets B mounting bolt (C).
- 4. Rear Differential Mount Bolt - Tighten
1. Lower the transmission jack
2. Tighten differential mount brackets B mounting bolt to the specified torque.
- 5. Breather Hose - Connect - Refer to: Rear Differential Breather Box and Hose Removal and Installation(4WD) Rear Differential Breather Box and Hose Removal and Installation(AWD)
- 6. Rear Differential Subharness Connector - Connect
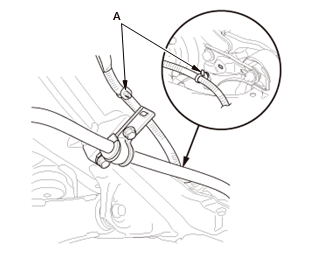
1. Install the harness clips (A).
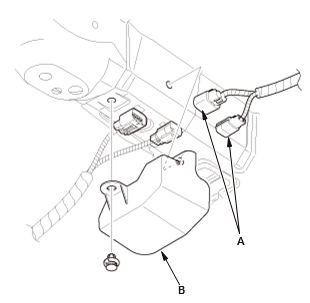
2. Connect the connectors (A) 3. Install the connector cover (B).
- 7. No. 2 Propeller Shaft - Connect
- 8. Rear Differential Fluid - Refill - Refer to: Rear Differential Fluid Inspection and Replacement(4WD)Rear Differential Fluid Inspection and Replacement(AWD)
- 9. Real Time AWD System - Air Bleed
- 10. Test Drive - Check