Roof Molding Removal & Installation: Installation
- 1. Retainer - Install
Except USA Factory Model
1. Clean the body bonding surface with a shop towel dampened with isopropyl alcohol. After cleaning, keep oil, grease, and water from getting on the clean surface
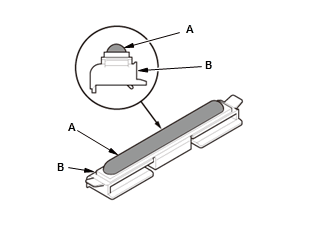
2. Apply the two-part epoxy adhesive (A) on the clip (B) as shown.
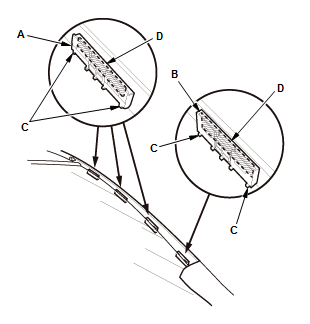
3. Line up the retainers (A, B) with the alignment marks (C) on the body, then press the adhesive portion (D) into place securely 4. Wait for adhesive to dry.
NOTE: Refer to the adhesive manufacturer's instructions in dry time.
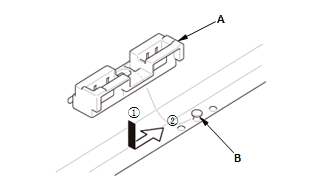
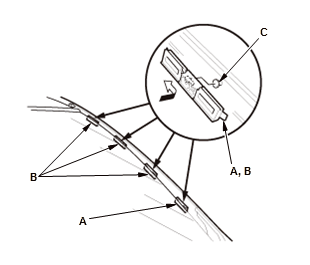
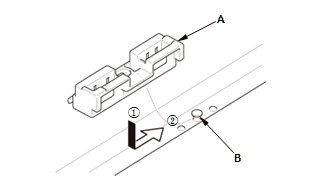
5. Install the retainers (A) to the pins (B) on the body. (4 places) USA Factory Model 1. Install the retainers (A, B) to the pins (C) on the A-pillar.
2. Install the retainers (A) to the pins (B) on the body. (4 places) - 2. Roof Molding - Install
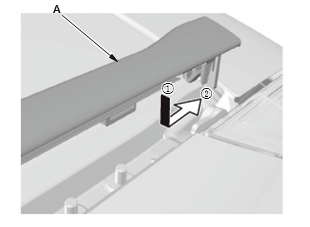
1. Slide the rear end of the roof molding (A) rearward to install it to the body.
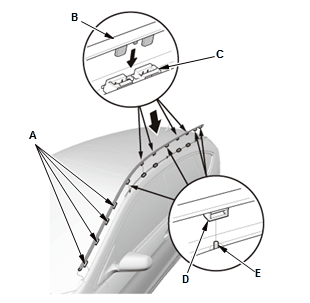
2. Push on the clip areas (A) of the roof molding (B) until the clips lock into the retainers (C) securely, and the retainers (D) into lock the stud bolts (E). - 3. Side Cowl Cover - Install