Steering Column Removal & Installation: Removal
SRS components are located in this area. Review the SRS component locations , and the precautions and procedures before doing repairs or service.
- 1. 12 Volt Battery Terminal - Disconnect
- 2. Driver's Airbag - Remove
- 3. Steering Wheel - Remove
- 4. Column Cover - Remove
- 5. Combination Switch Body Assembly - Remove
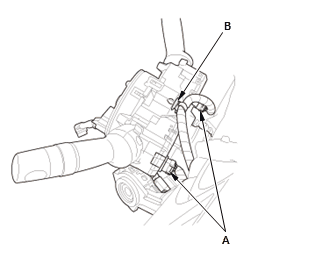
1. Disconnect the connectors (A)
2. Remove the harness clip (B).
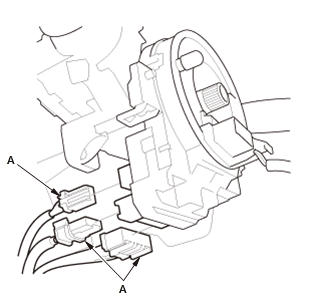
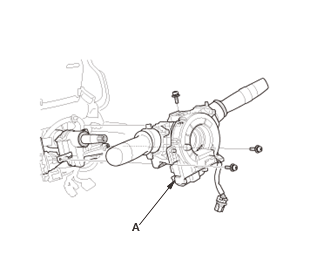
3. Disconnect the connectors (A). 4. Remove the combination switch body assembly (A) from the steering column shaft. - 6. Driver's Dashboard Undercover - Remove - Refer to: Passenger's Dashboard Undercover Removal and InstallationDriver's Dashboard Undercover Removal and Installation
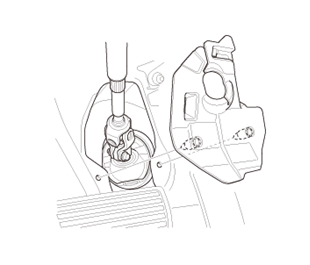
- 7. Steering Joint Cover - Remove
- 8. Steering Column Lower Slide Shaft - Hold
1. Set the steering column to the center tilt position, and to the center telescopic position
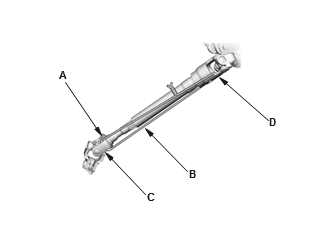
2. Hold the lower slide shaft (A) on the column with a piece of wire (B) between the joint yoke (C) of the lower slide shaft and the joint yoke (D) of the upper shaft to prevent the lower slide shaft from pulling out.
- 9. Steering Joint - Disconnect
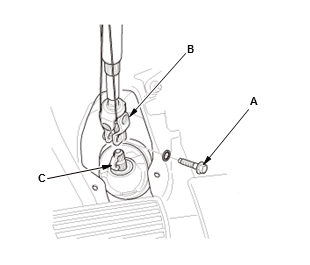
1. Remove the steering joint bolt (A)
2. Disconnect the steering joint (B) from the pinion shaft.
NOTE:
- If the center guide (C) is in place and has not moved, leave it in place.
- If the center guide has come off, discard it.
- 10. Steering Column - Remove
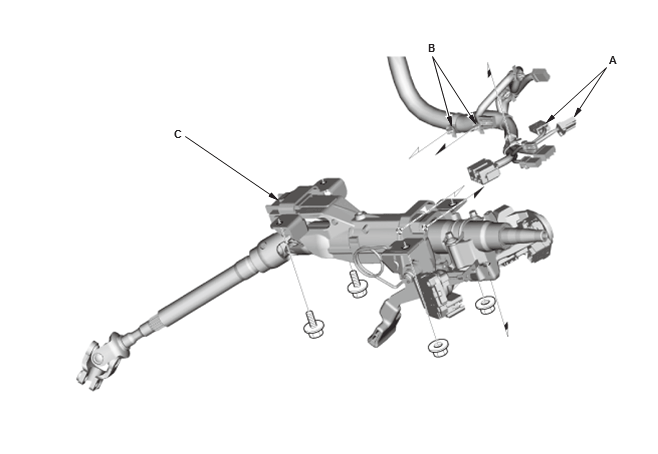
1. Disconnect the connectors (A).
2. Detach the wire harness clips (B)
3. Remove the steering column (C).
NOTE: Do not release the lock lever until the steering column is installed. If the lock lever is released before installation, adjust the steering column after installation.