Removal & Installation
- 1. Vehicle - Lift
- 2. Front Wheel - Remove
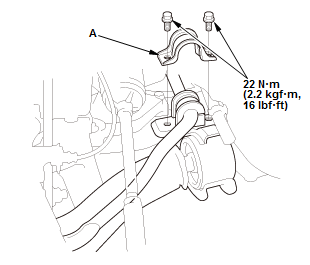
- 3. Stabilizer Bushing Holder - Remove
1. Remove the front stabilizer bushing holder (A).
- 4. Lower Arm Ball Joint - Disconnect
 Courtesy of HONDA, U.S.A., INC.
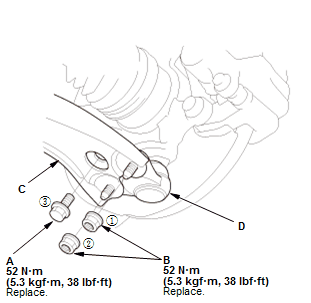
1. Remove the flange bolt (A) and the self-lock nuts (B).
NOTE:
- Use new self-lock nuts and the flange bolt during reassembly.
- Tighten the self-lock nuts and the flange bolt in the sequence shown.
2. Disconnect the lower arm (C) from the front lower ball joint (D).
- 5. Lower Arm - Remove
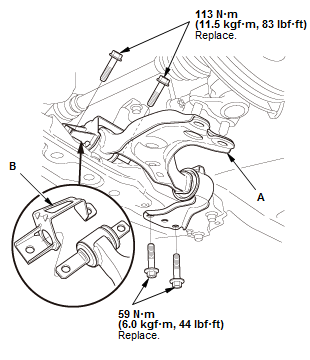
1. Remove the lower arm (A).
NOTE: Use the new lower arm mounting bolts during reassembly
2. Remove the bush stopper bracket (B) from the lower arm.
- 6. All Removed Parts - Install
1. Install the lower arm in the reverse order of removal, and note these items:
NOTE:
- Loosely install nuts and/or bolts to install the bushings, load the suspension with the vehicle's weight, and then tighten the nuts and/or bolts to the specified torque.
- Be careful not to damage the ball joint boot when connecting the knuckle.
- 7. Wheel Alignment - Check