Rear Damper/Spring Removal & Installation: Installation
- 1. Damper/Spring - Install
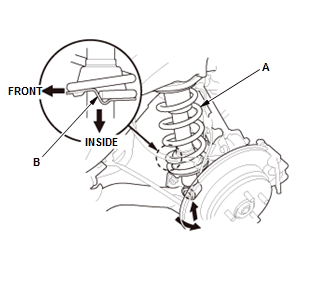
1. Position the damper/spring (A) between the body and the trailing arm.
NOTE: Be careful not to damage the body
2. Note the direction of the stepped part (B) of the lower spring seat on it is toward the inside of the vehicle.
3. Raise the floor jack until the suspension begins to compress
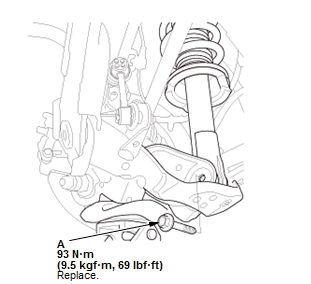
4. Loosely install a new damper mounting bolt (A).
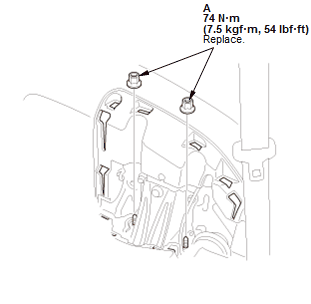
5. Loosely install new flange nuts (A) to the top of the damper.
- 2. Rear Damper/Spring Items - Install
 Courtesy of HONDA, U.S.A., INC.
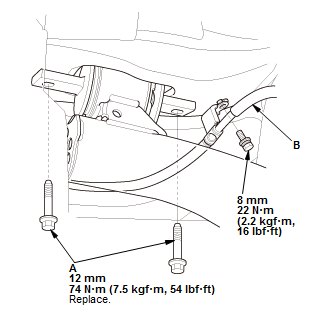
1. Loosely install new trailing arm rear mounting bolts (A)
2. Install the parking brake cable (B).
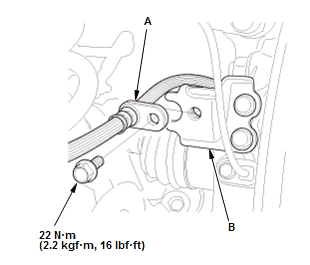
3. The brake hose (A) to the brake hose mounting bracket (B).
- 3. Stabilizer Link - Connect
1. Connect the stabilizer link to the trailing arm.
- 4. Rear Suspension All Mounting - Tighten Under Vehicle's Weight
1. Load the suspension with the vehicle's weight
5. Tighten all loosely installed mounting hardware to the specified torque.
- 5. Damper Maintenance Cover - Install
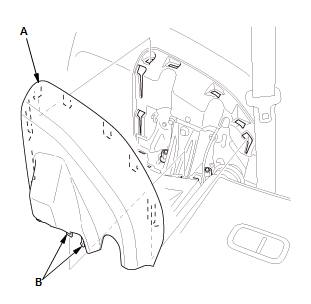
1. Install the rear damper maintenance cover (A). Make sure the hooks (B) snap into place securely.
- 6. Rear Wheel - Install
- 7. Wheel Alignment - Check