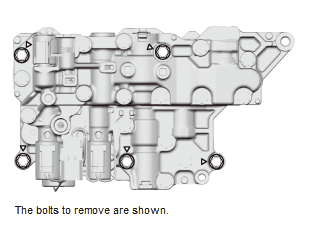
Lower Valve Body Removal & Installation: Removal
NOTE:
- Keep all foreign particles out of the transmission.
-
- The lower valve body and the following parts are not available separately. Replace them as a set.
-CVT clutch pressure control solenoid valve
-CVT drive pulley pressure control solenoid valve
-CVT driven pulley pressure control solenoid valve
-CVT lock-up clutch control solenoid valve
-Shift solenoid valve B
- The lower valve body and the following parts are not available separately. Replace them as a set.
- 1. Transmission Fluid Pan - Remove
- 2. Transmission Fluid Strainer - Remove
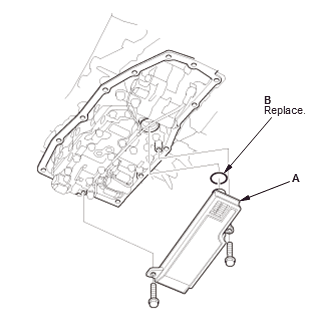
1. Remove the transmission fluid strainer (A) with the O-ring (B).
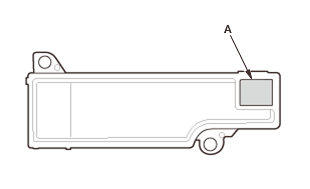
2. Clean the inlet opening (A) of the transmission fluid strainer thoroughly with compressed air 3. Check that it is in good condition and that the inlet opening is not clogged
4. Test the strainer by pouring clean transmission fluid through the inlet opening, and replace it if it is clogged or damaged.
- 3. Lower Valve Body Assembly - Remove
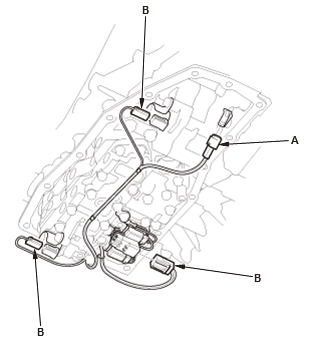
1. Remove the transmission fluid temperature sensor (A)
2. Disconnect the connectors (B).
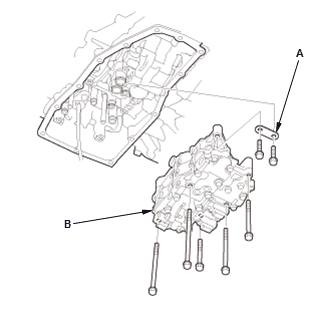
3. Remove the guide plate (A) 4. Remove the lower valve body assembly (B), and hold the lower valve body assembly.
NOTE:
- Check that the lower valve body assembly is free of solenoid wire harness A.
- Do not damage solenoid wire harness A and B while removing the lower valve body assembly.
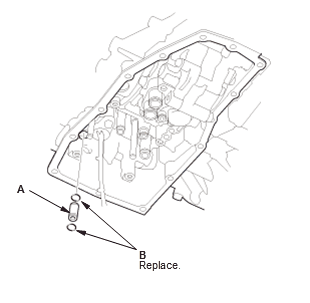
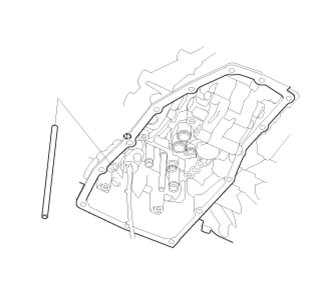
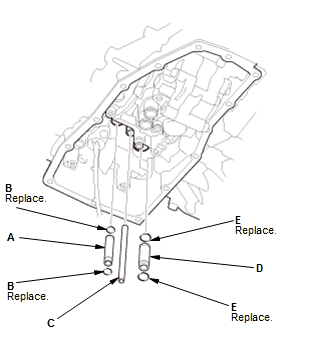
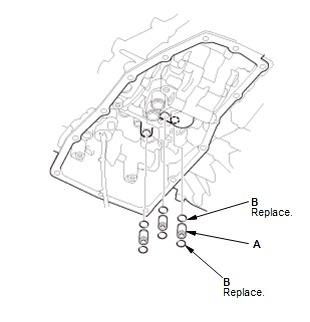
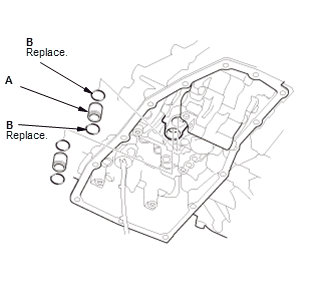
5. Remove the 10.9 x 26 mm pipe (A) with the O-rings (B). 6. Remove the 8 x 133.5 mm pipe. 7. Remove the 12 x 56.7 mm pipe (A) with the O-rings (B) 8. Remove the 8 x 71.5 mm pipe (C)
9. Remove the 14.3 x 36.2 mm pipe (D) with the O-rings (E).
10. Remove the 10.9 x 18.5 mm pipes (A) with the O-rings (B). 11. Remove the 18 x 18 mm pipes (A) with the O-rings (B).