Lower Valve Body Removal & Installation: Installation
NOTE:
- Keep all foreign particles out of the transmission.
-
- The lower valve body and the following parts are not available separately. Replace them as a set.
-CVT clutch pressure control solenoid valve
-CVT drive pulley pressure control solenoid valve
-CVT driven pulley pressure control solenoid valve
-CVT lock-up clutch control solenoid valve
-Shift solenoid valve B
- The lower valve body and the following parts are not available separately. Replace them as a set.
- 1. Lower Valve Body Assembly - Install
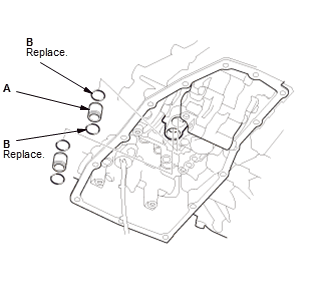
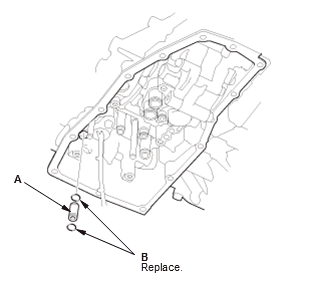
1. Install the 18 x 18 mm pipes (A) with new O-rings (B).
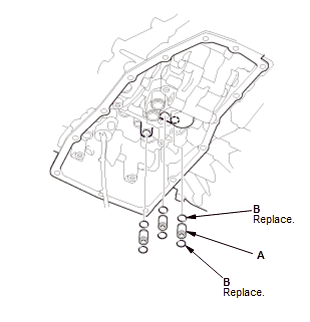
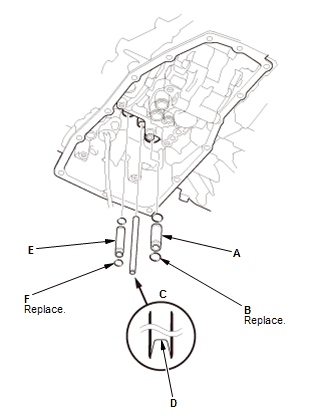
2. Install the 10.9 x 18.5 mm pipes (A) with new O-rings (B). 3. Install the 14.3 x 36.2 mm pipe (A) with new O-rings (B) 4. Install the 8 x 71.5 mm pipe (C) with the filter end (D) facing the lower valve body assembly into the transmission
5. Install the 12 x 56.7 mm pipe (E) with new O-rings (F).
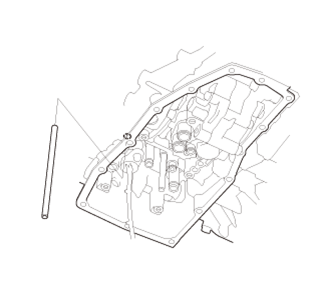
6. Install the 8 x 133.5 mm pipe. 7. Install the 10.9 x 26 mm pipe (A) with new O-rings (B). 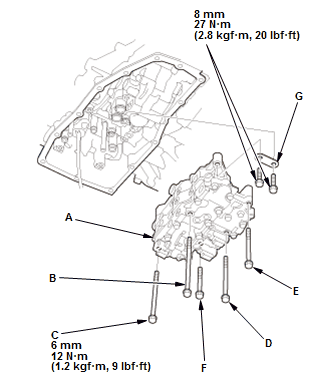 Courtesy of HONDA, U.S.A., INC.
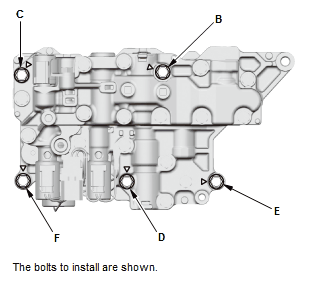
8. Install the lower valve body assembly (A), and tighten them in a crisscross pattern in at least two steps. NOTE:
- Do not pinch the solenoid wire harnesses.
- Do not damage the solenoid wire harnesses while installing the lower valve body assembly.
B 90 mm (3.54 in) C 80 mm (3.15 in) D 65 mm (2.56 in) E 55 mm (2.17 in) F 40 mm (1.57 in) 9. Install the guide plate (G).
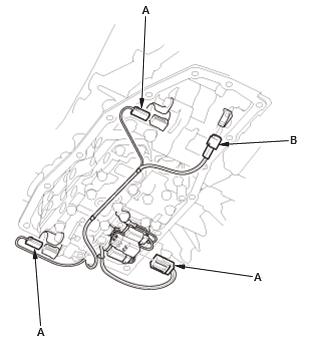
10. Connect these connectors (A) 11. Install the transmission fluid temperature sensor (B).
- 2. Transmission Fluid Strainer - Install
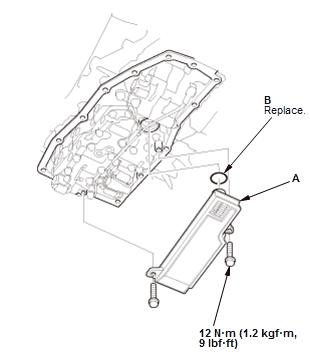
1. Install the transmission fluid strainer (A) with a new O-ring (B).
NOTE:
- Install the transmission fluid strainer carefully to prevent damaging the O-ring.
- Do not pinch the solenoid wire harnesses.
- 3. Transmission Fluid Pan - Install