Removal And Installation: Installation
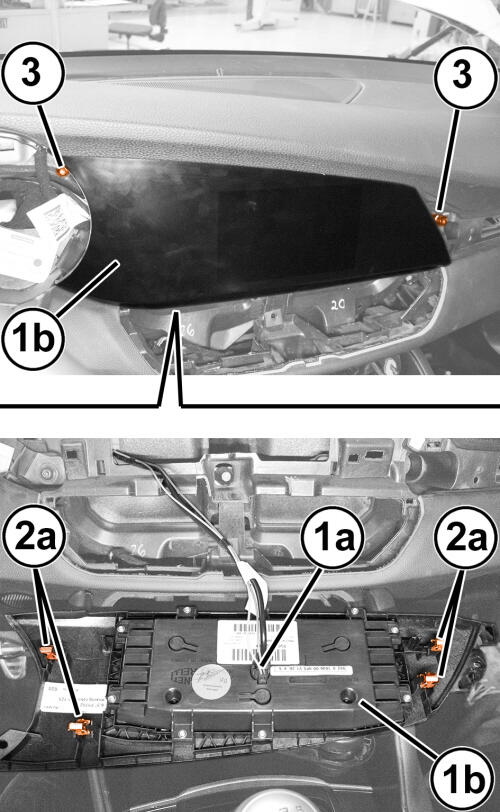
- Carefully position the radio display (1b) near the instrument panel and connect the wire harness connector (1a).
- Install the radio display into the instrument panel. Be sure that the integral latches are fully installed (2a).
- Install and securely tighten the two radio display screws (3).
- Install the center air outlets. Refer to OUTLET, AIR, REMOVAL AND INSTALLATION .
- Install the right instrument panel trim. Refer to PANEL, INSTRUMENT PANEL TRIM, CENTER, REMOVAL AND INSTALLATION .
- Install the IPC. Refer to REMOVAL AND INSTALLATION .
- Connect the negative battery cable. If equipped with an Intelligent Battery Sensor (IBS), connect the IBS connector.NOTE:
If this Electronic Control Unit (ECU) is being replaced with a new unit, a diagnostic scan tool MUST be used to align the PROXI configuration data into the new ECU. Follow the routine outlined in the diagnostic scan tool for PROXI Configuration Alignment under Body Control Module (BCM) Miscellaneous Functions menu.