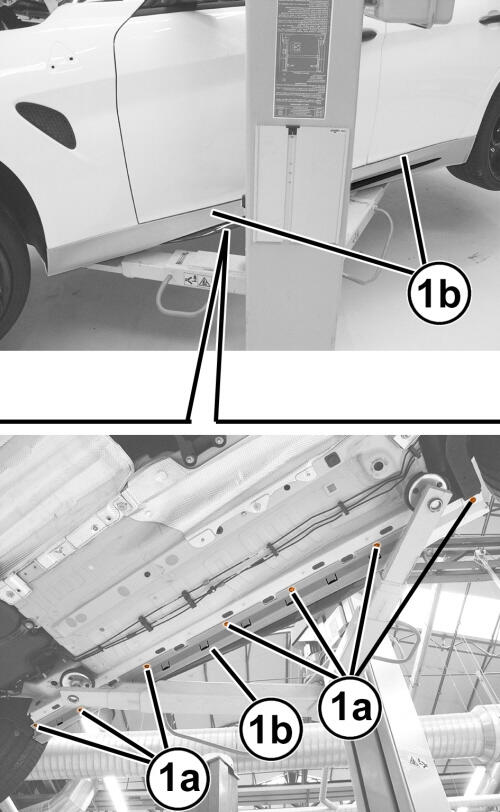
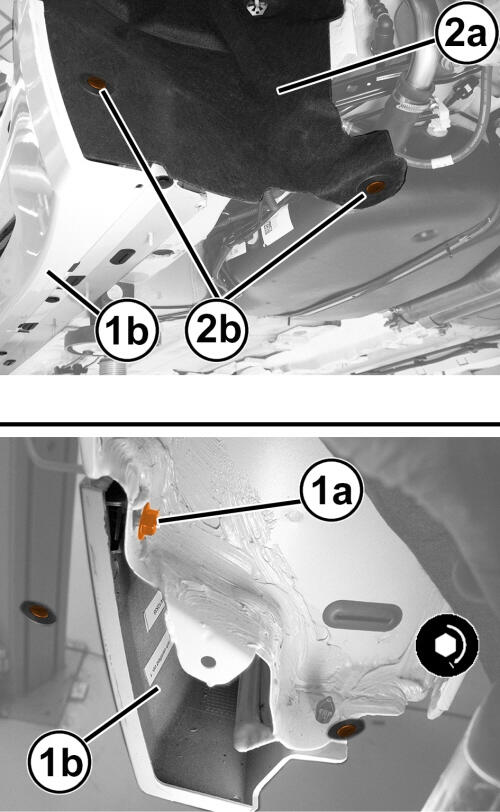
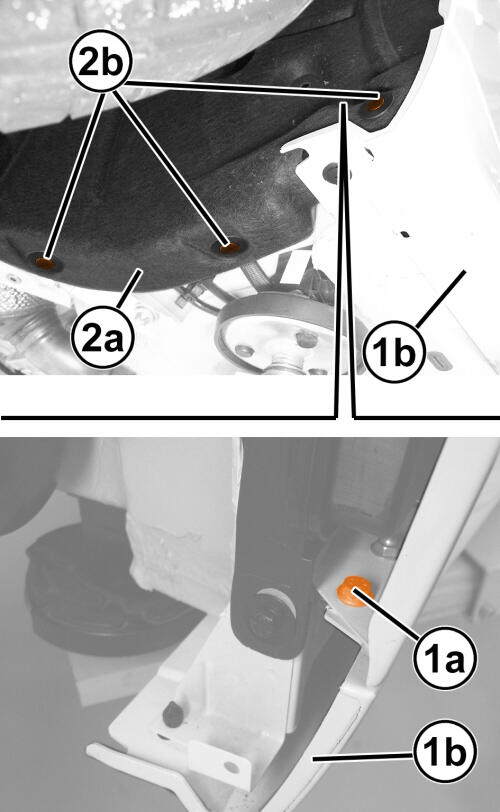
Removal And Installation: Removal
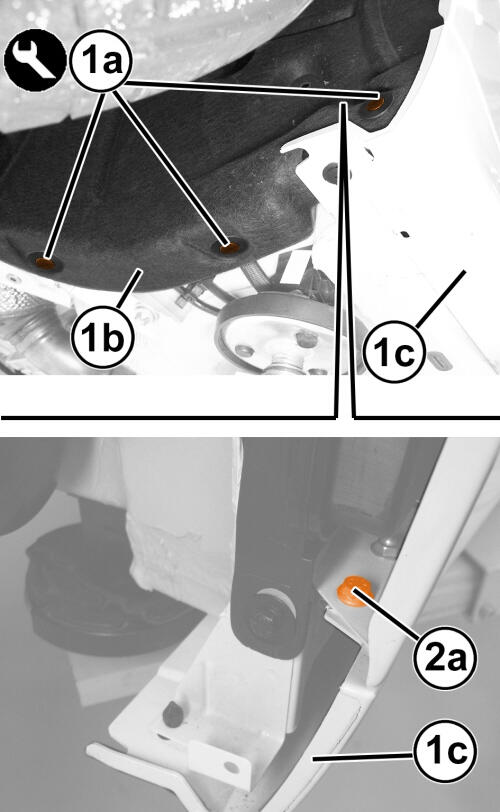
- Position the car on the lift. It is preferable to use a platform lift, for easier access to the lower fasteners of the cladding.
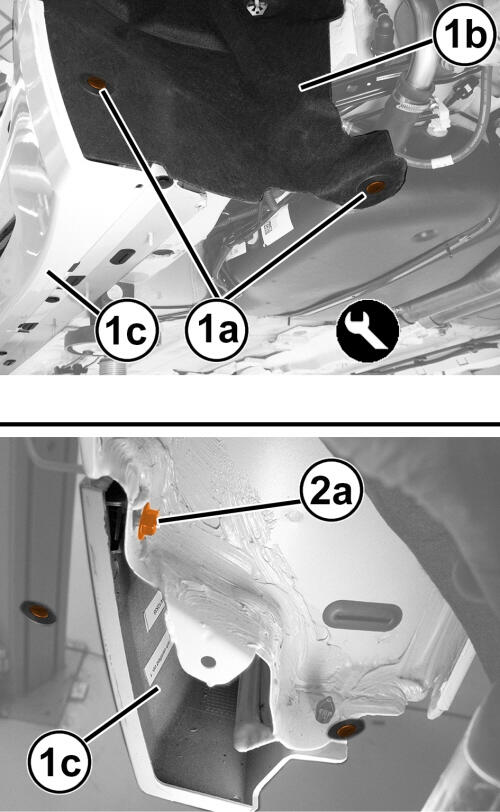
- Release the cladding (1c) front area retaining buttons (1a) of the wheelhouse splash shield (1b), using a trim stick, or equivalent.
- Shift the wheelhouse splash shield (1b) a little and remove the cladding (1c) front screw (2a).
- Release the cladding (1c) rear area retaining buttons (1a) of the wheelhouse splash shield (1b), using a trim stick, or equivalent.
- Shift the wheelhouse splash shield (1b) a little and remove the cladding (1c) rear nut (2a).
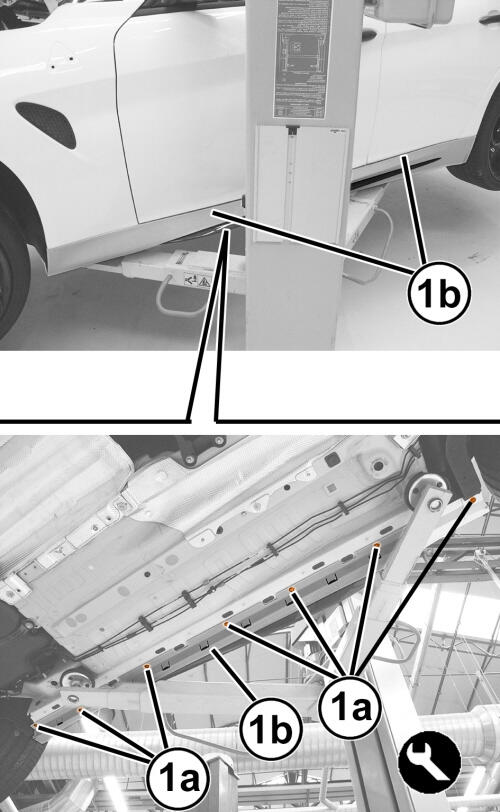
- Release the cladding (1b) lower retaining buttons (1a), using a trim stick, or equivalent.
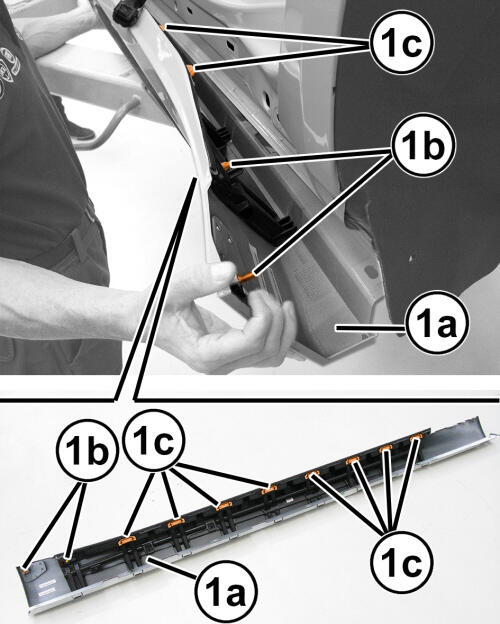
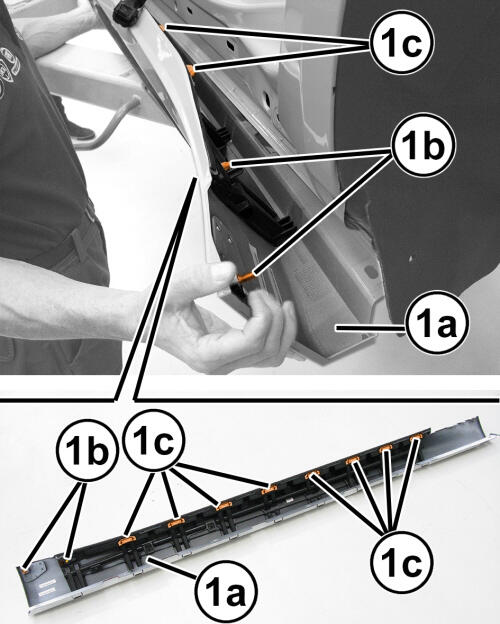
- Starting from the rear, remove the cladding (1a) by releasing the center (1b) and side retainers (1c).
- If necessary, remove the molding. Refer to MOLDING, BODY SIDE, REMOVAL AND INSTALLATION Refer to, MOLDING, RAIN GUTTER, REMOVAL AND INSTALLATION .
INSTALLATION
- If necessary, install the molding. Refer to MOLDING, BODY SIDE, REMOVAL AND INSTALLATION Refer to, MOLDING, RAIN GUTTER, REMOVAL AND INSTALLATION .
- Position the cladding (1a) and engage the rear center (1b) and side retainers (1c).
- Engage the cladding (1b) lower retaining buttons (1a).
- Tighten the cladding (1b) rear nut (1a).
- Position the wheelhouse splash shield (2a) in the rear area of the cladding and engage the retaining buttons (2b).
- Tighten the cladding (1b) front screw (1a).
- Position the wheelhouse splash shield (2a) in the front area of the cladding and engage the retaining buttons (2b).