Removal And Installation
NOTE:
The sunroof INITIALIZATION procedure must be performed if: the motor is replaced for the sunroof or sunshade, and after removal and installation of one of the motors.
REMOVAL
- Close the sunshade fully.
- Disconnect and isolate the negative battery cable.
- Lower the headliner. Refer to HEADLINER, REMOVAL AND INSTALLATION
.
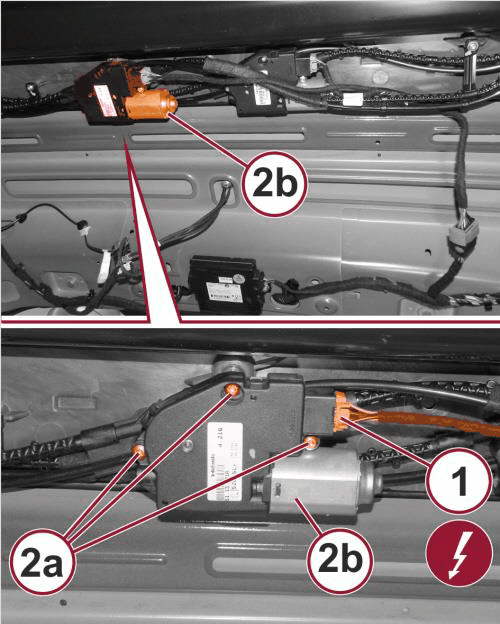
- Disconnect the wire harness connector (11) from the sunshade motor (1b).
- Remove the sunshade motor screws (2a).
- Remove the sunshade motor (2b) by lowering the motor without rotating the motor and releasing the motor pinion (3a) from the drive cables.NOTE:
Do not move the drive cables while removing the motor. Moving the cables will affect the sunshade alignment.
INSTALLATION
- Inspect the sunroof motor and wire harness connector.
- Install the sunshade motor and engage the pinion with the drive cables.
- Install the sunshade motor screws and securely tighten.
- Connect the wire harness connector to the sunshade motor.
- Check the sunshade alignment and adjust if necessary. Refer to GLASS, SUNROOF, FRONT, ADJUSTMENTS .
- Install the headliner. Refer to HEADLINER, REMOVAL AND INSTALLATION .
- Connect the negative battery cable.
- Perform motor initialization & obstacle detection calibration procedure (Refer to SUNROOF INITIALIZATION AND OBSTACLE DETECTION CALIBRATION .