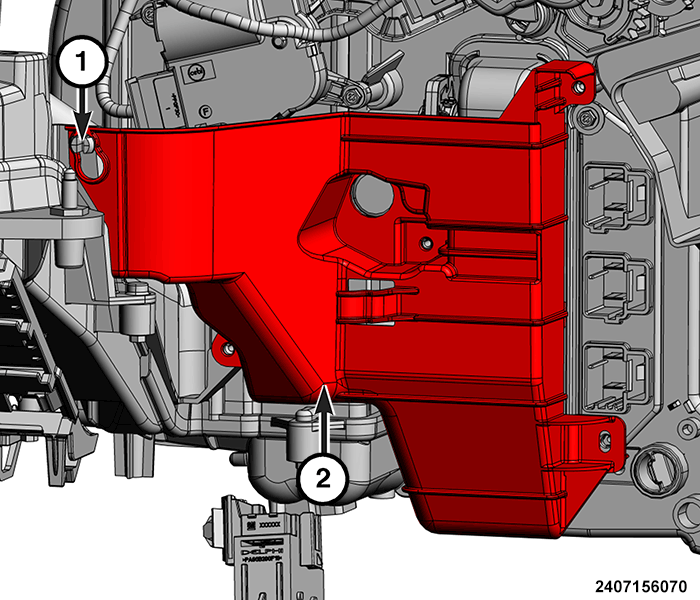
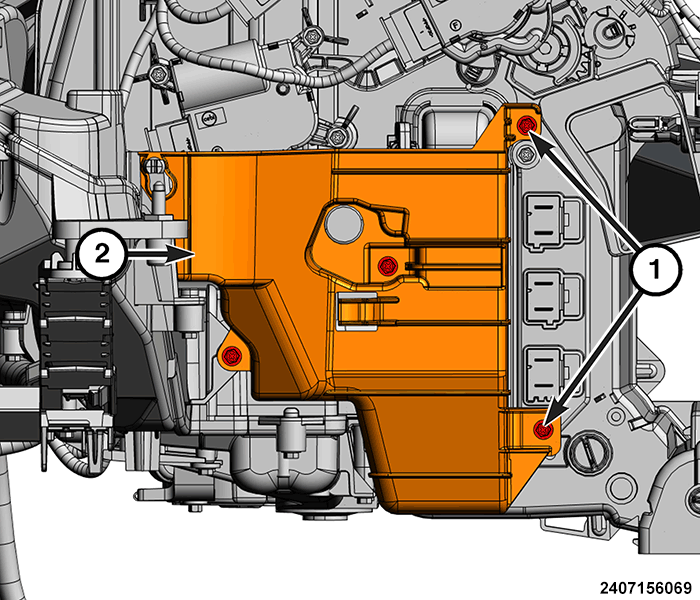
Removal And Installation: Left: Installation
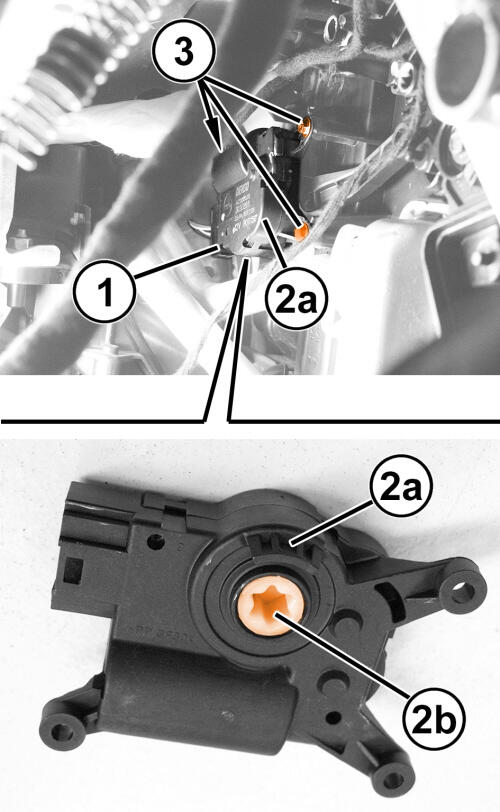
- Connect the actuator wire harness connector (1).
- Position the actuator (2a) and engage the coupling (2b).
- Install and securely tighten the three actuator to HVAC housing screws (3).
- Position the actuator cover (2) to the HVAC housing and engage the hole (1).
- Install and securely tighten the screws (1) securing the actuator cover (2) to the HVAC housing.
- Install the steering column shroud. Refer to SHROUD, STEERING COLUMN, REMOVAL AND INSTALLATION .
- Install the left front floor air outlet. Refer to OUTLET, AIR, REMOVAL AND INSTALLATION .
- Install the evaporator temperature sensor. Refer to SENSOR, EVAPORATOR TEMPERATURE, REMOVAL AND INSTALLATION .
- Connect the negative battery cable. If equipped with an Intelligent Battery Sensor (IBS), connect the IBS connector.
- Initiate the Actuator Calibration function using a scan tool. Refer to STANDARD PROCEDURE .