Removal And Installation: 2.0L: Installation
Be certain to adjust the refrigerant oil level when servicing the A/C refrigerant system. Failure to properly adjust the refrigerant oil level will prevent the A/C system from operating as designed and can cause serious A/C compressor damage.
When replacing multiple A/C system components, see the Refrigerant Oil Capacities chart to determine how much oil should be added to the refrigerant system. Refer to OIL, REFRIGERANT, STANDARD PROCEDURE .
Replacement of the refrigerant line O-ring seals is required anytime a refrigerant line is disconnected. Failure to replace the rubber O-ring seals could result in a refrigerant system leak.
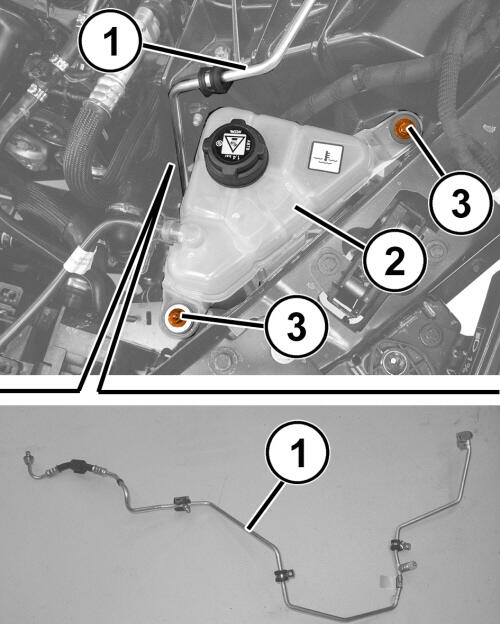
- Position the A/C liquid line (1) into the vehicle.
- Position the engine coolant recovery bottle (2) into position and securely tighten the bolts (3).
- Raise and support the vehicle. Refer to HOISTING, STANDARD PROCEDURE
.
- Remove the tape or plugs from the refrigerant line fittings and expansion valve ports.NOTE:
Lubricate NEW O-ring seals with clean refrigerant oil and install them onto the refrigerant line fittings. Use only the specified O-ring seals as they are made of a special material for the system. Use only refrigerant oil of the type recommended for the vehicle.
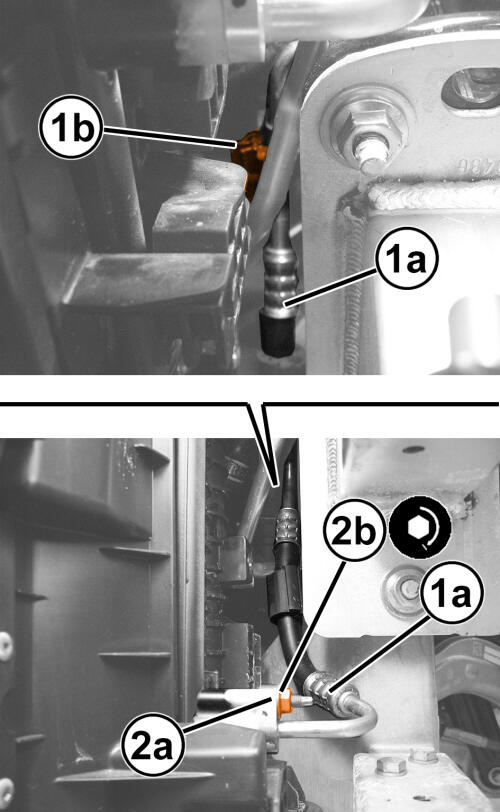
- Position the A/C liquid line (2a) onto the A/C condenser. Install a NEW O-ring seal
- Install the nut (2b) that secures the A/C liquid line (2a) to the A/C condenser and tighten the nut to the proper specification. Refer to TECHNICAL SPECIFICATIONS .
- Engaged the A/C liquid line retaining band (1b).
- Remove the support and lower the vehicle.
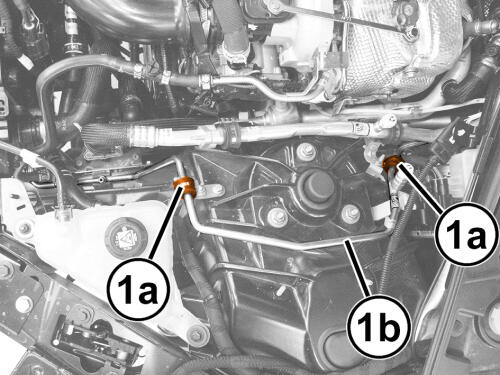
- Install the A/C liquid line retaining clamps (1a) to the strut tower.
- Remove the tape or plugs from the refrigerant line fittings and expansion valve ports.NOTE:
Lubricate NEW O-ring seals with clean refrigerant oil and install them onto the refrigerant line fittings. Use only the specified O-ring seals as they are made of a special material for the system. Use only refrigerant oil of the type recommended for the vehicle.
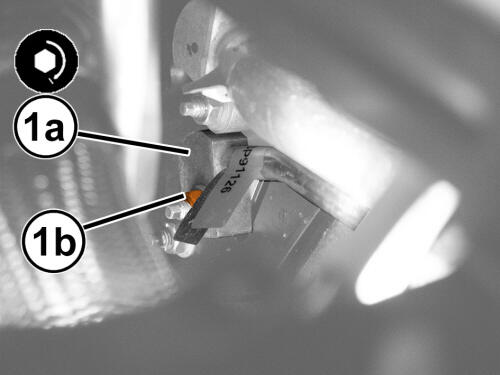
- Connect the A/C liquid line to the expansion valve and install the nut (1b) that secures the A/C liquid line (1a) to the A/C condenser and tighten the nut to the proper specification. Refer to TECHNICAL SPECIFICATIONS .
- Install the A/C suction line. Refer to LINE, A/C SUCTION, REMOVAL AND INSTALLATION LINE, A/C SUCTION JUMPER, REMOVAL AND INSTALLATION .
- Install the left front headlamp unit. Refer to UNIT, FRONT LAMP, REMOVAL AND INSTALLATION .
- Connect the negative battery cable. If equipped with an Intelligent Battery Sensor (IBS), connect the IBS connector.
- Adjust the refrigerant oil level. Refer to OIL, REFRIGERANT, STANDARD PROCEDURE .
- Charge the refrigerant system. Refer to PLUMBING, STANDARD PROCEDURE .