Position Engine On Engine Stand
WARNING: This page is about a different variant/trim than selected.
REMOVAL
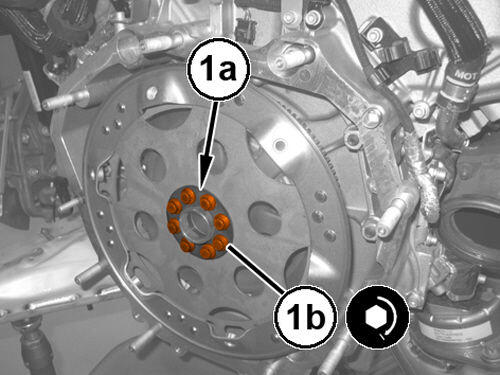
- Using the 2024200090 tool, remove the bolts (1a), spacer (1b), and the flexplate.NOTE:
For compressing the spring, be careful not to exceed a maximum torque of 60 N.m (44 ft. lbs.).
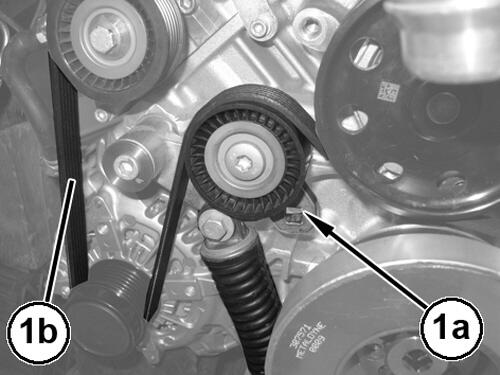
- Insert a suitable tool in the square hole (1a), turn it clockwise to compress the tensioner spring and remove the single auxiliary drive belt (1b).
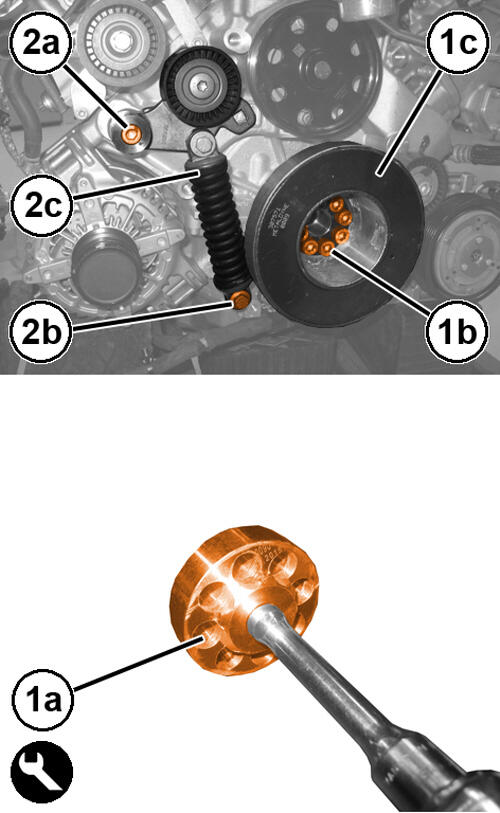
- Using the 2024200090 tool (1a), Remove the bolts (1b) and the vibration damper (1c).
- Remove the bolts (2a), (2b) and the belt tensioner (2c) complete with bushing.
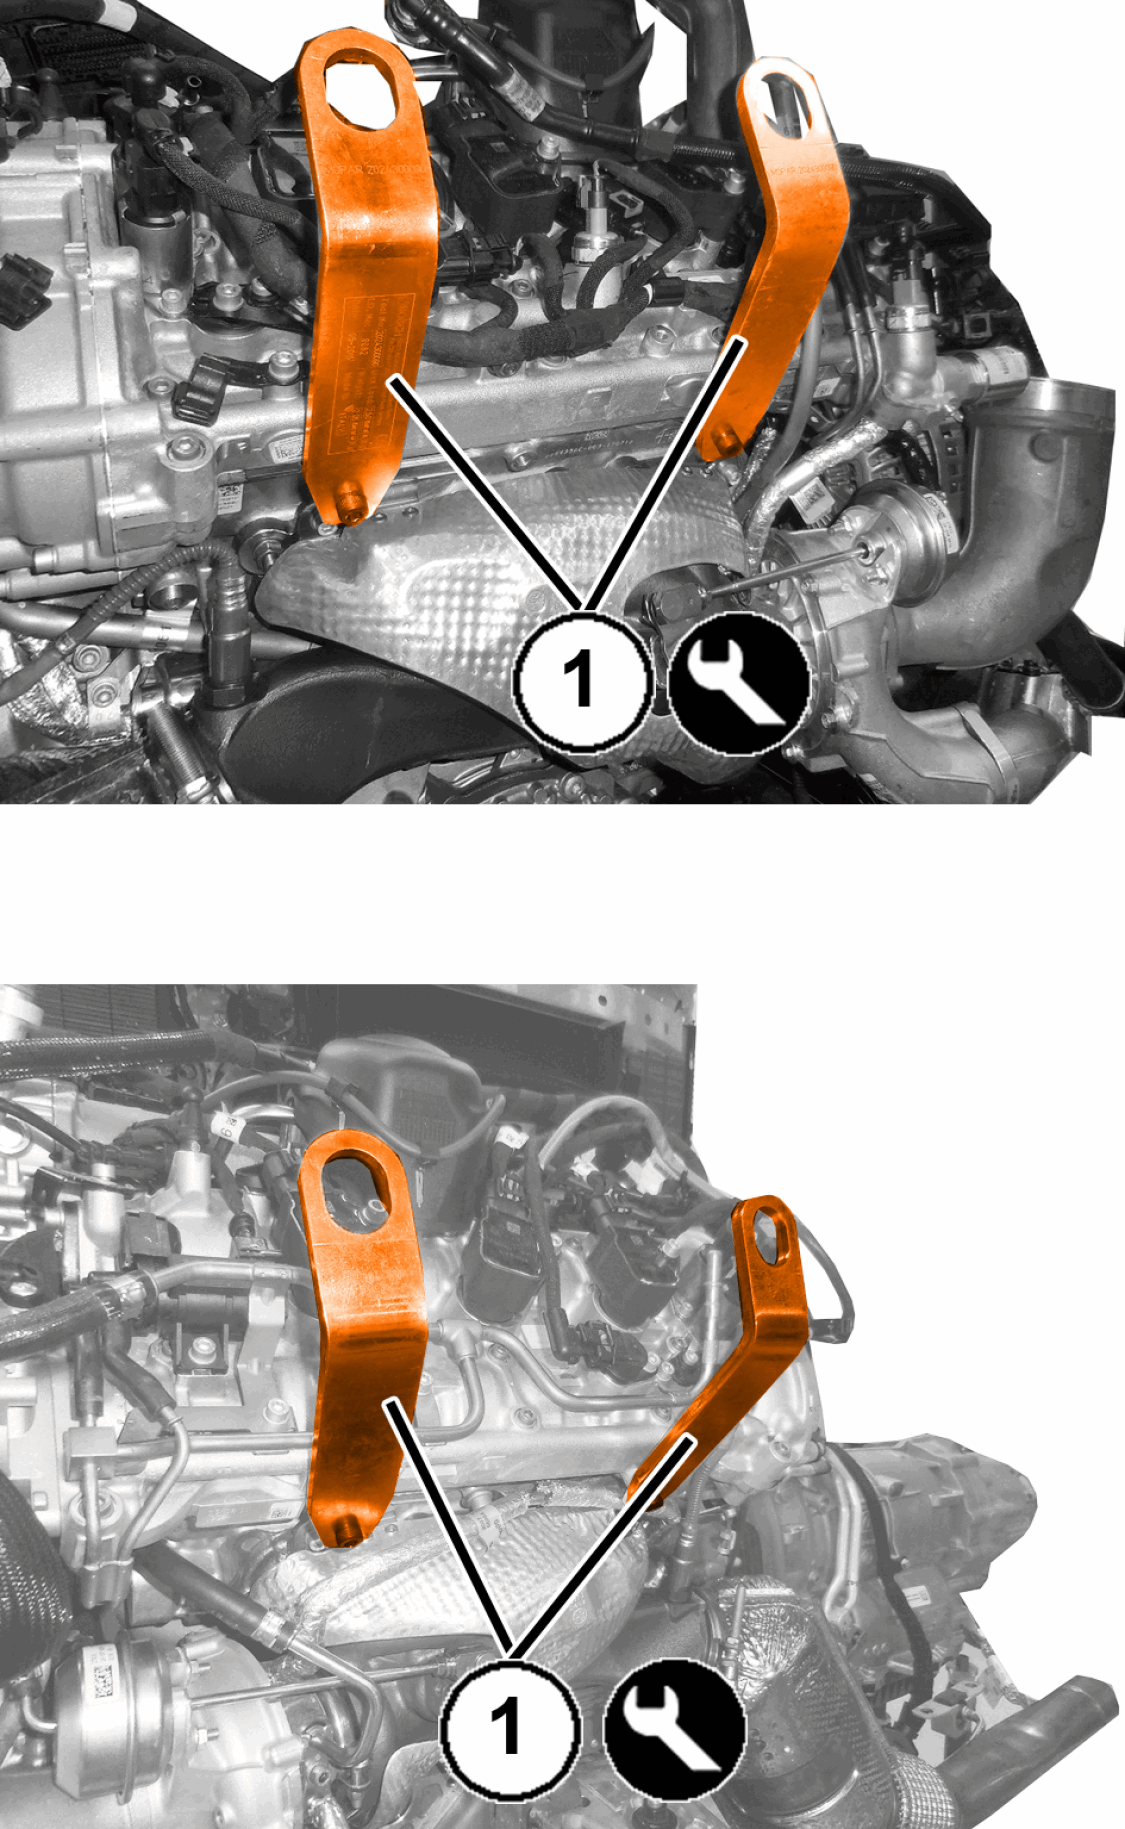
- Mount the four (special tool #2024300090, Brackets, Engine Lifting) (1) on the left and right cylinder head.
- Support the engine with a suitable hydraulic hoist.
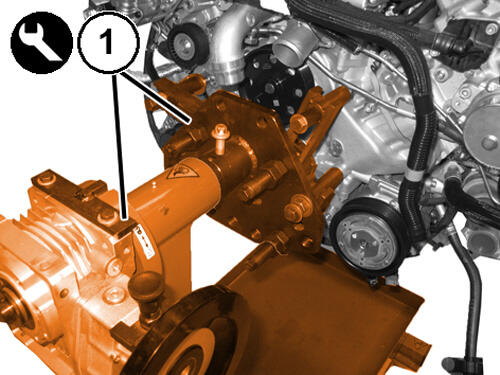
- Lift the engine and place it on the overhaul stand (1).
- Remove the tools used for lifting the engine.
INSTALLATION
- Support the engine using the (special tool #2024300090, Brackets, Engine Lifting) and a suitable hydraulic hoist.
- Undo the fastenings securing the engine to the overhaul stand bracket.
- Lift the engine and place it on a suitable support.
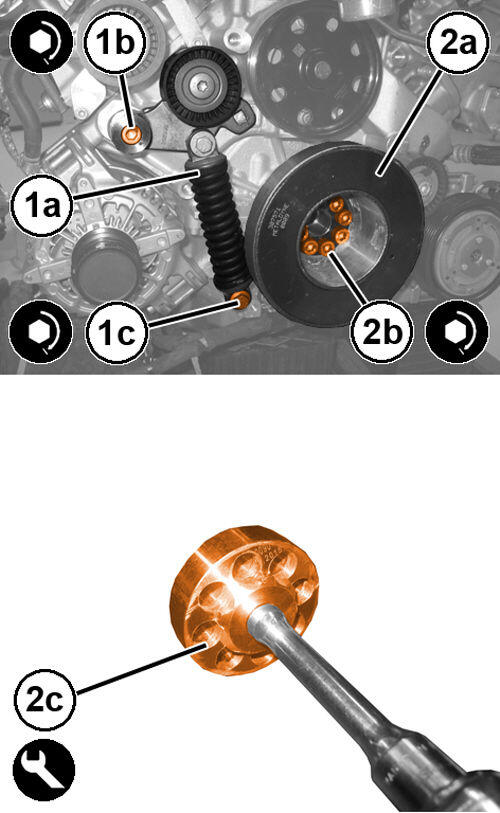
- Install the belt tensioner (1a) and tighten the upper bolt (1b) first and then the lower bolt (1c) to the proper specification. Refer to TORQUE SPECIFICATIONS GAS ENGINE .
- Install the vibration damper on the crankshaft (2a) complete with washer and tighten the NEW
bolts (2b) to the proper using the 2024200090 tool (2c). Refer to FRONT ENGINE
.NOTE:
For compressing the spring, be careful not to exceed a maximum torque of 60 N.m.
- Insert a suitable tool in the square hole on the tensioner, turn it clockwise to compress the spring of the tensioner and fully insert the lock pin in the specific hole on the motor.NOTE:
Visually check that all belt grooves are inserted in the pulley and runner grooves.
- Install the serpentine belt so that all grooves are inserted in the pulley and runner grooves.
- Insert a suitable tool in the square hole on the tensioner, turn it clockwise to compress the spring of the tensioner enough as needed and then remove the lock pin.
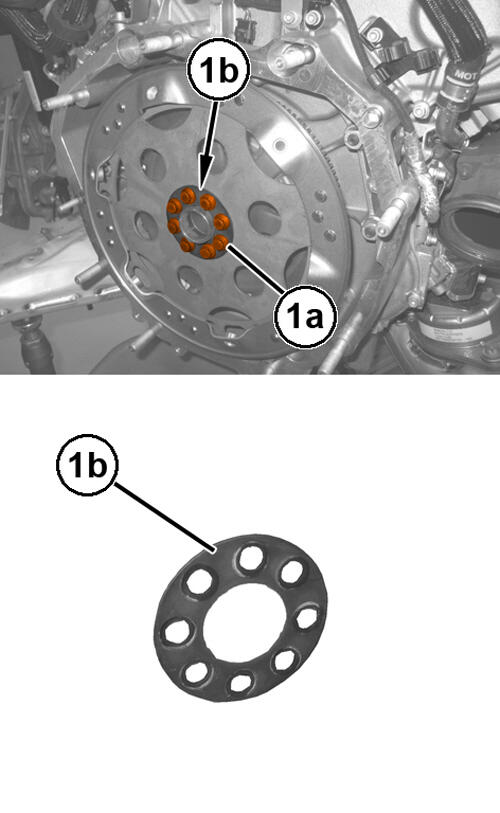
- Install the flexplate, spacer (1b). Using the 2024200090 tool, tighten the bolts (1a) to the proper specification. Refer to REAR ENGINE .