Standard Procedure
WARNING: This page is about a different variant/trim than selected.
NOTE:
At the end of the replacement the "Engine Oil Change" function must be updated using the diagnosis instrument in the engine management control unit environment.
NOTE:
Engine oil is dangerous for the skin: keep contact with skin to a minimum and if there is contact wash with soap and water.
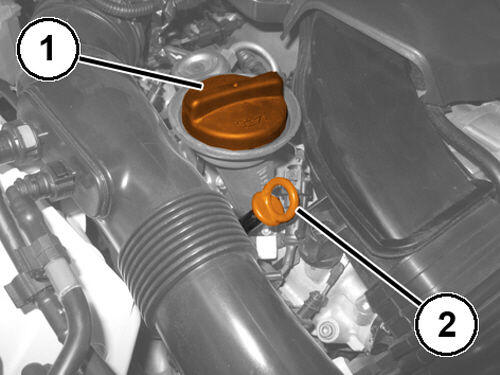
- Remove the filler cap (1) with the engine hot.
- Remove the engine oil dipstick (2).
- Remove the belly pan. Refer to BELLY PAN, ENGINE, REMOVAL AND INSTALLATION
or BELLY PAN, REAR, REMOVAL AND INSTALLATION
or BELLY PAN, REAR SUSPENSION, REMOVAL AND INSTALLATION
or BELLY PAN, SIDE, REMOVAL AND INSTALLATION
.NOTE:
Be very careful when removing the draining plug; the oil could be very hot.
NOTE:Do not dispose of oil into the environment as indiscriminate dispersion of this product causes pollution.
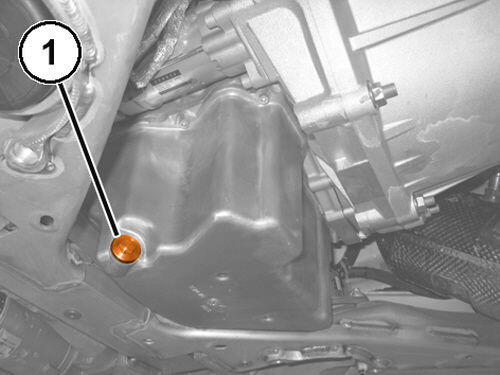
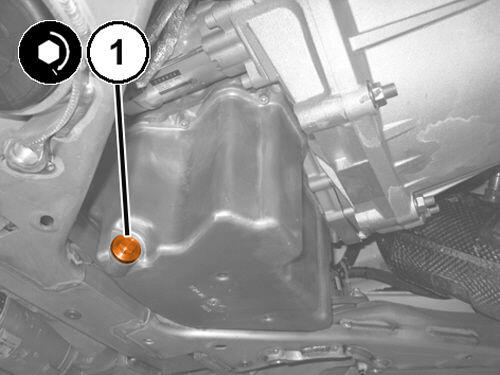
- Remove the drain plug (1) and drain the engine oil completely into a suitable container.
- Clean and inspect the gasket and replace if necessary.
- Install the drain plug and tighten to the proper specification. Refer to LUBRICATION .
- Replace the engine oil filter. Refer to FILTER, ENGINE OIL, REMOVAL AND INSTALLATION .
- Fill the engine with the recommended engine oil. Refer to CAPACITIES AND RECOMMENDED FLUIDS, SPECIFICATIONS .
- Check that the engine oil level is correct using the dipstick.
- The oil level must be checked with the vehicle on a flat surface.
- Fit the filler cap, let the engine idle for about 2 minutes, switch off the engine and then wait for several minutes.
- With engine cold, check the oil level and make sure there are no leaks.
- Install the belly pan. Refer to BELLY PAN, ENGINE, REMOVAL AND INSTALLATION or BELLY PAN, REAR, REMOVAL AND INSTALLATION or BELLY PAN, REAR SUSPENSION, REMOVAL AND INSTALLATION or BELLY PAN, SIDE, REMOVAL AND INSTALLATION .