Charge Air Water Cooler Bracket
WARNING: This page is about a different variant/trim than selected.
REMOVAL
- Remove the right charge air water cooler. Refer to COOLER AND HOSES, CHARGE AIR, REMOVAL AND INSTALLATION .
- Remove the left charge air water cooler. Refer to COOLER AND HOSES, CHARGE AIR, REMOVAL AND INSTALLATION .
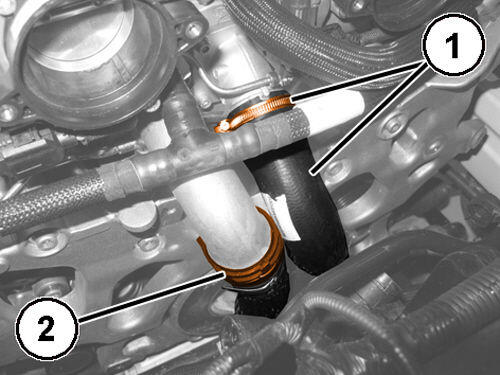
- Loosen the clamp (1) and disconnect the radiator coolant inlet multi-way pipe, thermostat side.
- Open the clip and release the pipe previously disconnected from the turbocharger charge air water coolers support frame.
- Disconnect the quick connector (2) of the coolant pump inlet multi-way pipe to the pressure pump, coolant pump side.
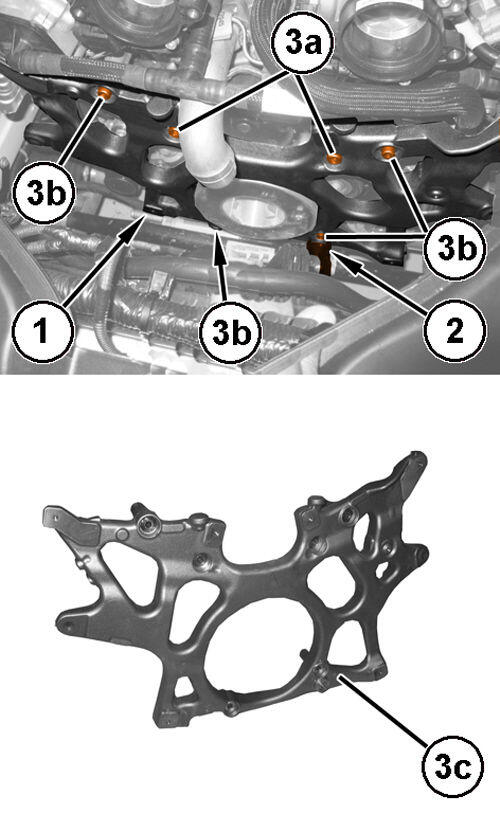
- Release the wiring retaining clip (1).
- Remove the bolt (2) and the multi-way pipe retaining clip to the radiator.
- Remove the bolts (3a), (3b) and the charge air water cooler support frame (3c).
INSTALLATION
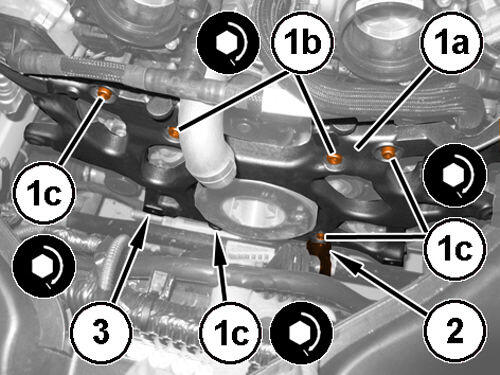
- Install the charge air water cooler support frame (1a) in its housing and tighten the screws (1b), (1c) to the proper specification. Refer to TURBOCHARGER .
- Install the coolant inlet multi-way pipe retaining clip to the radiator in its housing and securely tighten the screw (2).
- Engage the wiring retaining clip (3).
- Connect the quick connector of the coolant pump inlet multi-way pipe to the pressure pump, coolant pump side.
- Install the coolant inlet multi-way pipe to the radiator in its housing and secure the clip.
- Connect the coolant inlet multi-way pipe to the radiator, thermostat side and securely tighten the clamp.
- Install the left charge air water cooler. Refer to COOLER AND HOSES, CHARGE AIR, REMOVAL AND INSTALLATION .
- Install the right charge air water cooler. Refer to COOLER AND HOSES, CHARGE AIR, REMOVAL AND INSTALLATION .