2.0L Removal And Installation: Removal
- Raise and support the vehicle. Refer to HOISTING, STANDARD PROCEDURE .
- Disconnect and isolate the negative battery cable.
- Remove the left and right front wheel and tire assemblies. Refer to REMOVAL AND INSTALLATION .
- Remove the left and right front wheelhouse splash shields front halves. Refer to SHIELD, SPLASH, FRONT WHEELHOUSE, REMOVAL AND INSTALLATION .
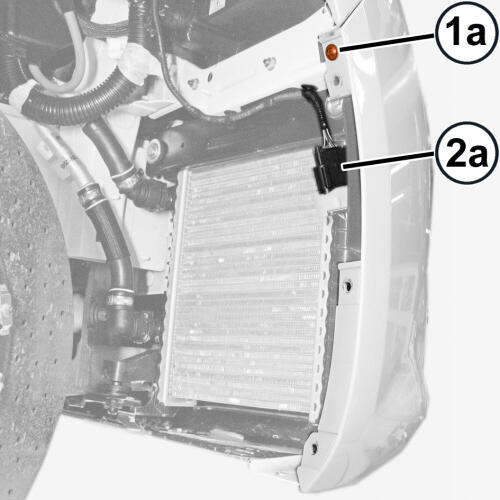
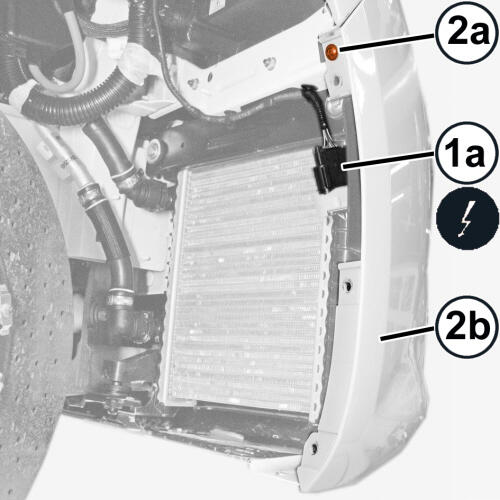
- Working on the right side of the bumper, remove the parking sensors electrical connection (1a) from the slide seat and separate the connector.
- Remove the fascia (2b) retaining screw (2a).
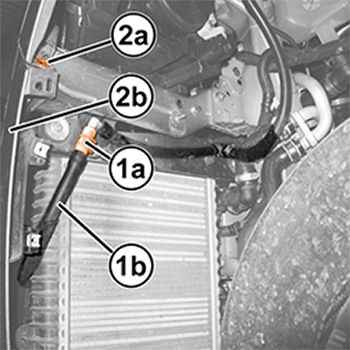
- If equipped, working on the left side of the fascia, disconnect the headlamp washer hose (1b) quick connect coupler (1a).
- Remove the retaining screw (2a) from the fascia (2b).
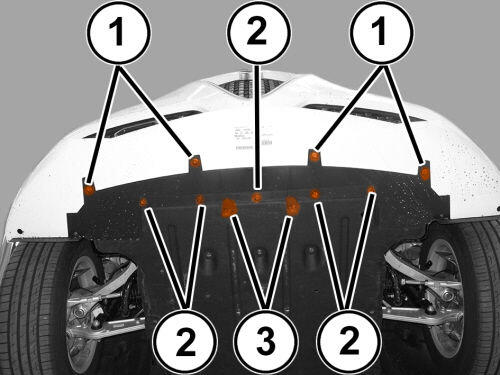
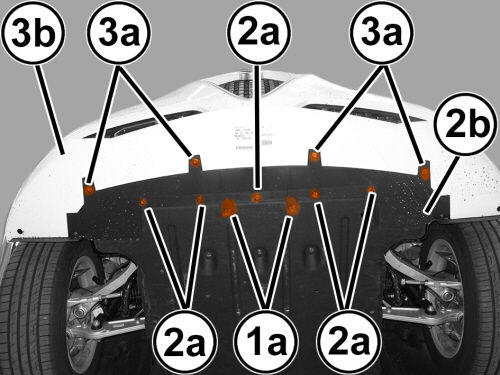
- Remove the mounting screws (1a) and (2a) from the engine belly pan (2b).
- Remove the fascia (3b) lower mounting screws (3a).
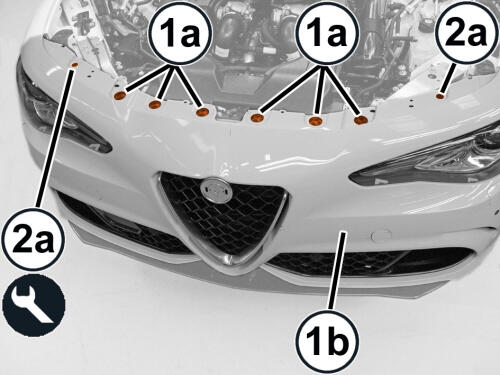
- Remove the upper mounting screws (1a) from the fascia (1b).
- Using the appropriate trim tool, remove the retaining clips (2a).
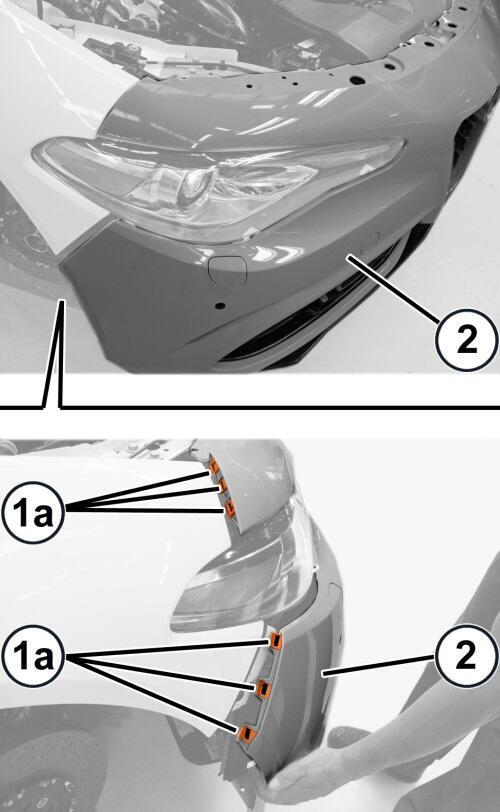
- Release the side retainers (1a) from both sides of the front fascia.
- Remove the front fascia.
INSTALLATION
- Position the fascia in place and secure the side retainers.
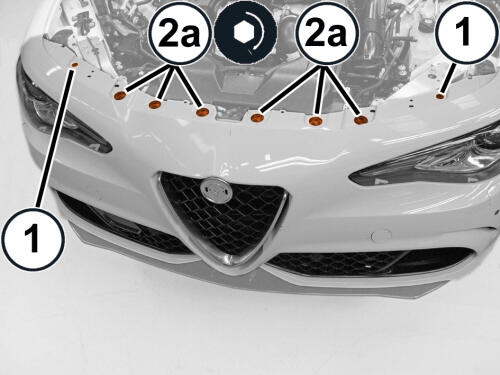
- Install the retaining clips (1).
- Install the fascia mounting screws (2a) and securely to proper specification. Refer to TECHNICAL SPECIFICATIONS .
- Install the lower front fascia mounting screws (1) and tighten securely.
- Install the engine belly pan mounting screws (2) and tighten securely.
- Install the push pin fasteners (3).
- Position the fascia (2b) and securely tighten the screw (2a).
- If equipped, connect the front headlight washer hose (1b) quick coupler (1a).
- Install and securely tighten the screw (1a).
- Connect the parking sensors electrical connection (2a) and secure in the slide seat.
- Install the left and right front wheelhouse splash shields front halves. Refer to SHIELD, SPLASH, FRONT WHEELHOUSE, REMOVAL AND INSTALLATION .
- Install the left and right front wheel and tire assemblies. Refer to REMOVAL AND INSTALLATION .