2.9L Removal And Installation: Removal
- Raise and support the vehicle. Refer to HOISTING, STANDARD PROCEDURE .
- Disconnect and isolate the negative battery cable.
- Remove the left and right side radiator closure side panels. Refer to PANEL, CLOSURE, RADIATOR, CENTER, REMOVAL AND INSTALLATION or PANEL, CLOSURE, RADIATOR, SIDE, REMOVAL AND INSTALLATION .
- Remove the radiator center closure side panel. Refer to PANEL, CLOSURE, RADIATOR, CENTER, REMOVAL AND INSTALLATION or PANEL, CLOSURE, RADIATOR, SIDE, REMOVAL AND INSTALLATION .
- Remove the left and right front wheel and tire assemblies. Refer to REMOVAL AND INSTALLATION .
- Remove the left and right front wheelhouse splash shields front halves. Refer to SHIELD, SPLASH, FRONT WHEELHOUSE, REMOVAL AND INSTALLATION .
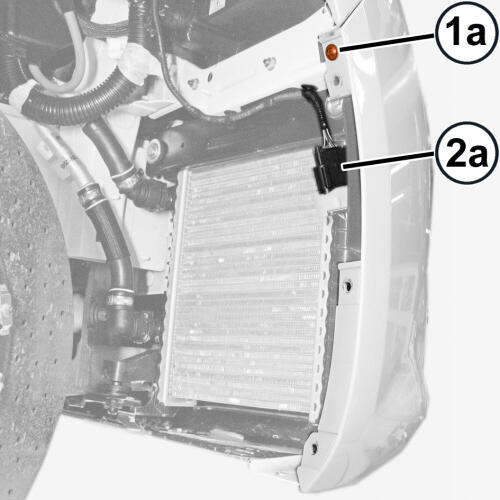
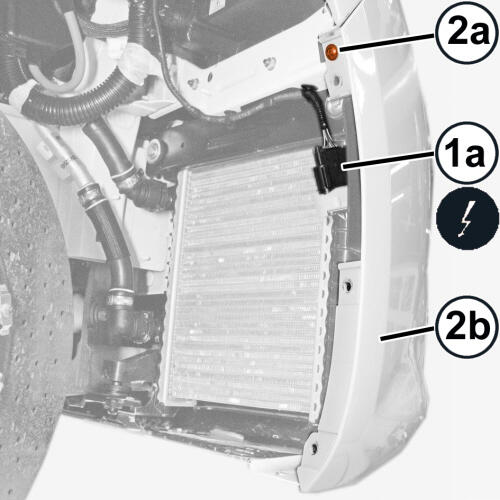
- Working on the right side of the fascia, remove the parking sensors electrical connection (1a) from the slide seat and separate the connector.
- Remove the fascia (2b) retaining screw (2a).
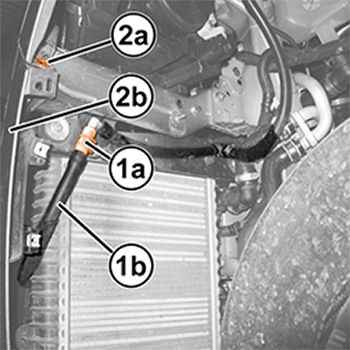
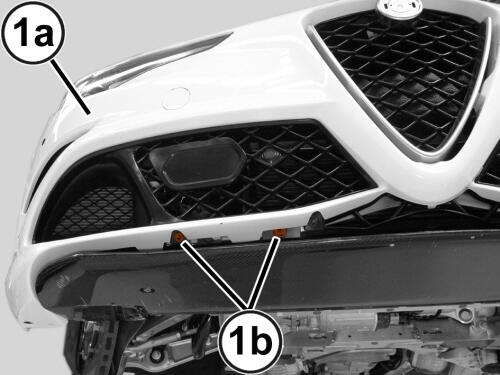
- Working on the left side of the fascia (2b), disconnect the headlight washer hose (1b) quick connector (1a).
- Remove retaining screw (2a) from the fascia (2b).
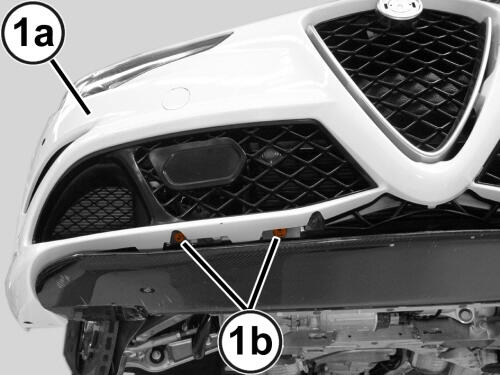
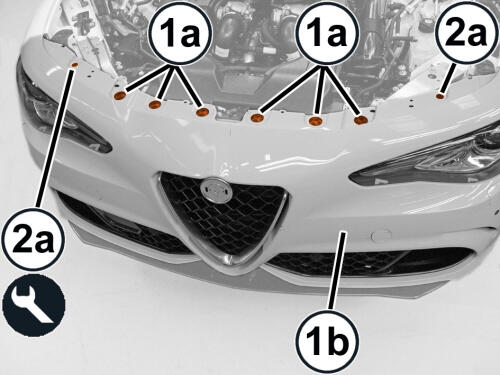
- Working on both sides of the front fascia (1a), remove the lower retaining screws (1b).
- Remove the upper retaining screws (1a) from the fascia (1b).
- Using the appropriate trim tool, remove the retaining clips (2a).
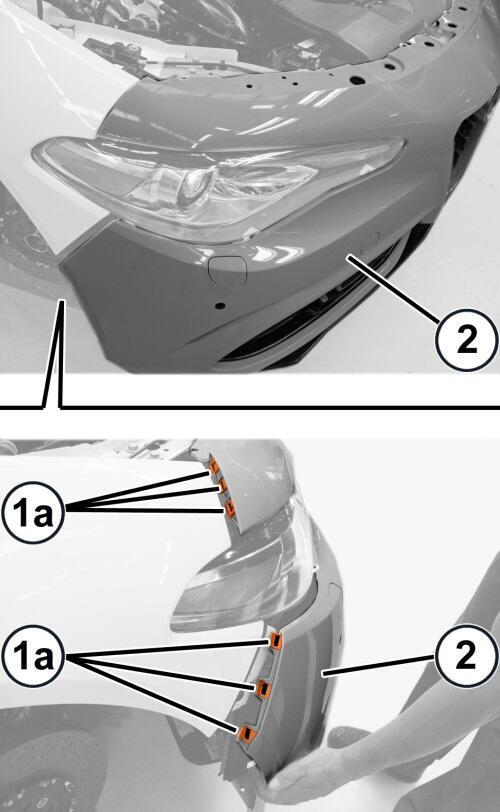
- Release the side retainers (1a) from both sides of the front fascia (2).
- Remove the front fascia (2).
INSTALLATION
- Position the fascia in place and secure the side retainers.
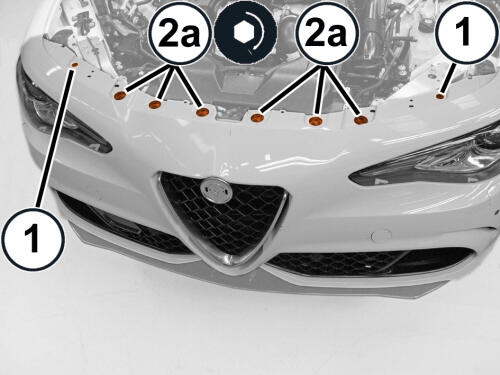
- Install the retaining clips (1).
- Install the fascia retaining screws (2a) and securely tighten.
- Install the lower retaining screws (1b) on both sides of the front fascia (1a).
- Position the front fascia (2b) and securely tighten the screw (2a).
- Connect the front headlight washer hose (1b) quick connect coupler (1a).
- Install and securely tighten the screw (1a).
- Connect the parking sensors electrical connection (2a) and secure in the slide seat.
- Install the left and right front wheelhouse splash shields front halves. Refer to SHIELD, SPLASH, FRONT WHEELHOUSE, REMOVAL AND INSTALLATION .
- Install the left and right front wheel and tire assemblies. Refer to REMOVAL AND INSTALLATION .
- Install the radiator center closure side panel. Refer to PANEL, CLOSURE, RADIATOR, CENTER, REMOVAL AND INSTALLATION or PANEL, CLOSURE, RADIATOR, SIDE, REMOVAL AND INSTALLATION .
- Install the left and right side radiator closure side panels side covers. Refer to PANEL, CLOSURE, RADIATOR, CENTER, REMOVAL AND INSTALLATION or PANEL, CLOSURE, RADIATOR, SIDE, REMOVAL AND INSTALLATION .
- After installing and adjusting the front fascia, use the diagnostic scan tool to perform the active aerodynamic system self-learning procedure. The system will stop with the air dam in the raised position, then check the distance between the air dam and the front fascia using the appropriate gauges. If the result is negative, check for foreign bodies between the air dam and the fixed parts, check for any actuator errors, adjust the actuator position values, fix the faults and clear any errors. Repeat the self-learning procedure and the check between the air dam and front fascia. If the distance is still out of specification, the fascia must be adjusted again.