2.9L Removal And Installation: Removal
- Raise and support the vehicle. Refer to HOISTING, STANDARD PROCEDURE .
- Disconnect and isolate the negative battery cable.
- Remove the left and right tire and wheel assembly. Refer to REMOVAL AND INSTALLATION .
- Remove the left and right outer tail lamps. Refer to LAMP, TAIL, REMOVAL AND INSTALLATION .
- Work on both sides of the vehicle.
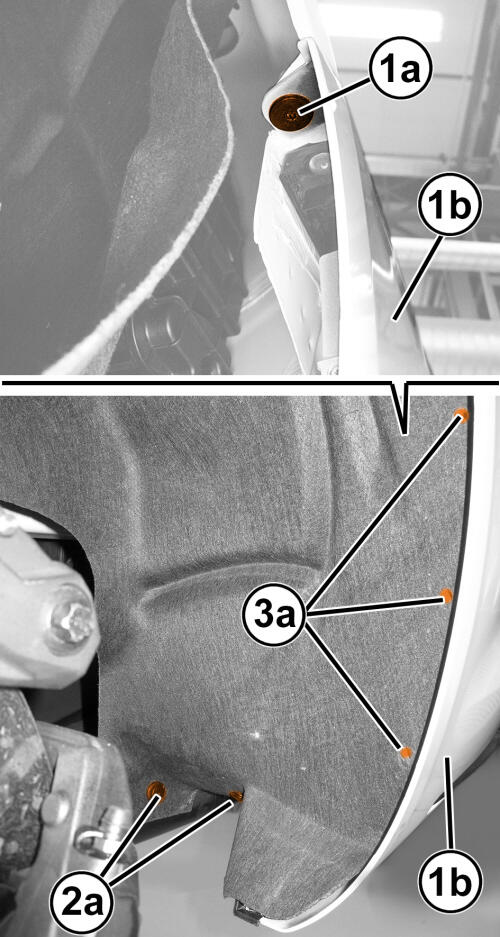
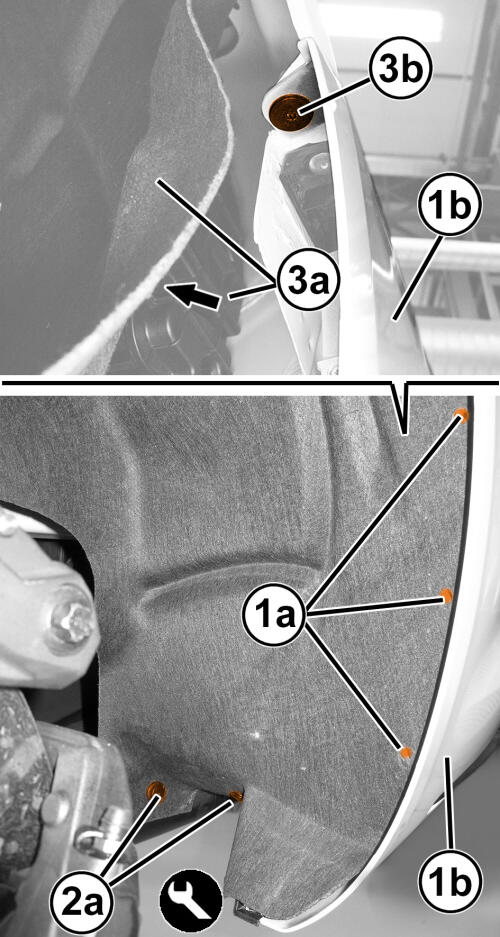
- Remove the retaining screws (1a) securing the wheelhouse splash shield to the rear fascia (1b).
- Remove the retaining clips (2a).
- Position aside the edge (3a) of the wheelhouse splash shield and remove the side screw (3b) retaining the rear fascia (1b) to the body.
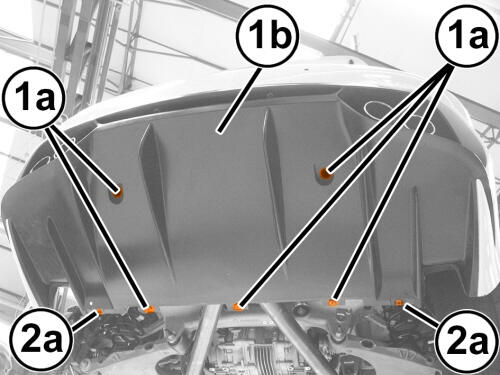
- If equipped, remove the retaining screws (1a) securing the bottom side covers to the rear fascia (1b).
- Remove the lower fascia retaining screws (2a).
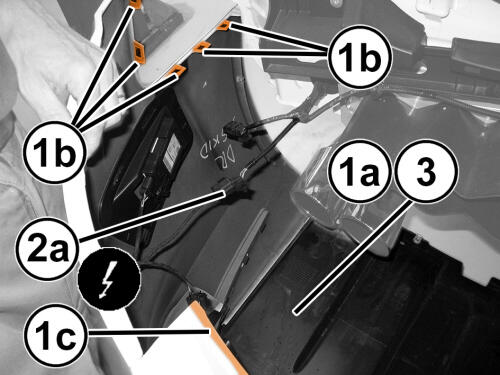
- Release the rear fascia (1a), release the side retainers (1b) and middle strip (1c).
- Release the retainers and disconnect the electrical connection (2a) of the rear bumper wiring.
- Remove the rear fascia.
INSTALLATION
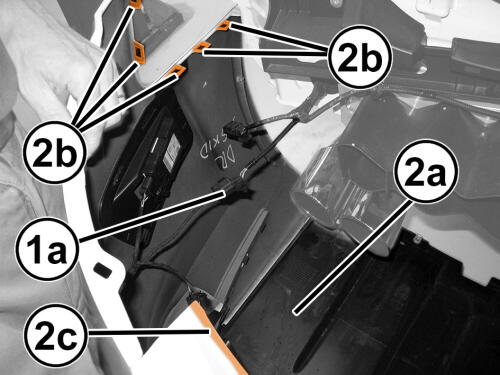
- Connect the electrical connection (1a) of the rear fascia wiring and secure the retainers.
- Position the rear fascia (2a) in place, secure the side retainers (2b) and the middle strip (2c).
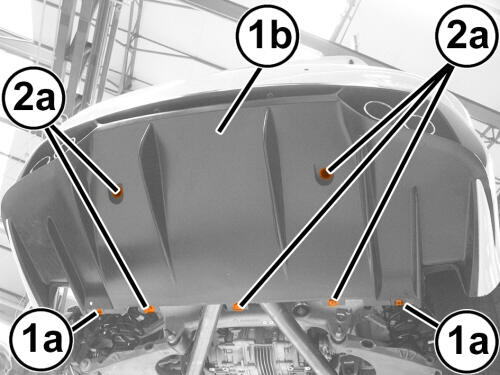
- Install the lower retaining screws (1a) of the fascia (1b).
- If equipped, install the bottom side covers retaining screws (2a). Securely tighten the screws.
- Install the retaining side screws (1a) securing the rear fascia (1b) to the body. Securely tighten the screws.
- Install the retaining clips (2a) of the wheelhouse splash shield.
- Install the retaining screws (3a) securing the wheelhouse splash shield to the rear fascia (1b). Securely tighten the screws.
- Install the left and right outer tail lamps. Refer to LAMP, TAIL, REMOVAL AND INSTALLATION .
- Install the left and right tire and wheel assemblies. Refer to REMOVAL AND INSTALLATION .
- Connect the negative battery cable.