Drive Shaft 2.0L
REMOVAL
- Raise and support the vehicle. Refer to HOISTING, STANDARD PROCEDURE .
- Remove the rear exhaust. Refer to MUFFLER, EXHAUST, REMOVAL AND INSTALLATION .
- Remove the heat shield. Refer to SHIELD, HEAT, REMOVAL AND INSTALLATION .
- Index mark the rear drive shaft to flange for installation purposes.
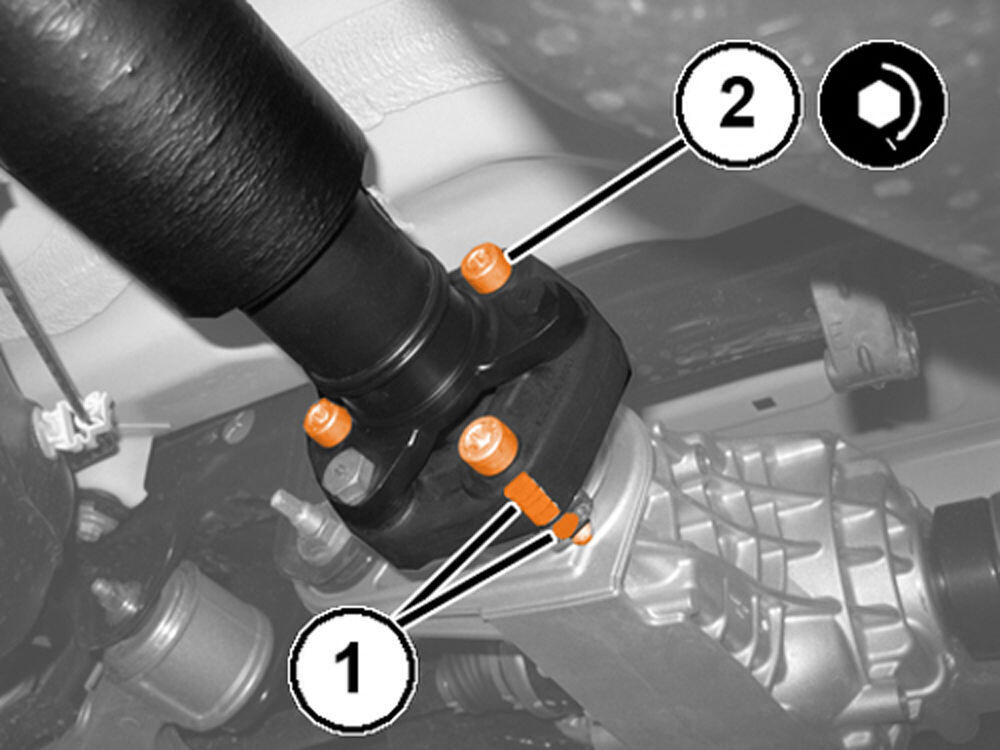
- Index mark the front drive shaft to transfer case flange for installation purposes.
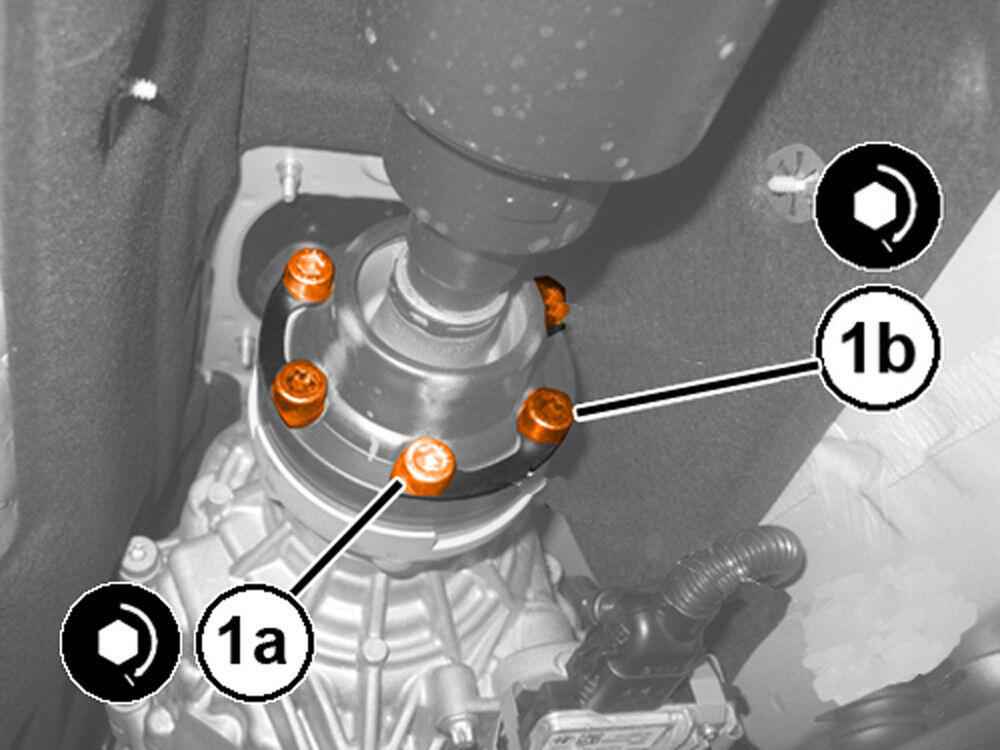
- Remove and DISCARD
the front drive shaft bolts (1a) and shims (1b).
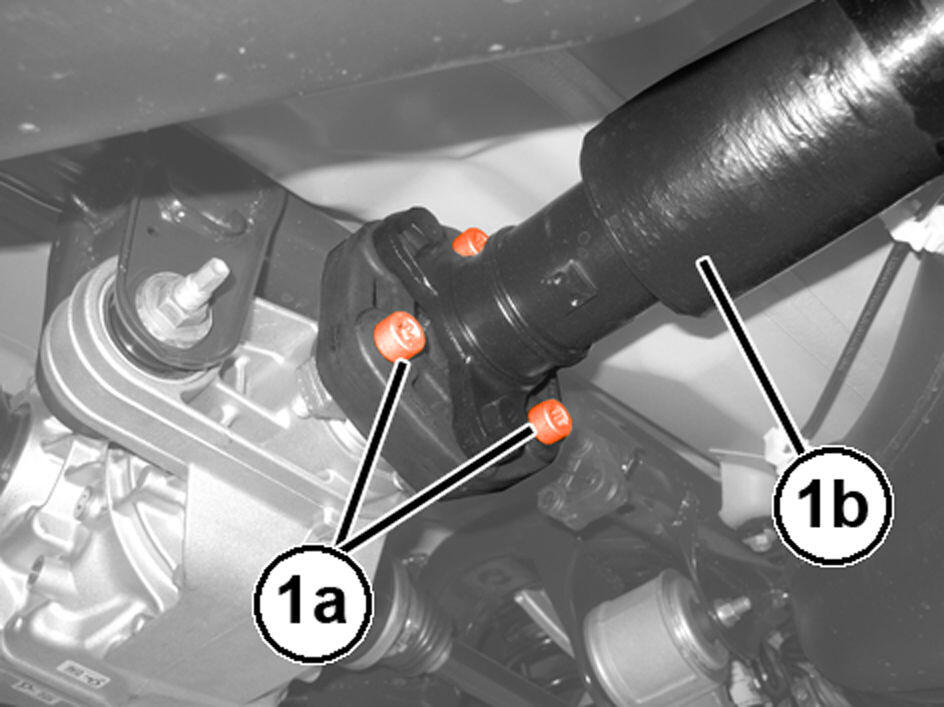
- Remove and DISCARD
the rear drive shaft bolts (1a) and remove the drive shaft (1b) from the vehicle.
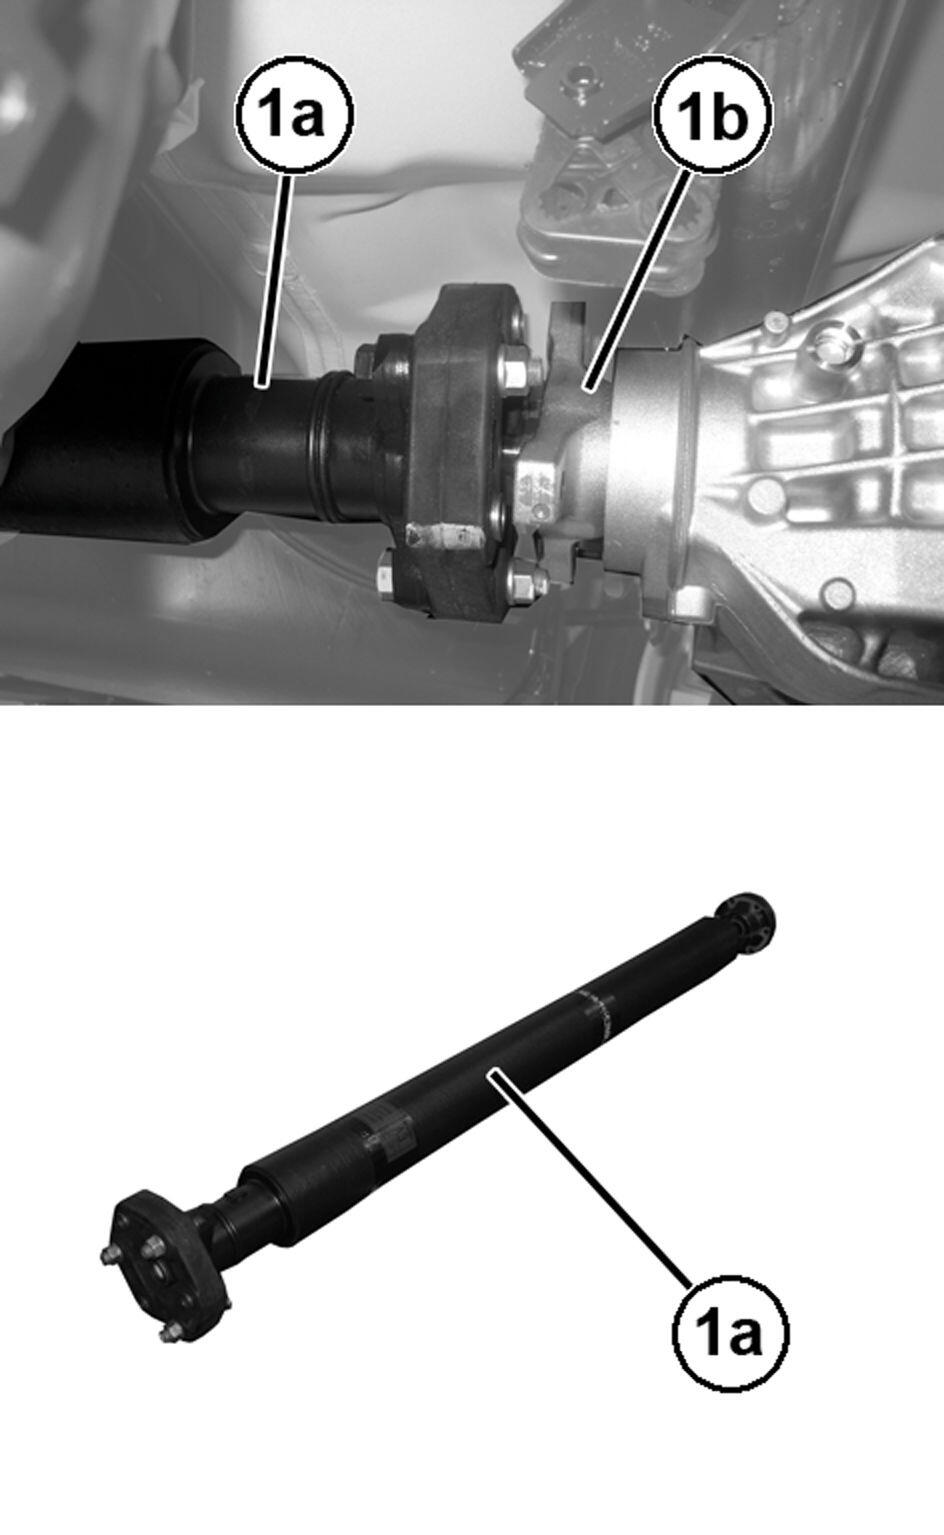
- Inspect the drive shaft (1a) for damage, replace as necessary.
- Inspect the transmission flange and the rear axle flange (1b) for damage and replace as necessary.
INSTALLATION
- Align the index marks made during removal and position the drive shaft in place.
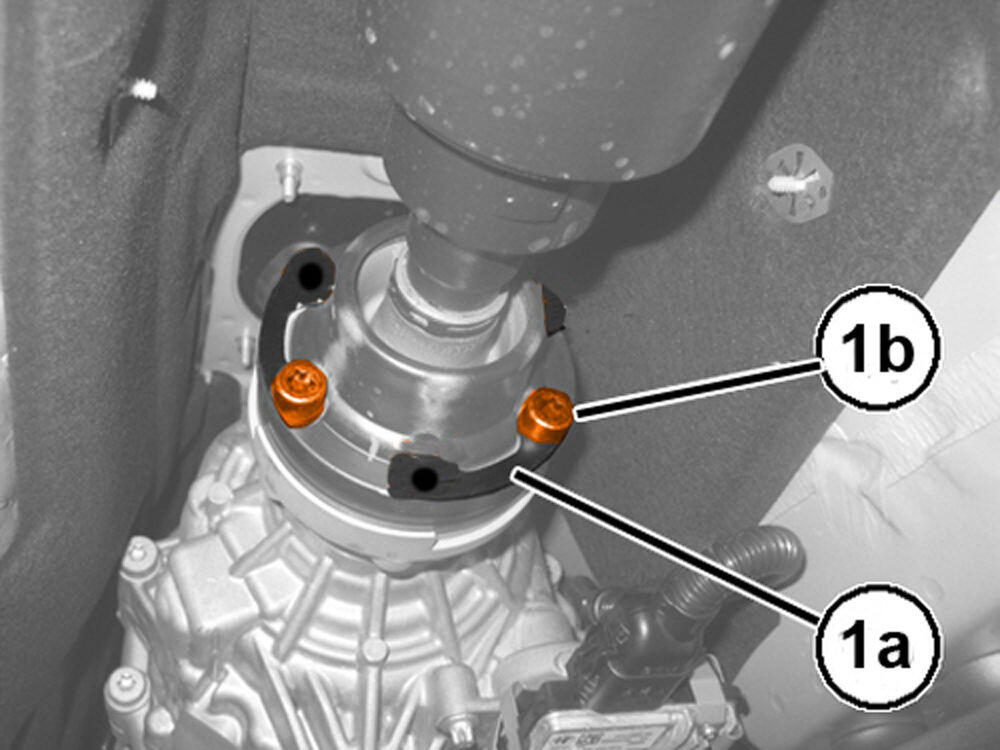
- Install the NEW
front drive shaft shims (1a), NEW
Torx bolts (1b) and tighten to 10 Nm (89 in lbs).
- Align the index marks (1) made during removal and position the drive shaft in place.
- Install the NEW
rear drive shaft bolts (2) and tighten to the proper specification. Refer to TECHNICAL SPECIFICATIONS .
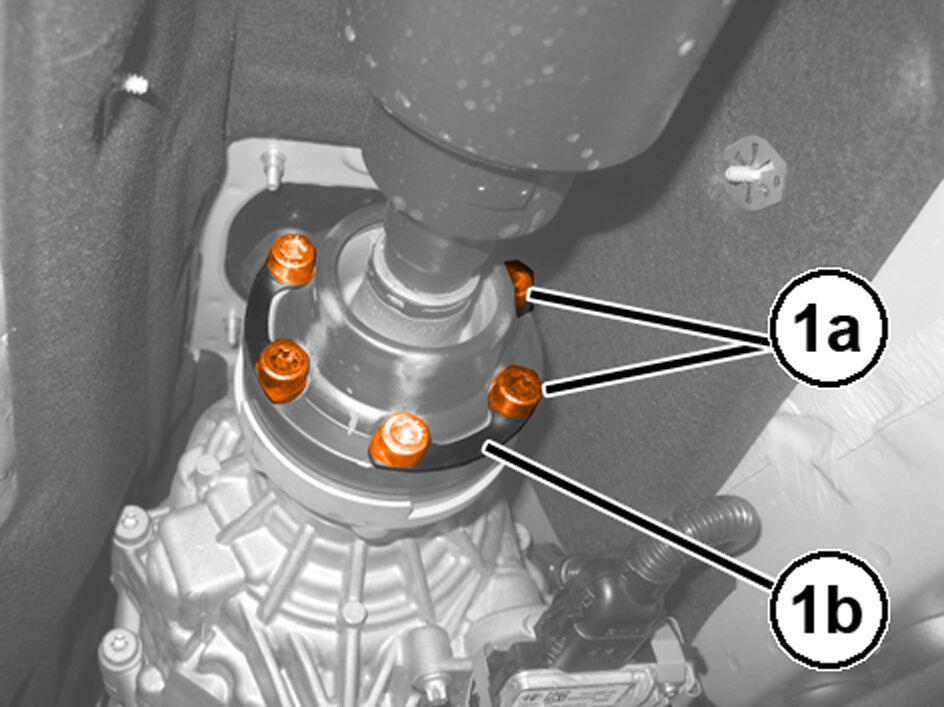
- Install the NEW allen bolts (1a) and tighten to the proper specification. Refer to TECHNICAL SPECIFICATIONS .
- Tighten the torx bolts (1b) previously pre-loaded, to the proper
Refer to TECHNICAL SPECIFICATIONS .
- Install the heat shield. Refer to SHIELD, HEAT, REMOVAL AND INSTALLATION .
- Install the rear exhaust. Refer to MUFFLER, EXHAUST, REMOVAL AND INSTALLATION .
- Remove the support and lower the vehicle.