Right Side
WARNING: This page is about a different variant/trim than selected.
REMOVAL
- Disconnect and isolate the negative battery cable.
- Remove the back half of the right front wheelhouse splash shield. Refer to SHIELD, SPLASH, FRONT WHEELHOUSE, REMOVAL AND INSTALLATION .
- Remove the belly pan. Refer to BELLY PAN, ENGINE, REMOVAL AND INSTALLATION or BELLY PAN, REAR, REMOVAL AND INSTALLATION or BELLY PAN, REAR SUSPENSION, REMOVAL AND INSTALLATION or BELLY PAN, SIDE, REMOVAL AND INSTALLATION .
- Remove the air cleaner body. Refer to BODY, AIR CLEANER, REMOVAL AND INSTALLATION
.
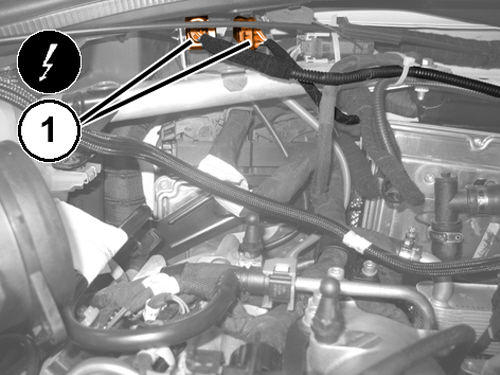
- Disconnect the front and rear oxygen sensors wire harness connectors (1).
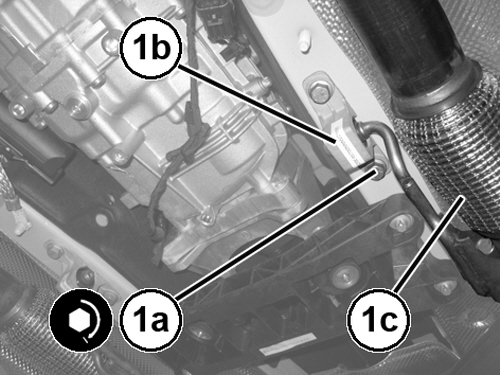
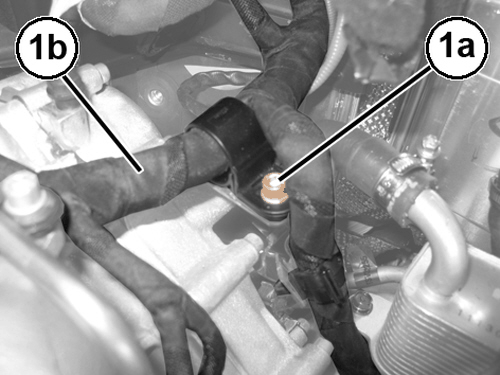
- Remove the bolt (1a) and position aside the engine wire harness (1b).
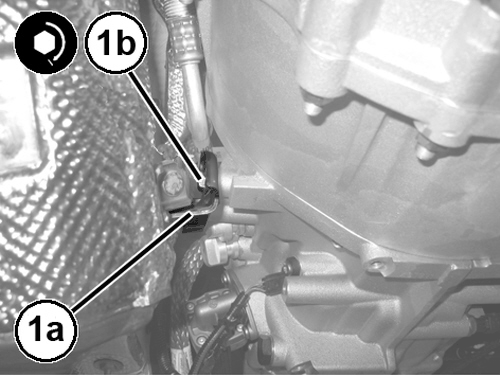
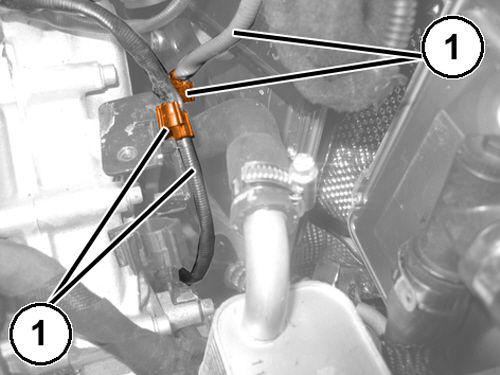
- Open the clips (1) and release the oxygen sensor wires.
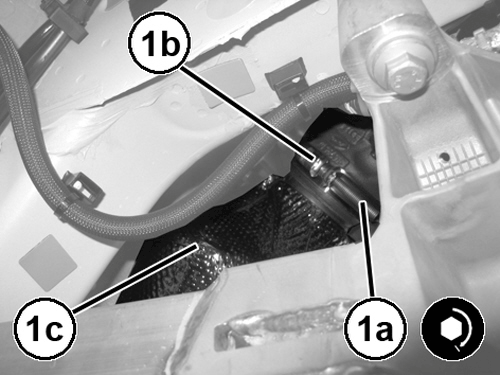
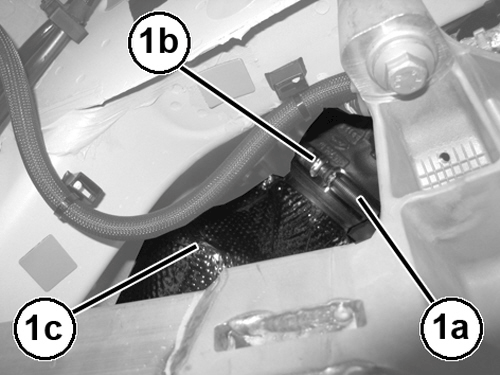
- Loosen the bolt (1a) and the collar (1b) securing the catalytic converter collar (1c) to the turbocharger.
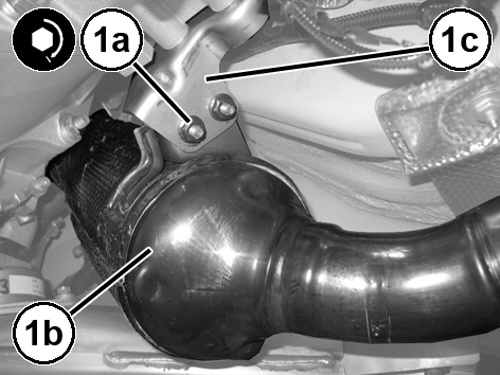
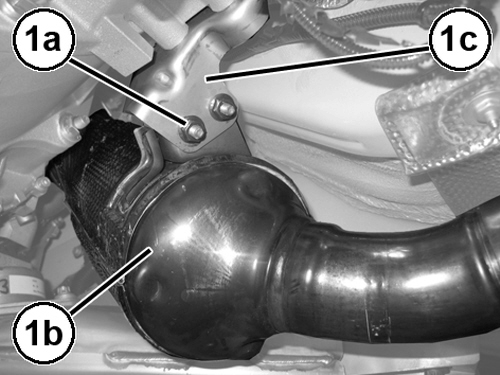
- Remove the catalytic converter (1b) nuts (1a) from bracket (1c).
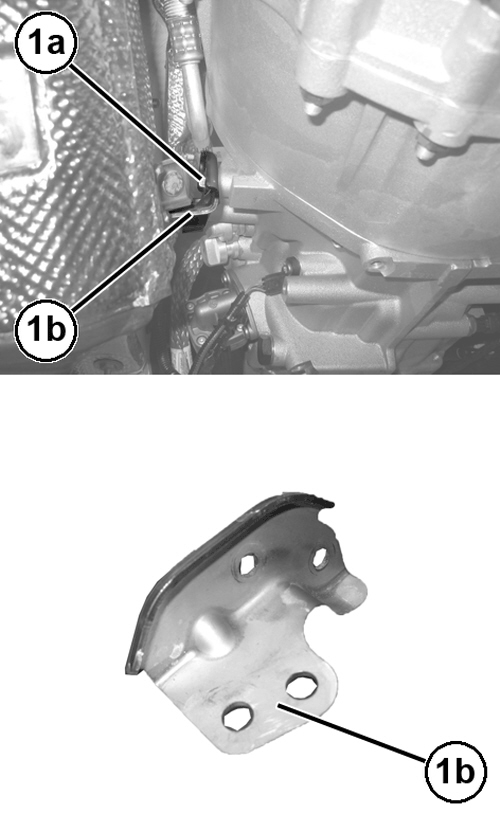
- Remove the bolts (1a) and the catalytic converter support bracket (1b).NOTE:
Adequately protect the flex joint because excessive bending could cause it to break.
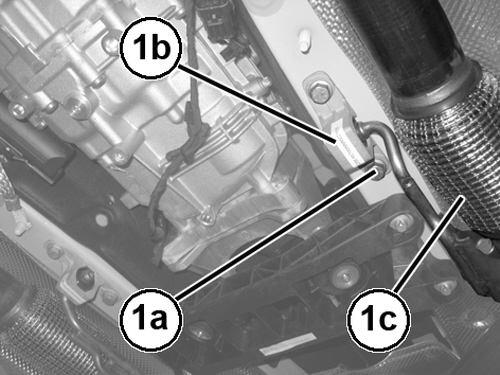
- Remove the exhaust pipe (1c) isolator mount (1b) two bolts (1a).
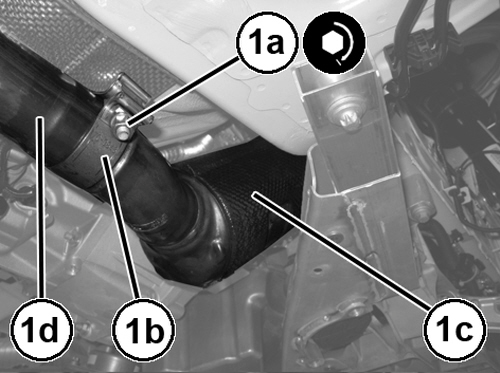
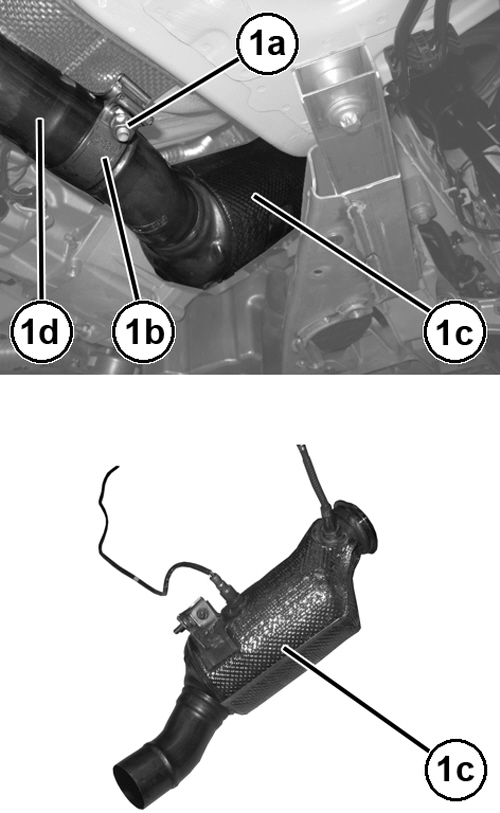
- Loosen the nut (1a), the collar (1b) and remove the right catalytic converter (1c) from the exhaust pipe (1d).
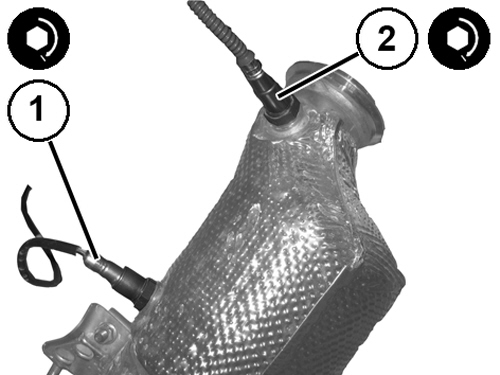
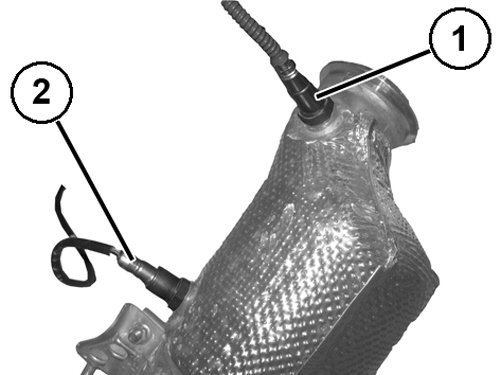
- Remove the front oxygen sensor (1) from the catalytic converter.
- Remove the rear oxygen sensor (2) from the catalytic converter.
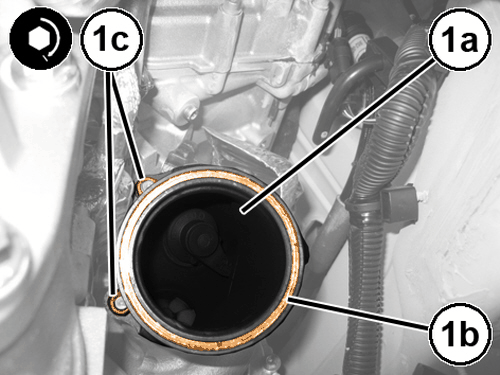
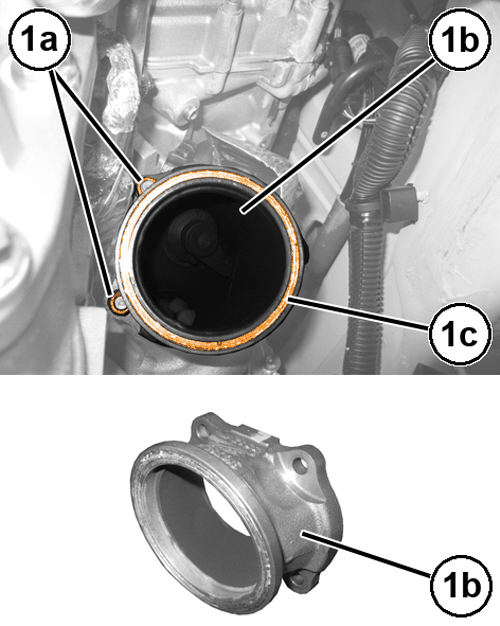
- Remove the nuts (1a) and the connector (1b) complete with seal (1c).
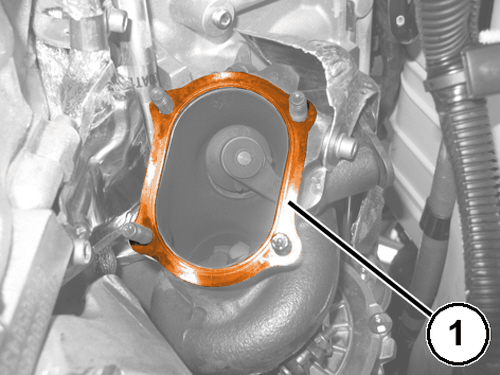
- Remove the gasket (1) from the studs of the turbocharger.
INSTALLATION
- Install a NEW
gasket onto the studs of the turbocharger.
- Using a NEW
seal (1b), install the connector (1a) and NEW
nuts (1c), tighten to the proper specification. Refer to TORQUE SPECIFICATIONS
.
- Install the rear oxygen sensor (1) and tighten it to the proper specification. Refer to TORQUE SPECIFICATIONS .
- Install the front oxygen sensor (2) and tighten to the proper specification. Refer to TORQUE SPECIFICATIONS
.
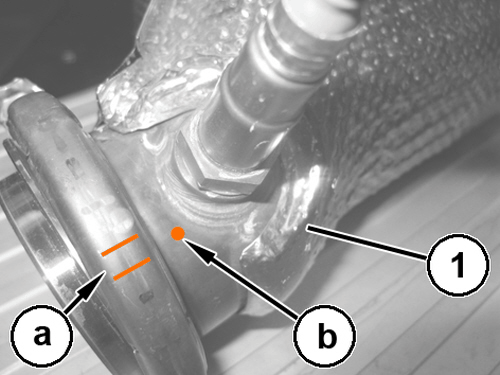
- Install the catalytic converter in its housing and orient the collar by making the markings "a" with the weld spot "b" on the catalytic converter.
- Tighten the bolt of the collar finger tight.
- Tighten the exhaust pipe (1d) clamp nut (1a) support collar (1b) for to the catalytic converter (1c) to the proper specification. Refer to TORQUE SPECIFICATIONS
.
- Tighten the exhaust pipe (1c) isolator mounts (1b) bolts (1a) to the proper specification. Refer to TORQUE SPECIFICATIONS
.
- Install the catalytic converter support bracket (1a) and tighten the bolts (1b) to the proper specification. Refer to TORQUE SPECIFICATIONS
.
- Install the catalytic converter (1b) bracket (1c) nuts (1a) and tighten to the proper specification. Refer to TORQUE SPECIFICATIONS
.
- Tighten the catalytic converter (1c) to the turbocharger collar (1b) nut (1a) to the proper specification. Refer to TORQUE SPECIFICATIONS .
- Engage the oxygen sensors wires and close the clips.
- Position the engine wire harness and securely tighten the bolt.
- Connect the front and rear oxygen sensors wire harness connector.
- Install the air cleaner body. Refer to BODY, AIR CLEANER, REMOVAL AND INSTALLATION .
- Install the belly pan. Refer to BELLY PAN, ENGINE, REMOVAL AND INSTALLATION or BELLY PAN, REAR, REMOVAL AND INSTALLATION or BELLY PAN, REAR SUSPENSION, REMOVAL AND INSTALLATION or BELLY PAN, SIDE, REMOVAL AND INSTALLATION .
- Install the back half of the right front wheelhouse splash shield. Refer to SHIELD, SPLASH, FRONT WHEELHOUSE, REMOVAL AND INSTALLATION .
- Connect the negative battery cable.