Catalytic Converter
REMOVAL
- Remove the left front wheelhouse splash shield. Refer to SHIELD, SPLASH, FRONT WHEELHOUSE, REMOVAL AND INSTALLATION .
- Remove the exhaust pipe. Refer to PIPE, EXHAUST, REMOVAL AND INSTALLATION .
- Drain the engine cooling system. Refer to DRAINING AND FILLING THE ENGINE COOLING SYSTEM .
- Remove the catalytic converter heat shield. Refer to CONVERTER, CATALYTIC, REMOVAL AND INSTALLATION .
- Remove the left engine box reinforcement brace. Refer to BRACE, ENGINE BOX REINFORCEMENT, REMOVAL AND INSTALLATION
.
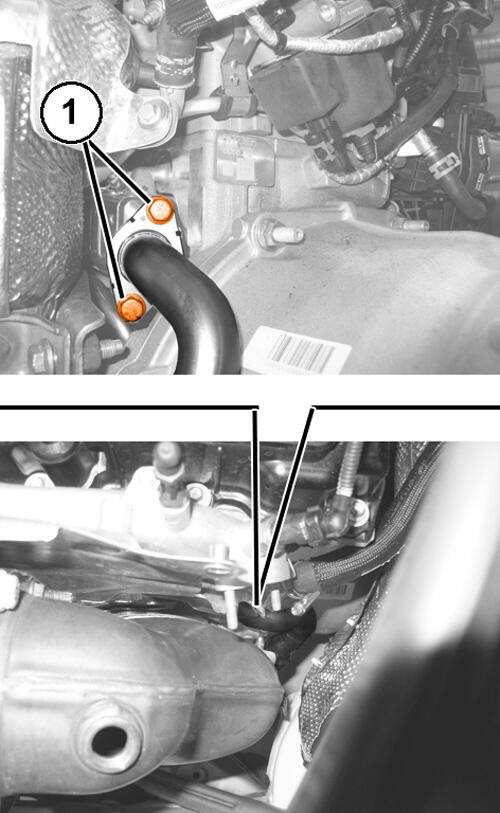
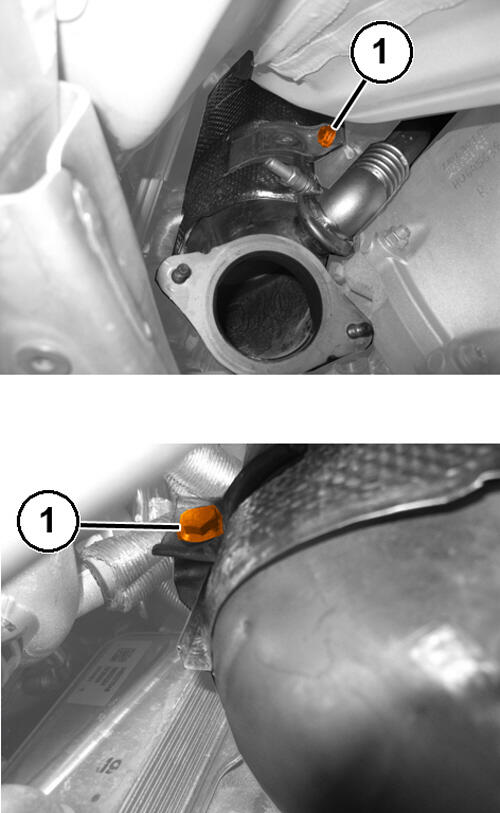
- Remove the bolts (1) securing the low pressure EGR pipe to the exhaust gas heat exchanger.
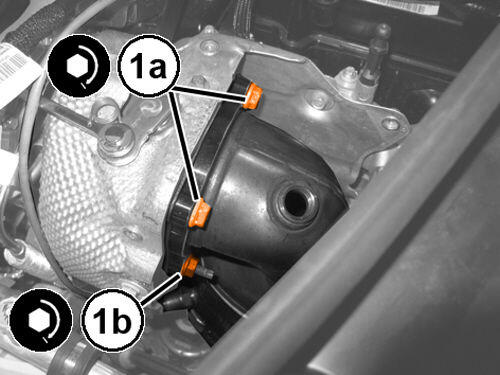
- Remove and discard the bolts (1a) and the nuts (1b) securing the catalytic converter to the turbocharger.NOTE:
Avoid bending the heatshield when removing the bolts securing the catalytic converter to the mounting bracket.
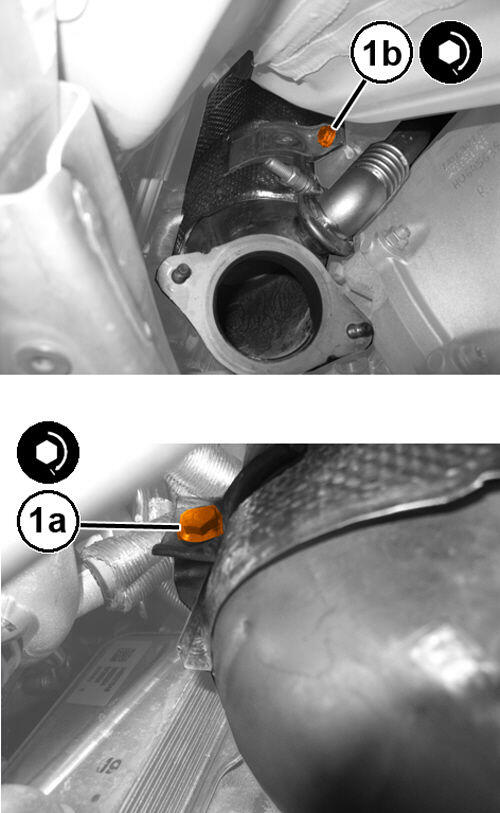
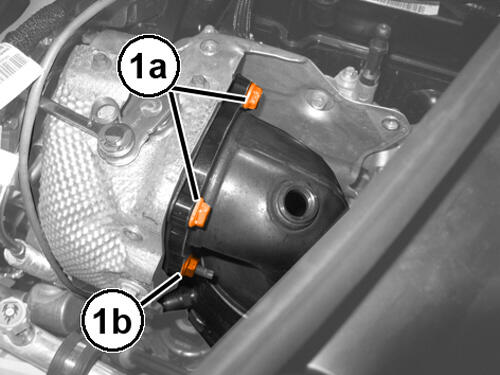
- Remove the bolts (1) securing the catalytic converter to the mounting bracket.
- Remove the catalytic converter from the turbocharger and position it on the suspension crossmember.
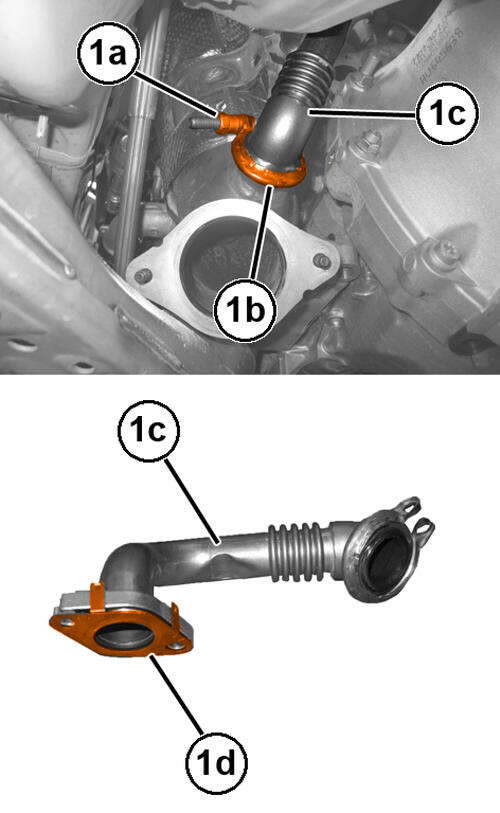
- Loosen the nut (1a), loosen the collar (1b) and remove the low pressure EGR pipe (1c) from the catalytic converter, complete with seal (1d).
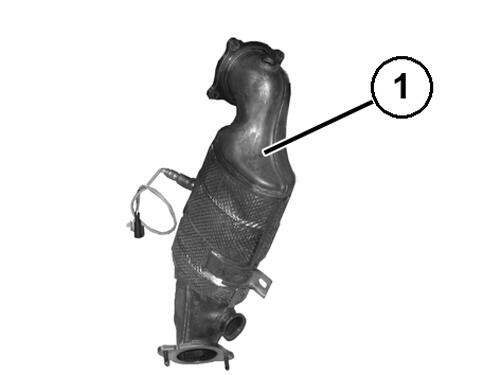
- Remove the catalytic converter (1) from the engine compartment.
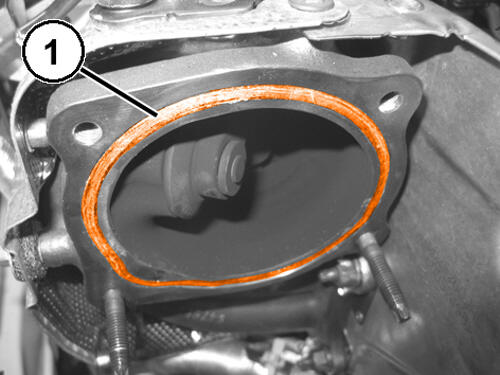
- Remove and discard the gasket (1) from the turbocharger.
INSTALLATION
- Install a NEW gasket on the turbocharger.
- Install the catalytic converter in position.
- Install the low pressure EGR pipe (1c) complete with NEW
seal (1d) to the catalytic converter and engage the collar (1b) to the catalytic converter.
- Install the catalytic converter to the turbocharger with NEW bolts (1a) and NEW nuts (1b) and tighten finger tight.
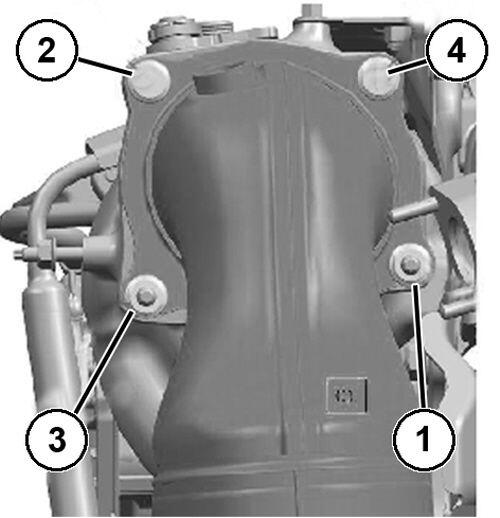
- Pre-tighten the bolts and nuts in the sequence shown in illustration to 16 N.m (12 Ft. Lbs.).
- Install the catalytic converter to mounting bracket bolt (1a) and pre-tighten to 10 N.m (7 Ft. Lbs.).
- Install the catalytic converter to mounting bracket bolt (1b) and pre-tighten to 10 N.m (7 Ft. Lbs.).
- Tighten the bolts and nuts in the sequence shown in illustration to the proper specification.. Refer to TORQUE SPECIFICATIONS
.
- Tighten the catalytic converter to mounting bracket bolts (1a) and (1b) to the proper specification.. Refer to TORQUE SPECIFICATIONS
.
- Securely tighten the low pressure EGR pipe bolts (1) to the exhaust gas heat exchanger.
- Tighten the low pressure EGR pipe collar nut at the catalytic converter.
- Install the engine box reinforcement brace. Refer to BRACE, ENGINE BOX REINFORCEMENT, REMOVAL AND INSTALLATION .
- Install the catalytic converter heat shield. Refer to CONVERTER, CATALYTIC, REMOVAL AND INSTALLATION .
- Fill the engine cooling system. Refer to DRAINING AND FILLING THE ENGINE COOLING SYSTEM .
- Install the exhaust pipe. Refer to PIPE, EXHAUST, REMOVAL AND INSTALLATION .
- Install the left front wheelhouse splash shield. Refer to SHIELD, SPLASH, FRONT WHEELHOUSE, REMOVAL AND INSTALLATION .
- Remove the support and lower the vehicle.