Removal And Installation
REMOVAL
multimedia:A supplement to the article is available.
NOTE:
If the fuel rail or the injectors are replaced, connect the diagnostic scan tool to the vehicle, go to Powertrain Control Module (PCM) in the "Miscellaneous functions" menu and start the following procedures: fuel feed system component replacement; adaptive parameter reset.
- Disconnect and isolate the negative battery cable.
- Remove and discard the high pressure fuel pipe. Refer to LINES, FUEL, REMOVAL AND INSTALLATION .
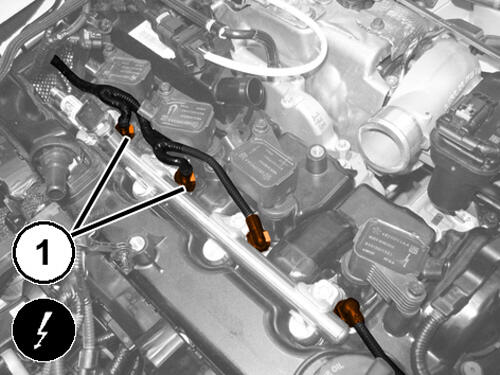
- Disconnect the wire harness connections (1) from the fuel injectors.
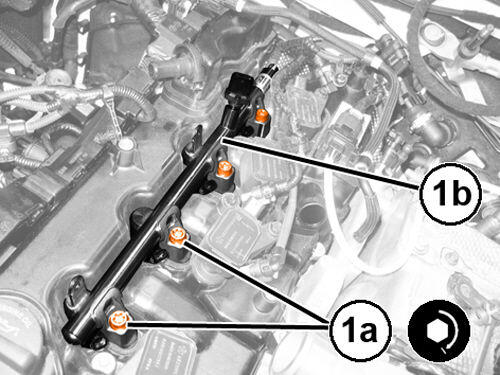
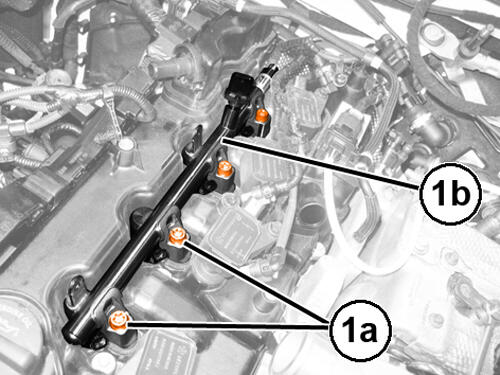
- Remove the bolts (1a) securing the fuel rail (1b) to the cylinder head.
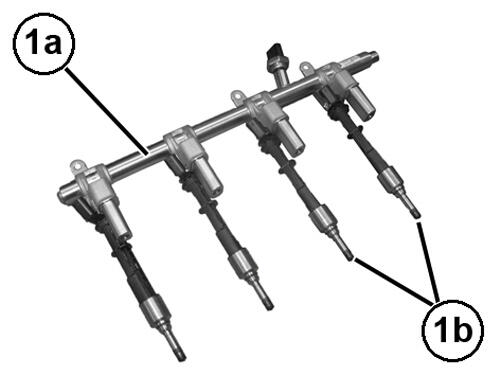
- Using the (special tool #2044500140, Remover, Fuel Rail), remove the fuel rail (1a) and injectors (1b).
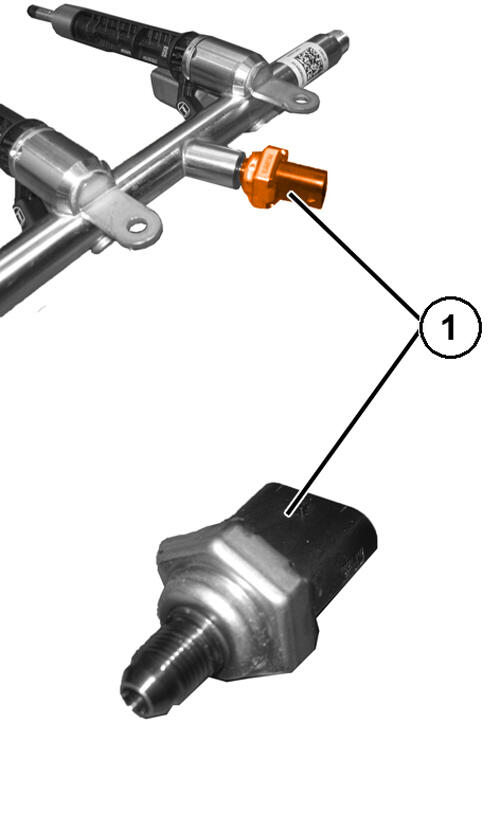
- If required, remove the fuel pressure sensor (1).
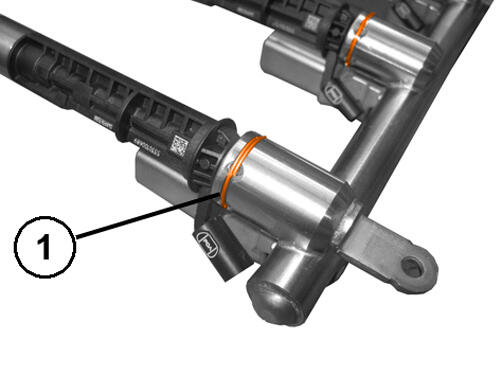
- Remove the injector fastening pin retaining clips (1).
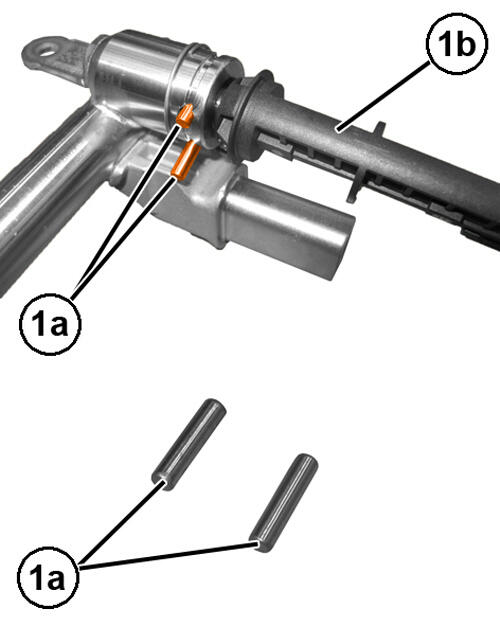
- Remove the injector (1b) fastening pins (1a).
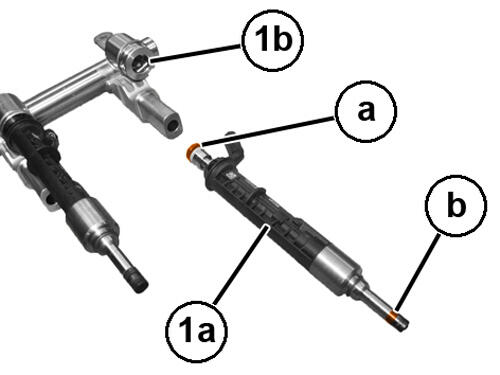
- Remove the fuel injector (1a) from the fuel rail (1b).NOTE:
The O-rings (a) and injector seal (b) must be replaced once they have been removed. The O-rings and injector seals should never be reused.
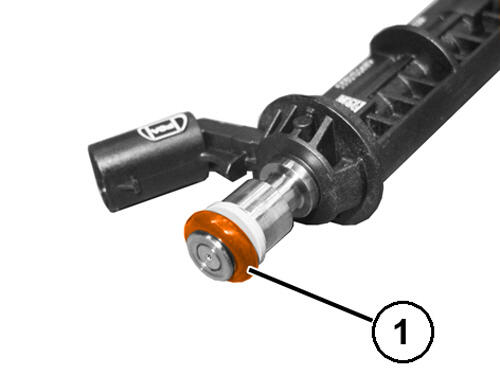
- Remove the O-rings (1) from the injectors.
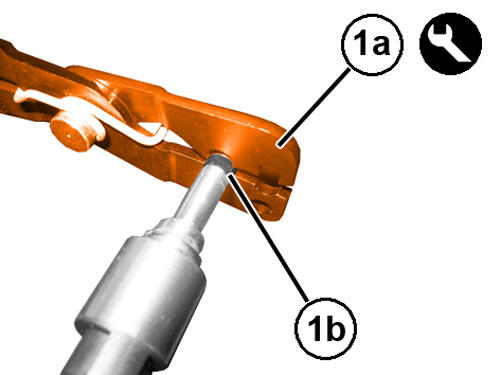
- With the (special tool #2025505140, Pliers, Injector Seal Removal) (1a) partially remove the injector seal (1b).
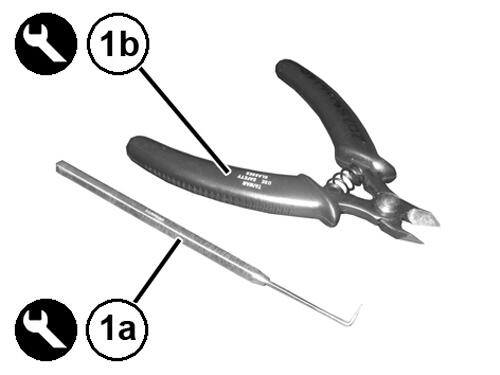
- Finish removing the injector seal using the (special tool #2025504140, Pick, Injector Seal 90 Degree) (1a) and the (special tool #2025506140, Pliers, Injector Seal Side Cutter) (1b).
- Repeat for all of the other injectors.
INSTALLATION
multimedia:A supplement to the article is available.
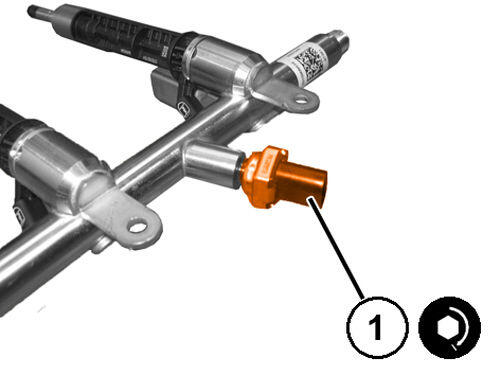
- Lubricate the threads of the fuel rail pressure sensor (1) with a medium hydraulic oil Mobil DTE-25 or equivalent.
- Install the engine fuel pressure sensor and tighten it the proper specification. Refer to TORQUE SPECIFICATIONS .
- Install the NEW O-rings on each injector.
- Install the NEW
injector seals on each injector, using the (special tool #2025500140, Kit, Fuel Injector) as described below.
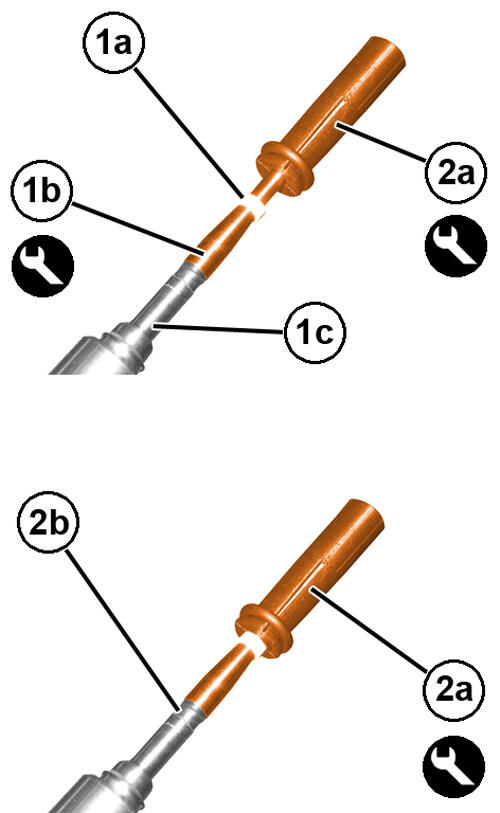
- Insert the injector seal (1a) on the (special tool #2025501141, Cone, Injector Seal Installer 70mm) (1b) mounted on the injector (1c).
- Using the (special tool #2025502140, Installer, Injector Seal to Cone) (2a), slide the injector seal into the recess on the fuel injector (2b).
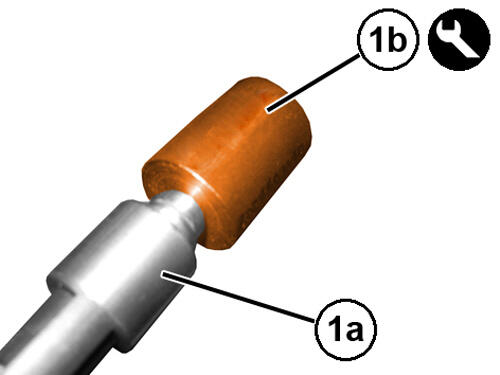
- Check that the injector seal is correctly fitted onto the injector (1a) with the (special tool #2025503140, Tool, Injector Seal Calibration) (1b). The tool has to install and remove freely without catching on the injector seal edge.
- Lightly lubricate new O-ring seals with engine oil, install the injectors in the fuel rail, insert the fastening pins and engage the respective retaining clips.
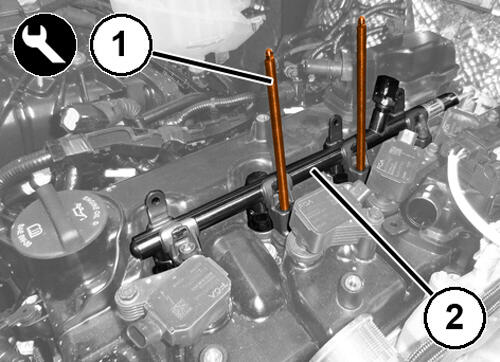
- Install and hand tighten the (special tool #2044400140, Guide, Fuel Rail Installer) (1) onto the cylinder head.
- Lightly lubricate new O-ring seals with engine oil, using the fuel rail guides, install the fuel rail (2) and injectors.
- Tighten the bolts (1a) securing the fuel rail (1b) to the cylinder head, to the proper specification. Refer to TORQUE SPECIFICATIONS .
- Connect the wire harness connections to the injectors and engage the wiring.
- Install the NEW high pressure fuel pipe. Refer to LINES, FUEL, REMOVAL AND INSTALLATION .
- Connect the negative battery cable.
- Check the high pressure fuel system for leaks. Refer to DIAGNOSIS AND TESTING .