Removal And Installation
8HP50/850RE
REMOVAL
- Raise and support the vehicle. Refer to HOISTING, STANDARD PROCEDURE .
- Remove the engine belly pan. Refer to BELLY PAN, ENGINE, REMOVAL AND INSTALLATION .
- Remove the transmission belly pan. Refer to BELLY PAN, ENGINE, REMOVAL AND INSTALLATION or BELLY PAN, REAR, REMOVAL AND INSTALLATION or BELLY PAN, REAR SUSPENSION, REMOVAL AND INSTALLATION or BELLY PAN, SIDE, REMOVAL AND INSTALLATION .
- Remove the RH and LH catalytic converters. Refer to CONVERTER, CATALYTIC, REMOVAL AND INSTALLATION
.
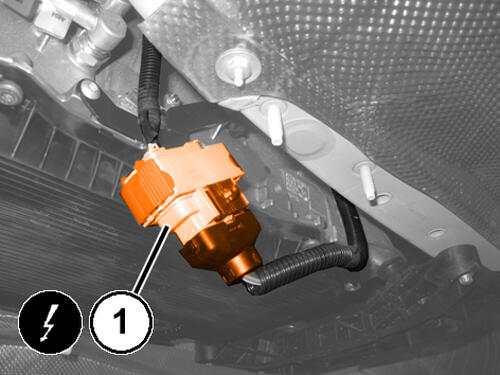
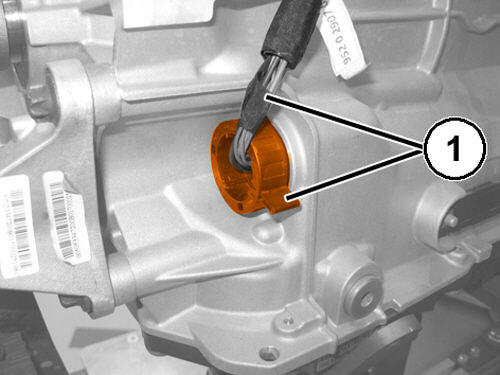
- Disconnect the transmission wiring harness connector (1).
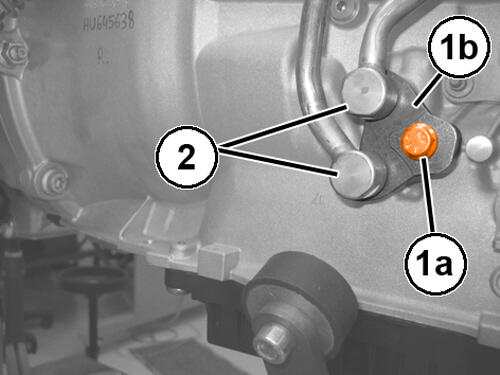
- Remove the transmission fluid cooler tube bracket bolt (1a), from the fluid cooler bracket (1b) and remove the transmission cooler tubes (2) from the transmission.
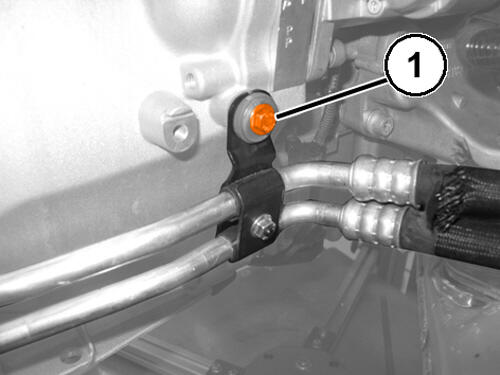
- Remove the transmission fluid cooler tube bracket bolt (1).
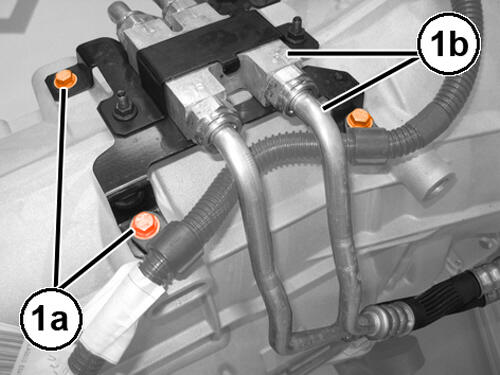
- Remove the thermal by-pass valve bracket bolts (1a).
- Support the transmission with a suitable jack.NOTE:
For Rear Wheel Drive (RWD) vehicles.
- Remove the transmission crossmember. Refer to CROSSMEMBER, TRANSMISSION, REMOVAL AND INSTALLATION .
- Remove the drive shaft. Refer to REMOVAL AND INSTALLATION
.NOTE:
For All Wheel Drive (AWD) vehicles.
- Remove the transfer case. Refer to REMOVAL AND INSTALLATION
.NOTE:
All vehicles
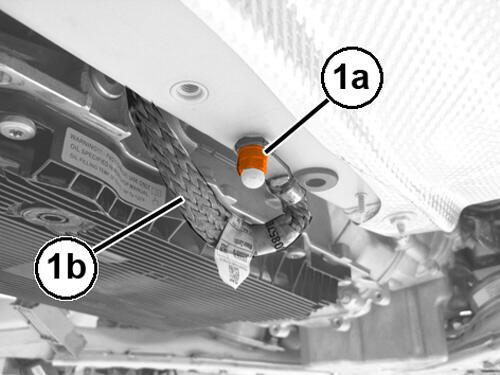
- Remove the ground wire nut (1a) and position the ground wire aside (1b).
- Disconnect the transmission solenoid wire harness connector (1).
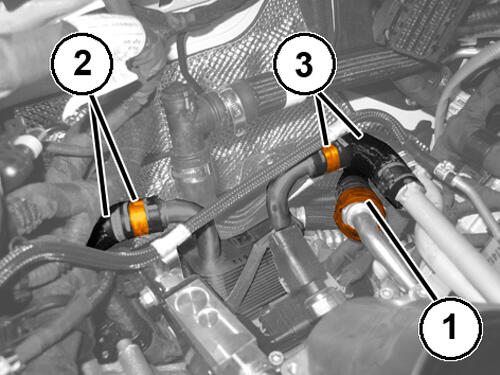
- If equipped, loosen the coolant supply and return pipes bands (2 and 3), disconnect the coolant supply and return pipes (2 and 3) from the transmission fluid heat exchanger and position aside the pipes.
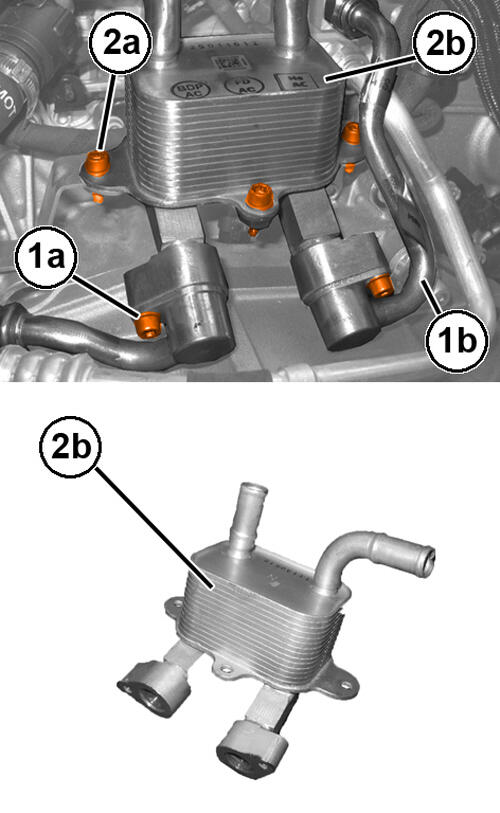
- If equipped, remove the transmission fluid heat exchanger tube bolts (1a), the transmission fluid heat exchanger bolts (2a) and the transmission fluid heat exchanger (2b).
- Remove the starter. Refer to STARTER, REMOVAL AND INSTALLATION
.NOTE:
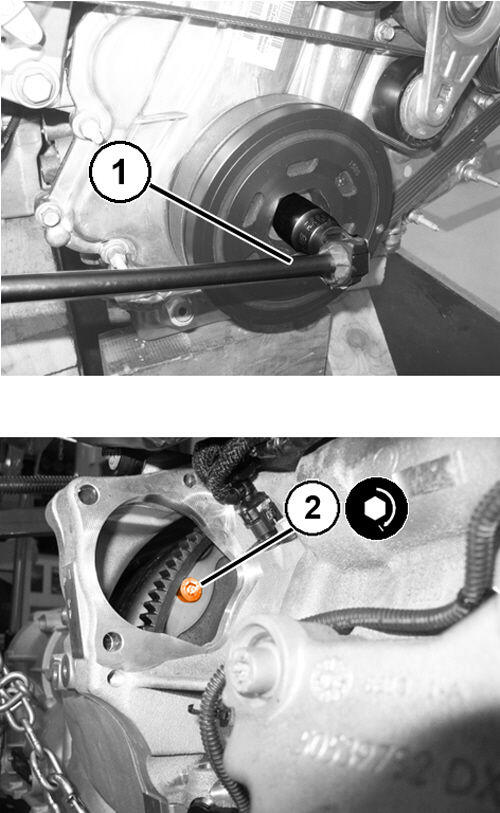
Photos shown in illustration with drivetrain removed for clarity.
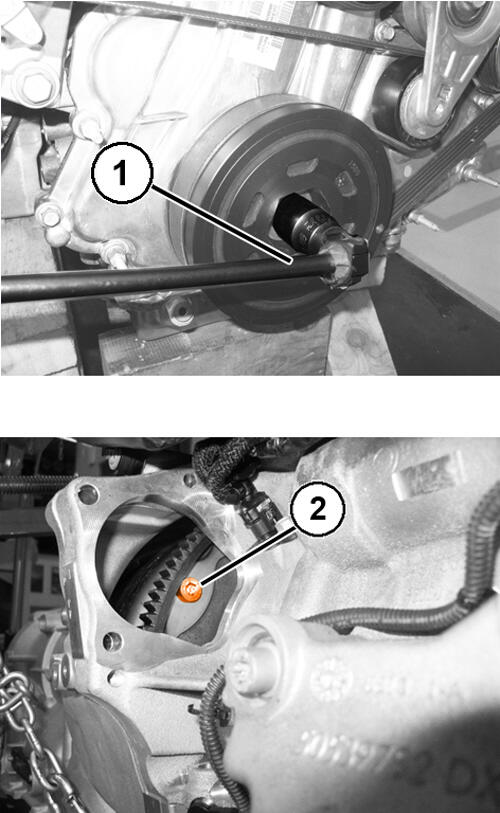
- Using a socket and breaker bar (1) on the bolt securing the vibration damper, turn the engine crankshaft to access and remove the six torque converter bolts (2).
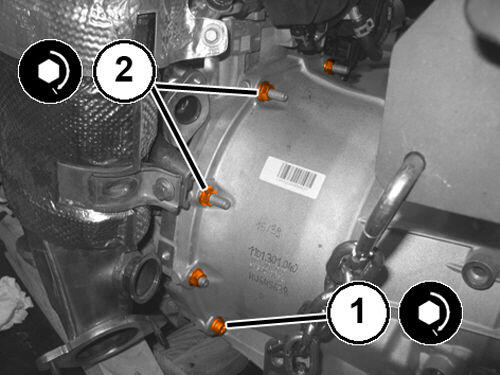
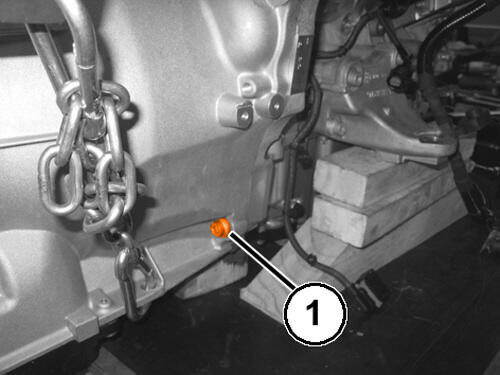
- Remove the transmission to engine bolt (1).
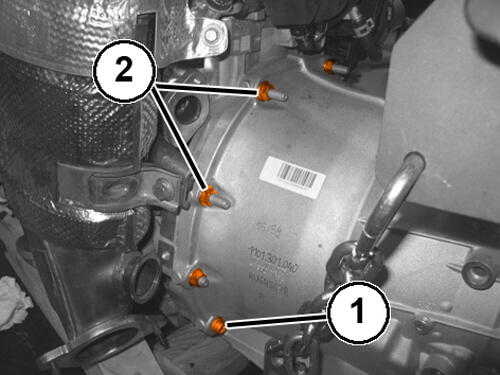
- Remove the transmission to engine bolt (1) and the four transmission to engine stud bolts (2).
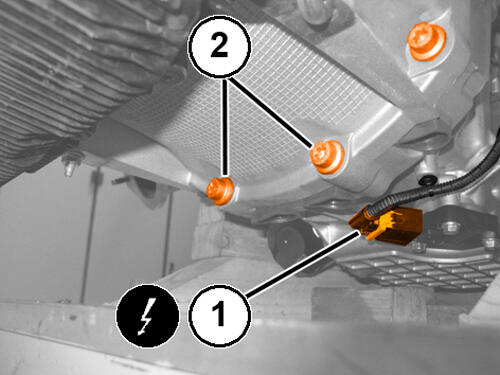
- Remove the transmission to engine bolts (2), disconnect the wire harness connector (1) and remove the transmission.
INSTALLATION
- Check and clean the threads on the torque converter housing for the engine flywheel bolts.
- Lubricate the torque converter centering seat using suitable grease.
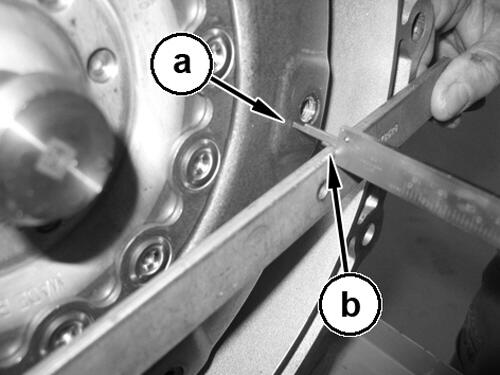
- Check that the torque converter is positioned correctly by verifying that the distance between point "a" on the torque converter and surface "b" of the transmission bell housing is 13.95 mm.
- Install the transmission to the engine while engaging the centering pin of the torque converter in the crankshaft flange.
- Install the transmission to engine bolt (1), the four transmission to engine stud bolts (2) and tighten to the proper. Refer to TORQUE SPECIFICATIONS
.
- Install the transmission to engine bolt (1) and tighten to the proper. Refer to TORQUE SPECIFICATIONS
.
Photos shown in illustration with drivetrain removed for clarity.
- Use a socket and breaker bar (1) on the bolt securing the vibration damper to turn the engine crankshaft and access the bolts securing the torque converter to the flywheel.
- Install the NEW bolts securing the torque converter to the flywheel and tighten to the proper. Refer to TORQUE SPECIFICATIONS .
- Install the starter. Refer to STARTER, REMOVAL AND INSTALLATION
.
- Install the 3-Way coolant valve bracket bolts (1a) and tighten to the proper. Refer to TORQUE SPECIFICATIONS
.
- Install the transmission fluid cooler tube bracket bolt (1) and tighten to the proper. Refer to TORQUE SPECIFICATIONS
.
- Position the transmission fluid cooler tubes (2) in place, install the fluid cooler tube bracket (1b) and install the transmission fluid cooler tube bracket bolt (1a) and tighten to the proper. Refer to TORQUE SPECIFICATIONS
.
- If equipped, install the transmission fluid heat exchanger (2b), transmission fluid heat exchanger tube bolts (1a), the transmission fluid heat exchanger bolts (2a) and tighten to the proper. Refer to TORQUE SPECIFICATIONS
.
- If equipped, connect the coolant supply and return pipes (2 and 3) to the transmission fluid heat exchanger and tighten the bands (2 and 3).
- Connect the transmission solenoid wire harness connector (1).
- Install the ground wire (1b), the ground wire nut (1a) and tighten to the proper. Refer to TORQUE SPECIFICATIONS
.NOTE:
For All Wheel Drive (AWD) vehicles.
- Install the transfer case. Refer to REMOVAL AND INSTALLATION .
- Install the front drive shaft. Refer to REMOVAL AND INSTALLATION
.NOTE:
For Rear Wheel Drive (RWD) vehicles.
- Install the transmission crossmember. Refer to CROSSMEMBER, TRANSMISSION, REMOVAL AND INSTALLATION .
- Install the drive shaft. Refer to REMOVAL AND INSTALLATION
.
- Connect the transmission wiring harness connector (1).
- Fill the transmission. Refer to CHECK FLUID LEVEL .
- Install the RH and LH catalytic converters. Refer to CONVERTER, CATALYTIC, REMOVAL AND INSTALLATION .
- Install the transmission belly pan. Refer to BELLY PAN, ENGINE, REMOVAL AND INSTALLATION or BELLY PAN, REAR, REMOVAL AND INSTALLATION or BELLY PAN, REAR SUSPENSION, REMOVAL AND INSTALLATION or BELLY PAN, SIDE, REMOVAL AND INSTALLATION .
- Install the engine belly pan. Refer to BELLY PAN, ENGINE, REMOVAL AND INSTALLATION .
- Remove the support and lower the vehicle.