Removal And Installation
REMOVAL
- Disconnect and isolate the negative battery cable. If equipped with an Intelligent Battery Sensor (IBS), disconnect the IBS connector first before disconnecting the negative battery cable.
- Remove the engine belly pan. Refer to BELLY PAN, ENGINE, REMOVAL AND INSTALLATION .
- Remove the exhaust resonator. Refer to RESONATOR, EXHAUST, REMOVAL AND INSTALLATION .
- Remove the transmission crossmember. Refer to CROSSMEMBER, TRANSMISSION, REMOVAL AND INSTALLATION .
- Remove the front and rear drive shafts. Refer to REMOVAL AND INSTALLATION
.
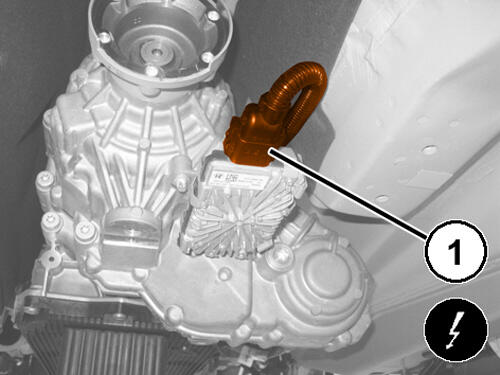
- Disconnect the Drivetrain Control Module (DTCM) wire harness connector (1).
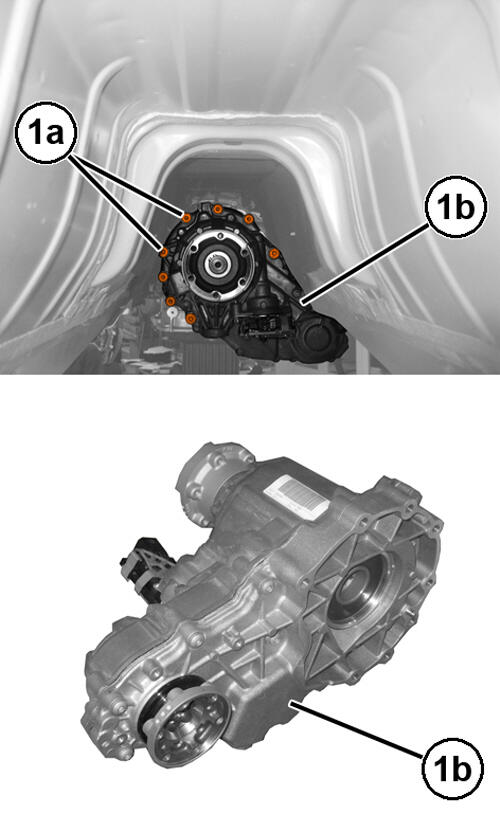
- Remove the transfer case bolts (1a) and remove the transfer case (1b).
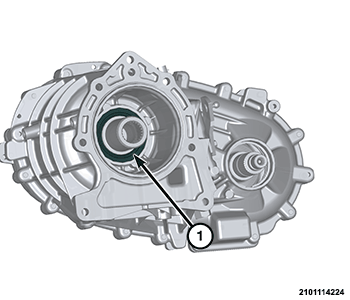
- Remove and discard the transfer case to transmission seal (1).
INSTALLATION
- Install a NEW transfer case to transmission seal (1).
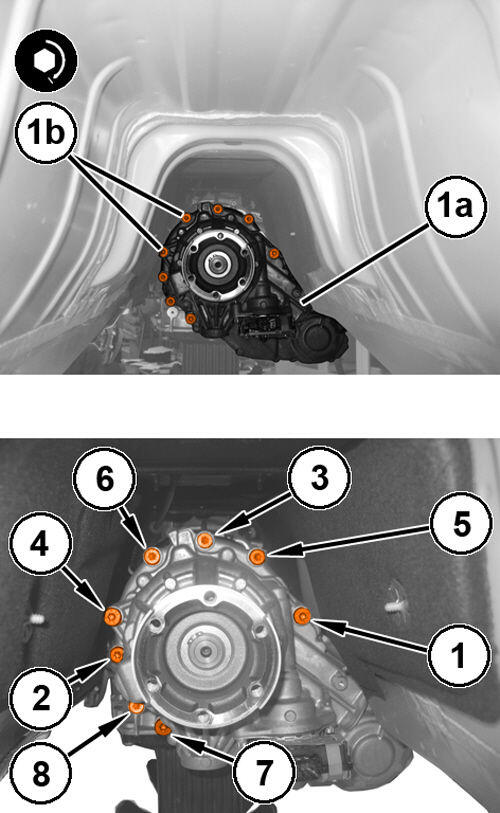
- Install the transfer case (1a), the transfer case bolts (1b) and in the order shown in illustration, tighten to the proper specification. Refer to TECHNICAL SPECIFICATIONS .
- Connect the DTCM wire harness connector (1).
- Install the exhaust resonator. Refer to RESONATOR, EXHAUST, REMOVAL AND INSTALLATION .
- Install the transmission crossmember. Refer to CROSSMEMBER, TRANSMISSION, REMOVAL AND INSTALLATION .
- Install the front and rear drive shafts. Refer to REMOVAL AND INSTALLATION .
- Verify that the transfer case and transmission are filled to the proper fluid level using the specified fluid. Refer to CAPACITIES AND RECOMMENDED FLUIDS, SPECIFICATIONS .
- Install the engine belly pan. Refer to BELLY PAN, ENGINE, REMOVAL AND INSTALLATION .
- Remove the support and lower the vehicle.
- Connect the negative battery cable. If equipped with an Intelligent Battery Sensor (IBS), connect the IBS connector to the negative battery cable.
- When installing a new transfer case, connect the diagnostic scan tool, enter "miscellaneous functions" of the Drive Train Control Module (DTCM) and run the self-learning procedure for the transfer case.
- Road test the vehicle to verify the repair.